Unreal Engine 4 Blueprints Tutorial
In this Unreal Engine 4 blueprints tutorial, you will learn how to use blueprints to create a player character, set up inputs and make an item disappear when the player touches it. By Ricardo Santos.
Sign up/Sign in
With a free Kodeco account you can download source code, track your progress, bookmark, personalise your learner profile and more!
Create accountAlready a member of Kodeco? Sign in
Contents
Unreal Engine 4 Blueprints Tutorial
25 mins
- Getting Started
- Creating the Player
- Attaching a Camera
- Representing the Player
- Spawning the Player
- Creating a Game Mode
- Placing the Player Start
- Setting Up Inputs
- Axis and Action Mappings
- Creating Movement Mappings
- Axis Value and Input Scale
- Moving the Player
- Using Variables
- Getting the Player Direction
- Adding the Offset
- Frame Rate Independence
- Actor Collisions
- Enabling Collision
- Creating an Item
- Setting the Collision Response
- Handling Collision
- Placing the Item
- Where to Go From Here?
Placing the Player Start
During the process of spawning a player, the Game Mode looks for a Player Start actor. If the Game Mode finds one, it will attempt to spawn the player there.
To place a Player Start, go to the Modes panel and search for Player Start. Left-click and drag Player Start from the Modes panel into the Viewport. Releasing left-click will place it.
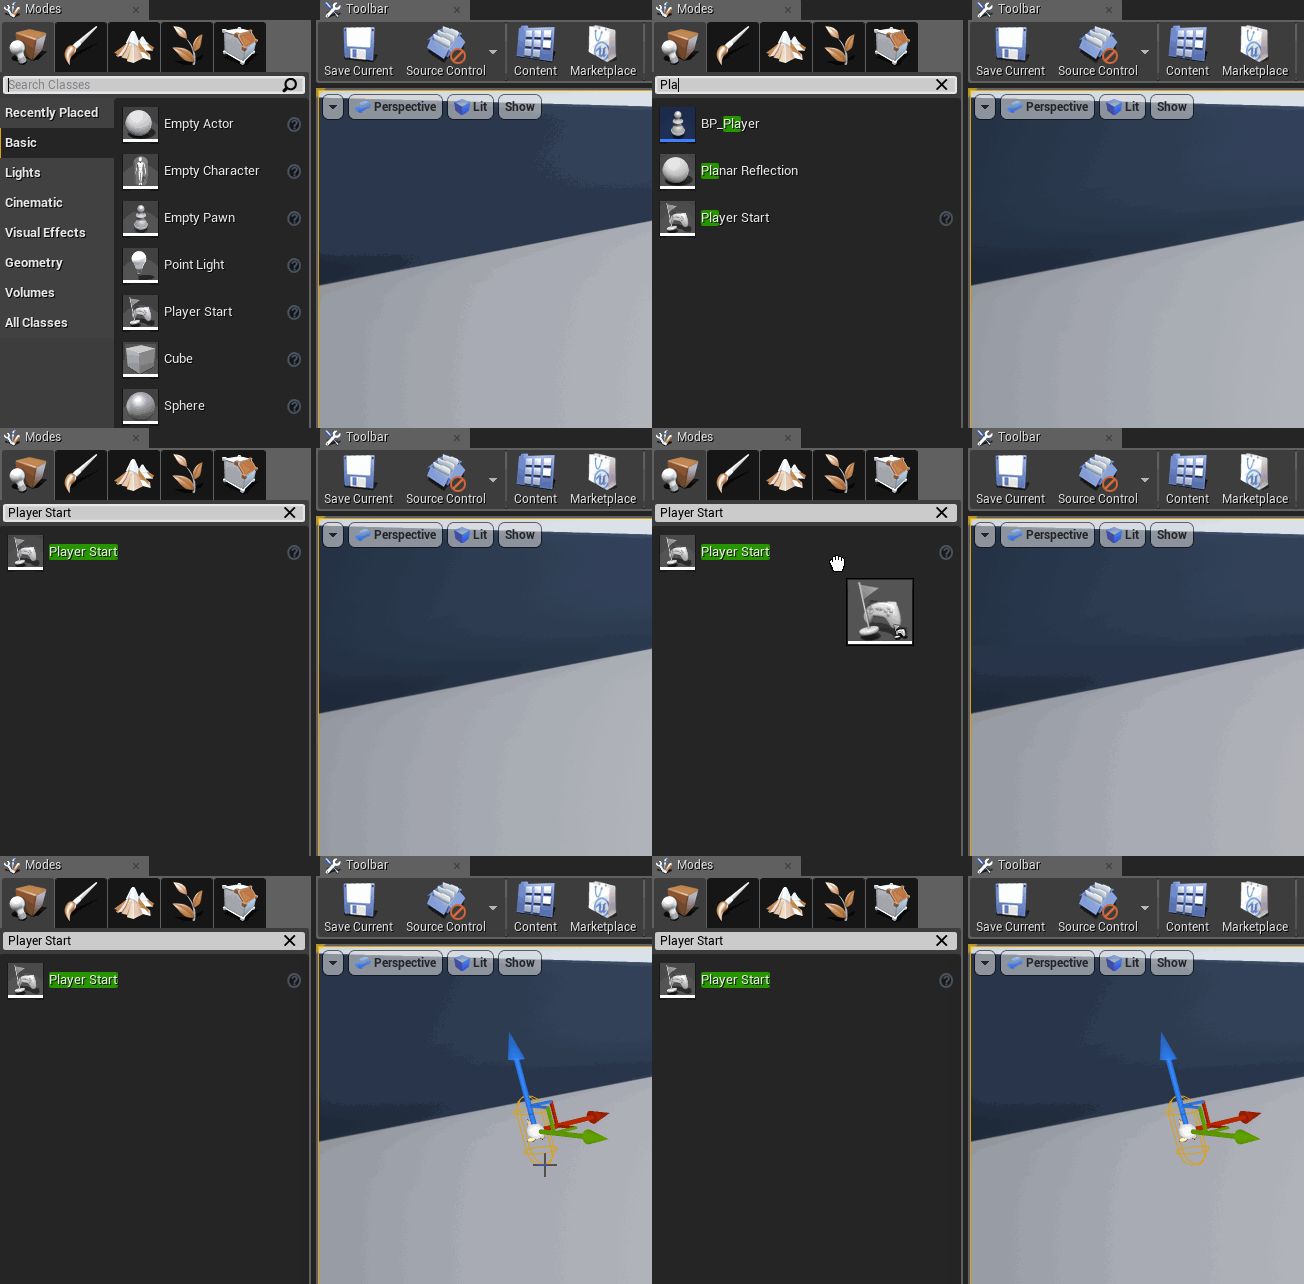
You can place this wherever you like. When you’re done, go to the Toolbar and click Play. You will spawn where you placed the Player Start.

To exit the game, click the Stop button in the Toolbar or press the Esc key. If you can’t see your cursor, press Shift+F1.
It’s not much of a game if you can’t move around, right? Your next task is to set up the input settings.
Setting Up Inputs
Assigning a key to an action is called key binding.
In Unreal, you can set up key bindings that will trigger an event when you press them. Events are nodes that execute when certain actions happen (in this case, when you press the bound key). When the event is triggered, any nodes hooked up to the event will execute.

This method of binding keys is useful because it means you do not have to hard code keys.
For example, you bind left-click and name it Shoot. Any actor that can shoot can use the Shoot event to know when the player has pressed left-click. If you want to change the key, you change it in the input settings.

If you had hard coded it, you would have to go through each actor and change the keys individually.
Axis and Action Mappings
To view the input settings, go to Edit\Project Settings. On the left, select Input under the Engine section.

The Bindings section is where you will set up your inputs.
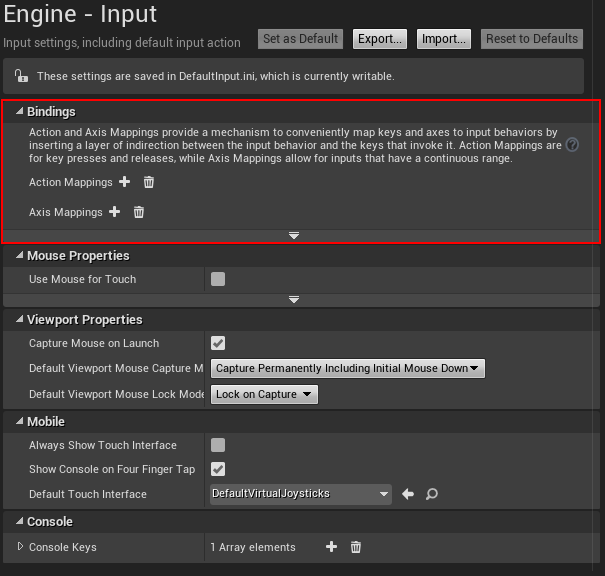
Unreal provides two methods to create key bindings:
- Action Mapping: These can only be in two states: pressed or not pressed. Action events will only trigger once you press or release the key. Used for actions that don’t have an in-between state, such as firing a gun.
- Axis Mapping: These output a numerical value called an axis value (more on that later). Axis events will fire every frame. Generally used for actions that require a thumbstick or mouse.
For this tutorial, you will use axis mappings.
Creating Movement Mappings
First, you will create two axis mapping groups. Groups allow you to bind multiple keys to one event.
To create a new axis mapping group, click the + sign to the right of Axis Mappings. Create two groups and name them MoveForward and MoveRight.
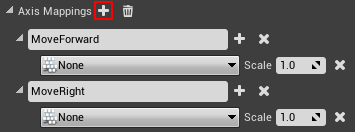
MoveForward will handle moving forward and backwards. MoveRight will handle moving left and right.
You will map movement to four keys: W, A, S and D. Currently, there are only two slots to map keys. Add another axis mapping to each group by clicking the + sign next to the group name field.
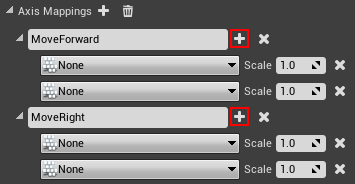
To map a key, click the drop-down to bring up a list of keys. Map the W and S keys to MoveForward. Map the A and D keys to MoveRight.

Next, you will set the Scale fields.
Axis Value and Input Scale
Before you set the Scale fields, you need to learn about how they work with axis values.
An axis value is a numerical value that is determined by the type of input and how you use it. Buttons and keys output 1 when pressed. Thumbsticks output a value between -1 and 1 depending on the direction and how far you push it.

You can use the axis value to control a Pawn’s speed. For example, if you push the thumbstick to the edge, the axis value will be 1. If you push it halfway, it will be 0.5.
By multiplying the axis value with a speed variable, you can adjust the speed with the thumbstick.

You can also use the axis value to specify a direction along an axis. If you multiply a Pawn’s speed by a positive axis value, you will get a positive offset. Using a negative axis value will result in a negative offset. Adding this offset to the Pawn’s location will determine which direction it moves in.

Since keyboard keys can only output an axis value of 1 or 0, you can use scale to convert it to a negative. It works by taking the axis value and multiplying it by the scale.
If you multiply a positive (the axis value) with a negative (the scale), you will get a negative.
Set the scale of the S and A keys by clicking on the Scale field and entering -1.
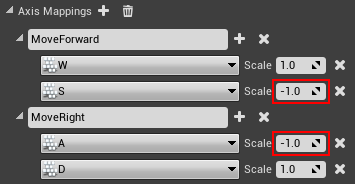
Next, comes the fun part: making the Pawn move! Close the Project Settings and then open up BP_Player in the Blueprints editor by double clicking on it.
Moving the Player
First, you need to get the events for your movement mappings. Right-click an empty space in the Event Graph to get a list of nodes. From the menu, search for MoveForward. Add the MoveForward node listed under Axis Events. Note you’re looking for the red node under Axis Events, not the green node under Axis Values.
Repeat the process for MoveRight.

Now, you will set up the nodes for MoveForward.
Using Variables
To move, you need to specify how fast the Pawn is moving. An easy way to specify the speed is by storing it in a variable.
To create one, go to the My Blueprint tab and click the + sign to the right of the Variables section.

With your new variable selected, head over to the Details tab. Rename the variable to MaxSpeed. Afterwards, change the variable type to Float. Do this by clicking the drop-down next to Variable Type and selecting Float.

Next, you need to set the default value. Before you can set it though, you need to click Compile in the Toolbar.
With your variable still selected, go back to the Details tab. Go to the Default Value section and change the default value of MaxSpeed to 10.
![]()
Next, drag-click the MaxSpeed variable from the My Blueprint tab into the Event Graph. Select Get from the menu.
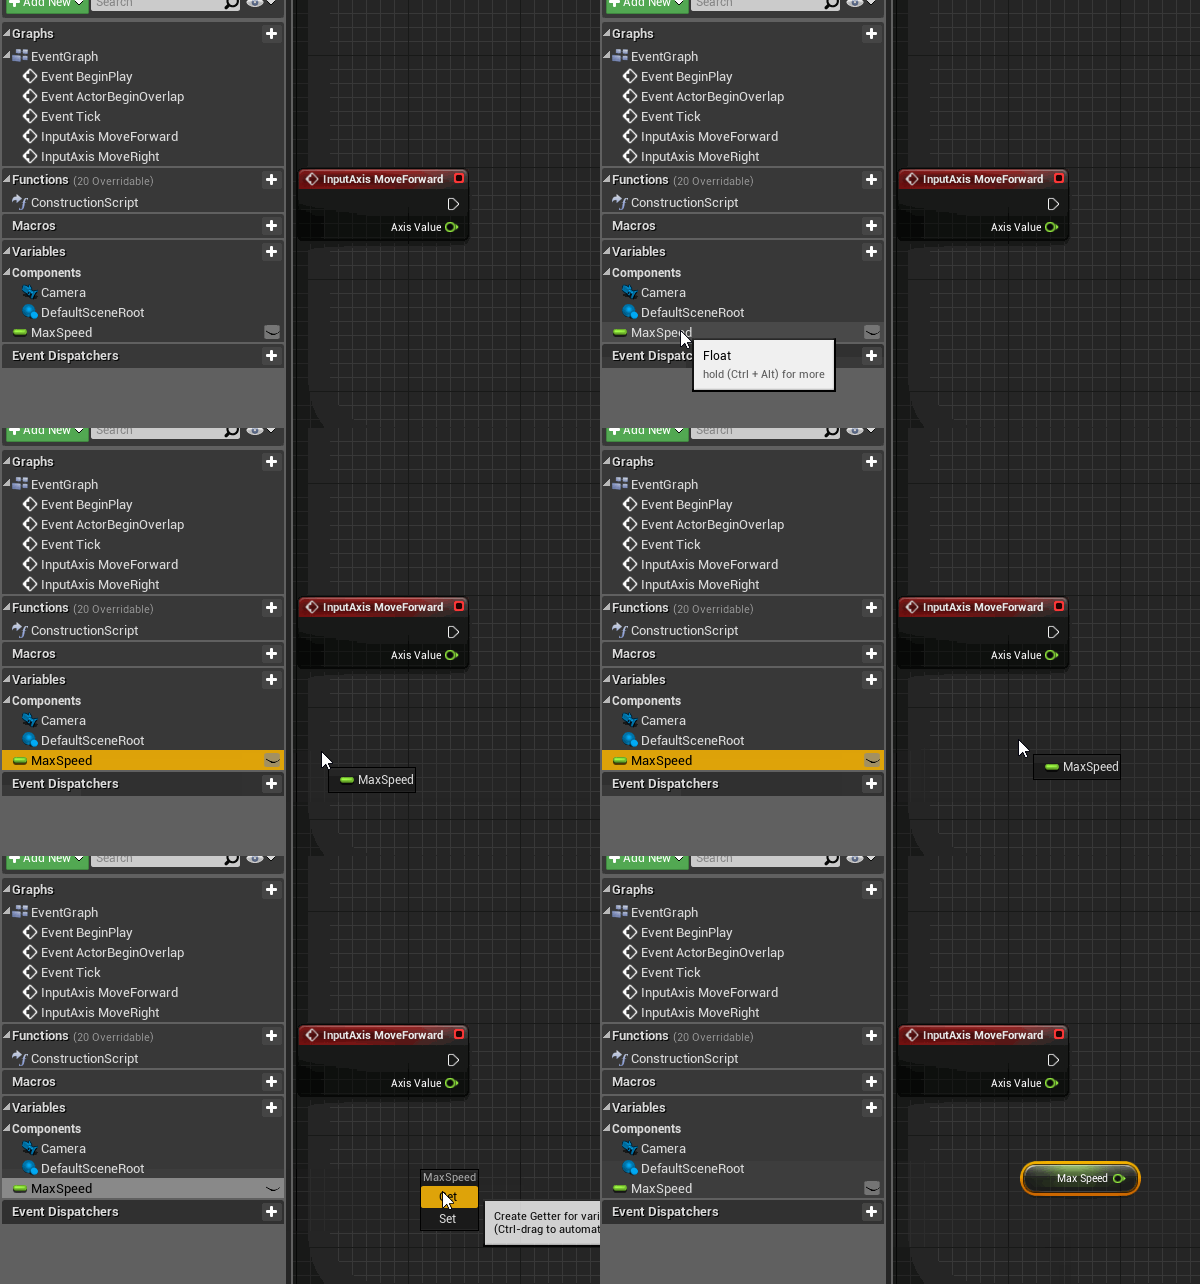
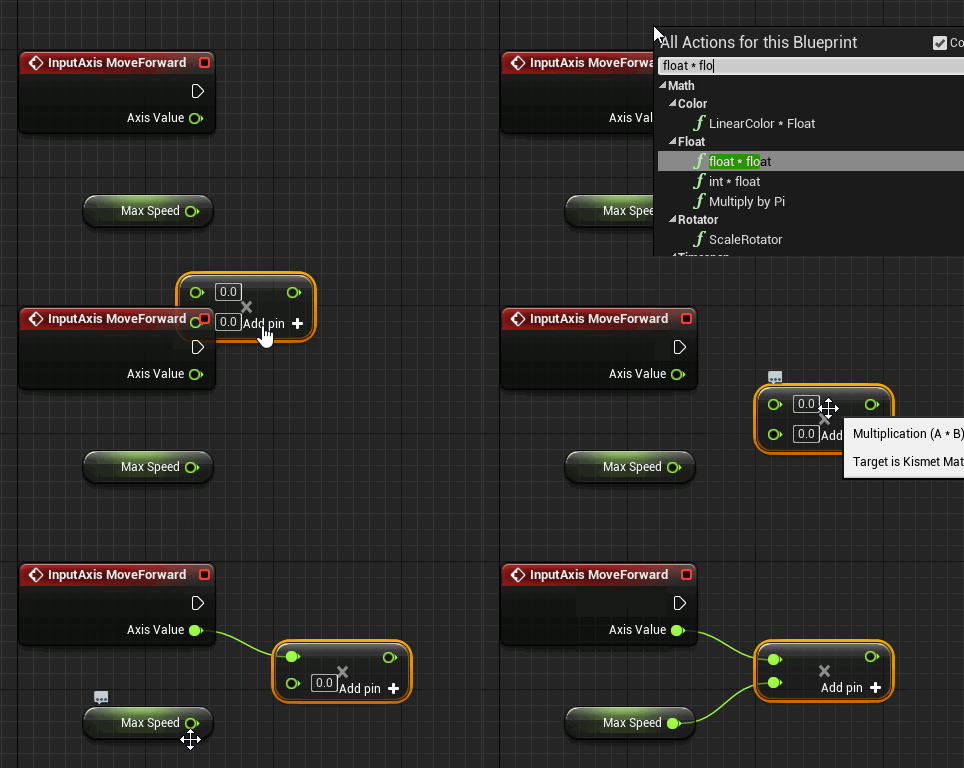
You will now multiply MaxSpeed and the axis value to determine the final speed and direction. Add a float * float node and connect Axis Value and MaxSpeed to it.
