Beginning Android Development with Kotlin, Part One: Installing Android Studio
In this Beginning Android Development tutorial, you will learn how to set up all the tools needed to start Android development. By Joe Howard.
Sign up/Sign in
With a free Kodeco account you can download source code, track your progress, bookmark, personalise your learner profile and more!
Create accountAlready a member of Kodeco? Sign in
Sign up/Sign in
With a free Kodeco account you can download source code, track your progress, bookmark, personalise your learner profile and more!
Create accountAlready a member of Kodeco? Sign in
Sign up/Sign in
With a free Kodeco account you can download source code, track your progress, bookmark, personalise your learner profile and more!
Create accountAlready a member of Kodeco? Sign in
Contents
Beginning Android Development with Kotlin, Part One: Installing Android Studio
35 mins
- Beginning Android Development
- Installing Android Studio
- Installing Java
- The Terminal
- Getting Android Studio
- Setting up Android Studio
- Android Studio Welcome Screen
- The Android SDK Manager
- Installing a New SDK
- SDK Platforms
- SDK Tools
- SDK Update Sites
- Creating Your First Project
- Identify Your Project
- Choose an SDK
- Set the Default Activity
- Building the Project
- Gradle
- Running on an Emulator
- Creating an Emulator
- Virtual Device
- Select Android Version
- Verify Virtual Device
- Selecting a Device
- The Emulator Toolbar
- Running on a Device
- Instant Run
- Testing Instant Run
- Importing an Existing Project
- Where To Go From Here?
Update Note: This Beginning Android Development tutorial is now up to date with the latest version of Android Studio, version 3.3, and uses Kotlin 1.3 for app development. Update by Joe Howard. Original tutorial by Matt Luedke. Previous updates by Darryl Baylis, Megha Bambra, and Eunice Obugyei.
Update Note: This Beginning Android Development tutorial is now up to date with the latest version of Android Studio, version 3.3, and uses Kotlin 1.3 for app development. Update by Joe Howard. Original tutorial by Matt Luedke. Previous updates by Darryl Baylis, Megha Bambra, and Eunice Obugyei.
Clearly there’s a demand for Android app development since there are over two billion monthly active users around the globe. To say that it’s an exciting platform and space to make apps for is an understatement.
Beginning Android Development
There aren’t any prerequisites for this tutorial, other than a willing mind and a Mac or PC. You can develop for Android on both a Mac or a PC. The instructions are similar but slightly different between macOS, Windows and Linux.
You’ll learn how to set up all the tools needed to start you on your way to becoming an Android developer. Here’s what you’ll do in this beginning Android development tutorial:
- Download and install Android Studio 3.3.
- Set up testing for your app on devices and emulators.
- Create a simple “Hello World!” Android app that displays text on your device’s or emulator’s screen.
- Import a sample project into Android Studio.
Installing Android Studio
One of the most important parts of getting started with any new platform is setting up your environment, and this is no different with Android.
It’s important to take your time and follow each step methodically. Even if you follow the steps perfectly, you may have to troubleshoot a small issue or a few. Your system configuration or product versions can make for unexpected results.
Installing Java
For versions of Android Studio prior to 2.2, you needed to install a Java Development Kit or JDK for Android Studio to use to compile your Android app. Since then, however, Android Studio comes bundled with it’s own version of the JDK.
Using the bundled version of the JDK is perfectly valid, and if you prefer to do so, you can skip down to the section named Getting Android Studio. Installing your own version of the JDK gives you some fine-grained control over which version you’re using, so if you wish to do so, continue on from here.
With all of this in mind, let’s quickly check that you have the Java Development Kit (JDK) installed. Even if you’re planning on doing all of your Android development in Kotlin, you’ll still need Java installed on your development machine. To check, you’ll use a trusty old Terminal.
Note: You’ll learn the essential steps for this tutorial in the next few paragraphs, but if you’d like to deepen your knowledge of the Terminal, you’ll find a good introductory tutorial about it in this post from Django Girls.
Note: You’ll learn the essential steps for this tutorial in the next few paragraphs, but if you’d like to deepen your knowledge of the Terminal, you’ll find a good introductory tutorial about it in this post from Django Girls.
The Terminal
In a nutshell, using a terminal is kind of like looking under your car’s hood. It’s how you really get to know the machine face-to-face, without any complex graphical interface to interfere.
You can find the Terminal app quite easily on a Mac: open Spotlight by hitting command+spacebar and type terminal into the search at the top of the screen and select Terminal when it shows up.
On Linux, you can use a similar system-wide search to find the Linux Terminal app. On Windows 10, you have the option of installing the Windows Subsystem for Linux, which will give you a Linux terminal that you can use in the Windows command prompt.
Once you have a terminal open on your system, type in java -version. You should see some output that mentions a version number, like below.
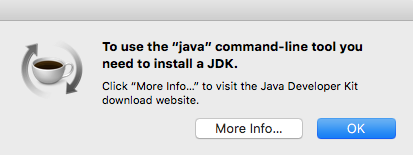
If that’s not what you see, then you don’t have the JDK installed. Terminal might tell you -bash: java: command not found, or it could say No Java runtime present, requesting install. and trigger a pop up that will lead you down the yellow brick road…to Oracle’s website.
You can either click More Info… or head over to Oracle to download the JDK from Oracle.
Install the JDK on your system if needed (and you’re not choosing to use the bundled Android Studio JDK), and once you’re done, proceed to the next section.
Getting Android Studio
Head over to the Android Studio page and click the Download Android Studio button.
Google constantly updates this page, so the version you see may very well be newer than the screenshot above. Once you click the Download Android Studio button, you’ll see a request to agree to the terms and conditions.
After reading these carefully (everybody takes the time to fully read these, right?) accept and click the blue button underneath titled Download Android Studio For Mac (or Linux or Windows). Once the download is complete, you can install Android Studio just like how you install any other program.
The download link will redirect to a page that contains installation instructions for macOS, Windows or Linux. If the instructions don’t appear, then you can view them here.
Once installation wraps itself up, go ahead and launch Android Studio!
Setting up Android Studio
The setup wizard will greet you the first time it loads.
Click Next to move to the Install Type screen. This whole process will probably take several minutes.
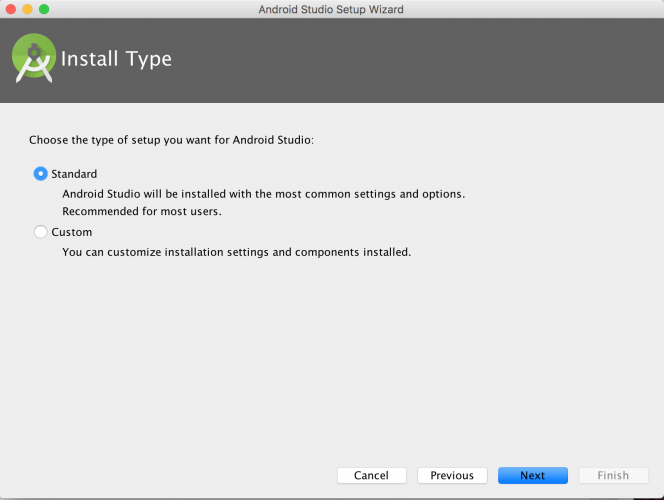
Check the box for Standard and click Next. You’re presented with a choice of UI Theme:
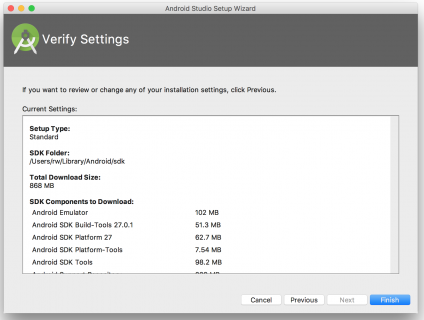
Pick a theme and click Next. On the Verify Settings window, you’ll have an opportunity to confirm your setup:
Click Finish to start downloading the SDK components.
If you’re on a Mac or using Windows, then while downloading, you will likely be prompted for your admin password, in order to install HAXM, a tool from Intel that will greatly speed up Android Virtual Devices aka AVDs:
On Linux, you’ll instead be prompted to install KVM. Follow the KVM Linux Installation instructions for your system to get the best performance from the emulator. It’s quite possible that on a newer system and with an OS like Ubuntu 18.04 LTS, KVM may already be setup without needing to perform any additional installation steps. You may need, however, to make sure your user is in the right Linux user groups. See this link for an example of setting up the user groups on Ubuntu 18.04, and also here for more information on setting up emulator acceleration.
When the download is complete, click Finish.


