Importing an Existing Project
During your Android app-making journey, you’ll find times where you need to import existing projects. The steps below will guide you through how to import a project:

- Use the Download Materials button at the top or the bottom of the tutorial to download materials for the tutorial.
- Once downloaded, unzip the contents and place them somewhere easy to get to.
- In Android Studio, go to File/New/Import Project….
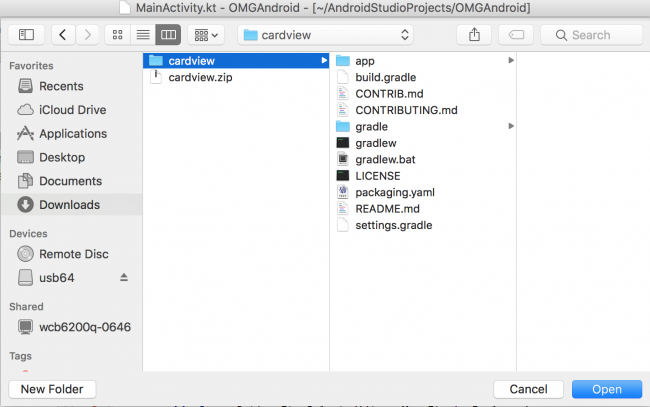
- An open sheet will appear. Select the cardview folder in the downloaded materials and click Open.

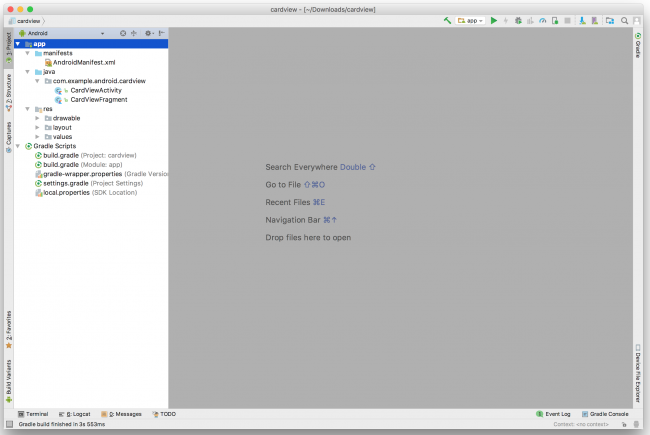
- Once the Gradle build completes, you’ll see all the necessary files of the imported project in the project explorer.

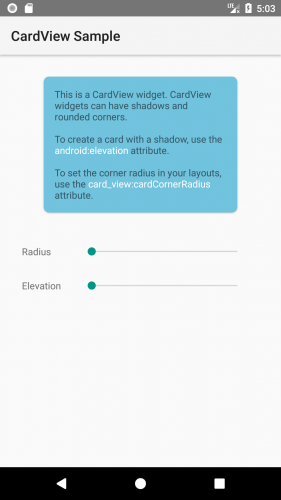
It’s build and run time! Click the Run button in the toolbar and select either the emulator or device you’ve already set up.

Where To Go From Here?
You’ve covered a lot of ground in this beginning Android development tutorial: from downloading and installing Android Studio, through creating your first “Hello World!” app, to deploying it on a physical device!
Keep reading our other Android tutorials, which we’re continually updating to Kotlin and recent versions of Android Studio.
In the meantime, you can follow Android — like any language or framework, Android’s development community is a strong asset and supplier of endless reference. It’s never too soon or too late to start checking out Google’s I/O conference, Android Developers blog or Android Developer videos.
I hope you enjoyed this Beginning Android Development tutorial — you’ve successfully installed Android Studio and are now ready to take on the world of Android development. If you have any questions or comments, please join the discussion in the comments below.


