Scary Bug Pictures!
But of course you’ll need some scary bug pictures for that! You can either browse the Internet and find some, or download these Scary Bug Pictures I found on stock.xchng.
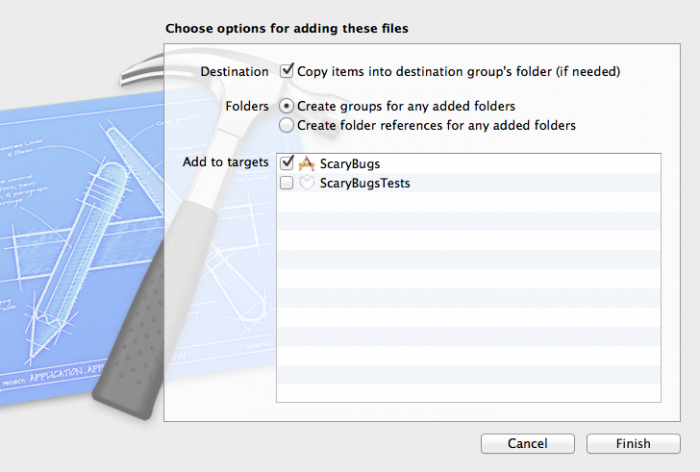
Once you’ve downloaded the files or gotten your own, drag them all into the root of your Project Navigator tree. When the popup appears, make sure Copy items into destination group’s folder (if needed) is checked, and click Finish.

Then open up RWTAppDelegate.m and make the following changes:
// At top of file
#import "RWTMasterViewController.h"
#import "RWTScaryBugDoc.h"

// At beginning of application:didFinishLaunchingWithOptions
RWTScaryBugDoc *bug1 = [[RWTScaryBugDoc alloc] initWithTitle:@"Potato Bug" rating:4 thumbImage:[UIImage imageNamed:@"potatoBugThumb.jpg"] fullImage:[UIImage imageNamed:@"potatoBug.jpg"]];
RWTScaryBugDoc *bug2 = [[RWTScaryBugDoc alloc] initWithTitle:@"House Centipede" rating:3 thumbImage:[UIImage imageNamed:@"centipedeThumb.jpg"] fullImage:[UIImage imageNamed:@"centipede.jpg"]];
RWTScaryBugDoc *bug3 = [[RWTScaryBugDoc alloc] initWithTitle:@"Wolf Spider" rating:5 thumbImage:[UIImage imageNamed:@"wolfSpiderThumb.jpg"] fullImage:[UIImage imageNamed:@"wolfSpider.jpg"]];
RWTScaryBugDoc *bug4 = [[RWTScaryBugDoc alloc] initWithTitle:@"Lady Bug" rating:1 thumbImage:[UIImage imageNamed:@"ladybugThumb.jpg"] fullImage:[UIImage imageNamed:@"ladybug.jpg"]];
NSMutableArray *bugs = [NSMutableArray arrayWithObjects:bug1, bug2, bug3, bug4, nil];

UINavigationController *navController = (UINavigationController *) self.window.rootViewController;
RWTMasterViewController *masterController = [navController.viewControllers objectAtIndex:0];
masterController.bugs = bugs;
Here you just use the RWTScaryBugDoc initializer to create four sample bugs, passing in the title, rating, and images for each. You add them all to a NSMutableArray, and set them on your table view.
Speaking of which, you can get a pointer to the RootViewController since you know it’s the first view controller in the navigation controller’s stack. There are other ways you could have gotten a pointer as well, but this is one easy way.
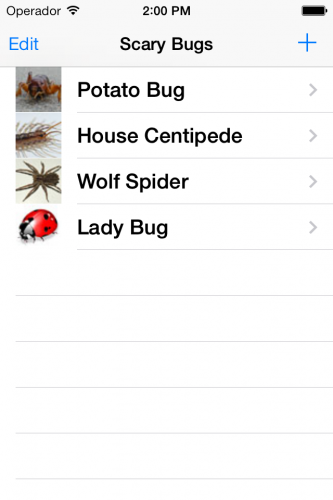
And that’s it! Compile and Run your app, and if all works well, you should see a list of (mostly) frightening bugs in your table view!

Where To Go From Here?
Here is a sample project with all of the code you’ve developed so far in this iOS tutorial series.
Please let me know if anything in the above is confusing or if you’d like me to go into more detail about anything.
Next in the iOS tutorial series, you’ll learn how to create a detail view for the bugs so you can edit and rate your bugs!

