Chipmunk Tutorial for iOS: How To Create A Simple iPhone Game
A Chipmunk tutorial that shows you how to create a fun and simple iPhone game called “Cat nap” with realistic physics! By Ray Wenderlich.
Sign up/Sign in
With a free Kodeco account you can download source code, track your progress, bookmark, personalise your learner profile and more!
Create accountAlready a member of Kodeco? Sign in
Sign up/Sign in
With a free Kodeco account you can download source code, track your progress, bookmark, personalise your learner profile and more!
Create accountAlready a member of Kodeco? Sign in
Contents
Chipmunk Tutorial for iOS: How To Create A Simple iPhone Game
40 mins
Sounds and Destruction!
So far so good, except we want to be able to tap the blocks to destroy them rather than moving them around with mouse joints for this game. We’d also like some sound effects, and to put a background into the scene.
So drag the Sounds folder from the resources for this Chipmunk tutorial into your Xcode project, make sure “Copy items into destination group’s folder (if needed)” is checked, and click Finish.
Then open ActionLayer.m and comment out the calls to cpMouseGrab, cpMouseMove, and cpMouseRelease inside ccTouchBegan/Moved/Ended/Cancelled, because we won’t be using mouse joints anymore.
Once that’s done, make the following changes to ActionLayer.m:
// Add to top of file
#import "SimpleAudioEngine.h"

// Add to ccTouchBegan right after commented out call to cpMouseGrab
cpShape *shape = cpSpacePointQueryFirst(space, touchLocation, GRABABLE_MASK_BIT, 0);
if (shape) {
    CPSprite *sprite = (CPSprite *) shape->data;
    [sprite destroy];
    [[SimpleAudioEngine sharedEngine] playEffect:@"poof.wav"];
}
This code checks to see which shape is at the touch location by using the cpSpacePointQueryFirst helper function included with Chipmunk. It then gets the CPSprite associated with that shape by using the data pointer. Remember that we set that up in createBodyAtLocation in CPSprite.
It also plays a sound effect for fun. Speaking of which, go ahead and add the background music, the background art, and preload the sound effects, by adding the following to the bottom of your init method:
CCSprite *background = [CCSprite spriteWithFile:@"catnap_bg.png"];
background.anchorPoint = CGPointZero;
[self addChild:background z:-1];

[[SimpleAudioEngine sharedEngine] playBackgroundMusic:@"TeaRoots.mp3" loop:YES];
[[SimpleAudioEngine sharedEngine] preloadEffect:@"sleep.wav"];
[[SimpleAudioEngine sharedEngine] preloadEffect:@"wake.wav"];
[[SimpleAudioEngine sharedEngine] preloadEffect:@"poof.wav"];
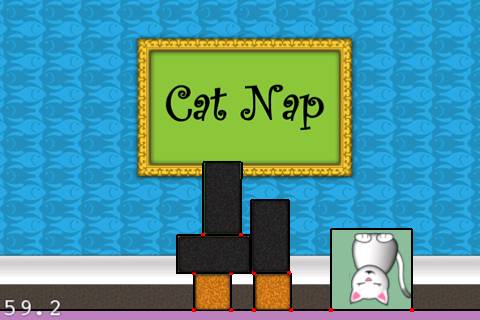
Compile and run, and you should now have the start of a game – tap the blocks to destroy them!
Polygon Shapes
Cat Nap is coming along well so far, but one of the main problems is the shape for the cat doesn’t match up well at all. You’re using a box sized the same as the cat artwork, but that leaves a lot of transparent space and things don’t look quite right!
In Chipmunk, you aren’t restricted to just simple shapes such as boxes, circles, or segments – you can also use polygon shapes. You just tell Chipmunk the location of each vertex in the polygon, and it works just like any other kind of shape!
But how do you get the vertices? You could open up the cat image in an image editor and measure out the distances, but there’s an easier way – use a tool called Vertex Helper by Johannes Fahrenkrug.
If you don’t have it already, go ahead and download Vertex Helper from its github page. It comes in source format only, so you’ll have to open up the project and compile it to use it. If you are too lazy, you can also purchase it on the Mac App Store :]
Once you have it compiling and running, you should see a window like this:
Drag the cat_sleepy.png from the “Raw Art” folder in the resources for this Chipmunk tutorial into Vertex Helper, the make the following setting changes:
- Set Rows/Cols to 1/1
- Set Type to Chipmunk
- Set Style to Initialization
- Click “Edit Mode” in the top toolbar
Then click around the cat to define your vertices. Some very important things to keep in mind when you do:
- You must click your vertices in clockwise order for Chipmunk. (Note: it’s counter-clockwise for Box2D!)
- You should aim to keep your vertex count as small as you can. For this cat, I think 4 do just fine.
- You do not need to connect the first and last points – Vertex Helper will do that automatically (and draw a light gray line to indicate this).
- Your polygon must be convex. This means that you can’t have any interior angles of greater than 180 degrees, as you can see in the diagram below.
Here’s a screenshot for how I defined the vertices for the cat (yours may vary slightly):
Once you’re done, copy the code from the output box of Vertex Helper, and then put it in a new method inside CatSprite.m as follows:
- (void)createBodyAtLocation:(CGPoint)location {

    // Add your vertices from Vertex Helper here
    int num = 4;
    CGPoint verts[] = {
        cpv(-31.5f, 69.5f),
        cpv(41.5f, 66.5f),
        cpv(40.5f, -69.5f),
        cpv(-55.5f, -70.5f)
    };

    float mass = 1.0;
    float moment = cpMomentForPoly(mass, num, verts, CGPointZero);
    body = cpBodyNew(mass, moment);
    body->p = location;
    cpSpaceAddBody(space, body);

    shape = cpPolyShapeNew(body, num, verts, CGPointZero);
    shape->e = 0.3;
    shape->u = 0.5;
    cpSpaceAddShape(space, shape);

}
As you can see here, it’s quite similar to creating a box shape except it uses slightly different functions (cpMomentForPoly instead of cpMomentForBox, and cpPolyShapeNew instead of cpBoxShapeNew).
If you compile and run, you’ll see it *almost* works, except the shape is way too big!
This is because you traced the retina-sized art, which is double the size in pixels (but we need points). So divide all of your coordinates by 2, similar to the following:
int num = 4;
CGPoint verts[] = {
    cpv(-31.5f/2, 69.5f/2),
    cpv(41.5f/2, 66.5f/2),
    cpv(40.5f/2, -69.5f/2),
    cpv(-55.5f/2, -70.5f/2)
};
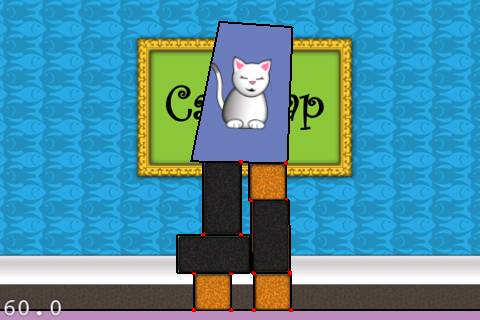
Compile and run yet again, and this time the cat shape should match up much more closely to the actual cat!
Where To Go From Here?
At this point, you understand the basics of Chipmunk and have hands-on experience doing the most important tasks – setting up a basic Chipmunk project, adding bodies and shapes, and decorating them with sprites.
In the Cocos2D Via Minigames workshop that Rod Strougo and I recently gave, we showed how to take the project even further and wrap it up into a complete game, by adding the cat bed, collision detection, and game logic.
However, this Chipmunk tutorial has gone on far enough for now so I’m going to wrap it up here. If you want to learn more, you can:
- Download the completed CatNap project and take a look at the extra finishing touches
- Check out the official Chipmunk documentation for more info
- We have a chapter on Chipmunk in our upcoming Cocos2D book that shows you how to make a Metroid-style platformer jumping level
- And also stay tuned on the Cocos2D book blog for an upcoming post where Rod will show you how to make the Penguin Toss minigame, which was the lab exercise from the workshop!
If you have any comments or questions about using Chipmunk in your games, please join in on the forum discussion below!


