How To Make an eBook with iBooks Author Tutorial
In this iBooks Author tutorial, you’ll learn how to create a book in iBooks Author from scratch – complete with embedded video, interactive quizzes, and more. You’ll see how easy it is, and will be making your own book in no time! By .
Sign up/Sign in
With a free Kodeco account you can download source code, track your progress, bookmark, personalise your learner profile and more!
Create accountAlready a member of Kodeco? Sign in
Sign up/Sign in
With a free Kodeco account you can download source code, track your progress, bookmark, personalise your learner profile and more!
Create accountAlready a member of Kodeco? Sign in
Contents
How To Make an eBook with iBooks Author Tutorial
30 mins
- Video Demo
- Getting Started
- Once Upon a Time — Choosing an iBooks Author Template
- You Can Judge a Book by its Cover — Creating an iBook Cover
- Going to the Movies — Adding Intro Media to Your iBook
- Lights! Camera! Action! — Viewing your iBook Live
- What’s in Here? — Fleshing out the Table of Contents
- Keeping the Lawyers Happy — Adding a Copyright Notice
- In the Beginning — Adding a Section to Your Chapter
- Don’t Get Bent Out of Shape — Adding Basic Shapes
- Widgets, Widgets Everywhere — Adding Interactive Widgets to your iBook
- There Will be a Quiz at the End — Adding A Review Widget to Your iBook
- Illustrative Images — Adding Interactive Images to your iBook
- Great Galloping Galleries — Adding a Gallery Widget to your iBook
- Adding Some Structure — Organizing Chapters and Sections in your iBook
- Hot off the Presses — Getting Your Book to the Public
- Navigating the iBooks Jungle — iBooks Publishing
- Is is There Yet? — The Approval Process
- Where to Go From Here?
Navigating the iBooks Jungle — iBooks Publishing
For those of you who choose to publish your books through the iBookstore, you’ll need an iBooks Account, which you’ll use in iTunes Connect. For those of you who are iOS app developers, you’ll need a new iTunes Connect account that uses a different email than your developer account.
You’ll also need iTunes Producer to upload your iBook to Apple. iOS developers, you can think of this as similar to submitting your app archive from Xcode.
Note: The website you’ll need to create a new iBooks account can be found here.
Note: The website you’ll need to create a new iBooks account can be found here.
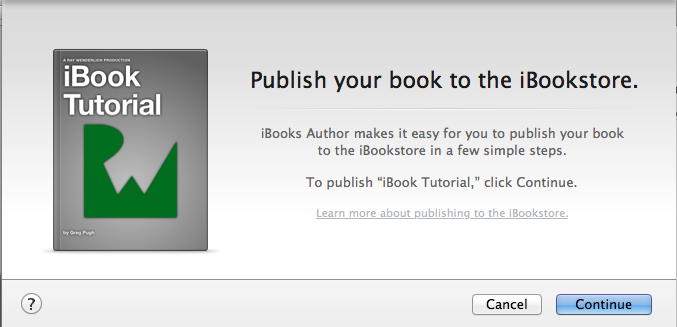
Once you’ve signed up for an iBooks account and are ready to publish your iBook, navigate to File\Publish:
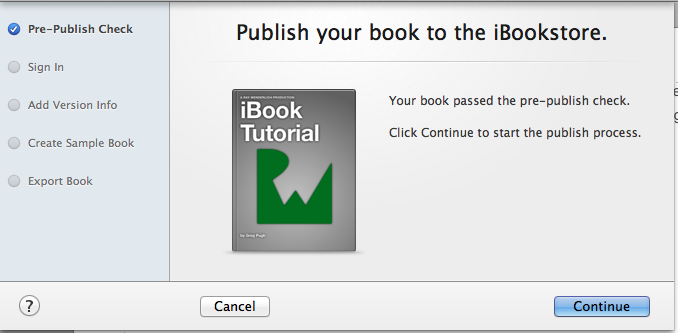
iBooks Author will first check your file for errors. If there aren’t any errors and it passes the pre-publish check, click Continue:
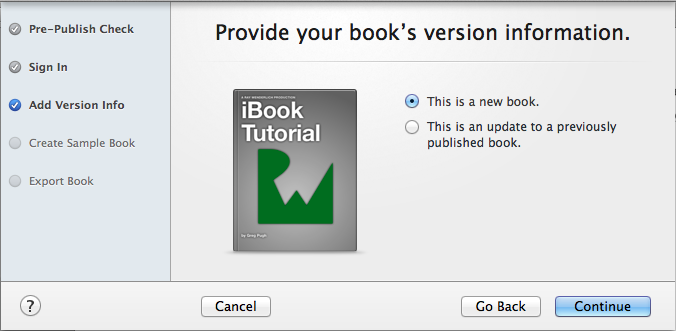
Sign into your iTunes Connect account and select if you’re uploading a new title or updating a title you’ve already published:
Now you’ll be asked to create a sample from one of your chapters. This is a great way to lure readers in, sort of like having super-appealing screenshots for your app.
Once your book is live on the iBookstore, readers will be able to download a free sample. If they enjoy it, they will have the option of buying the full version.
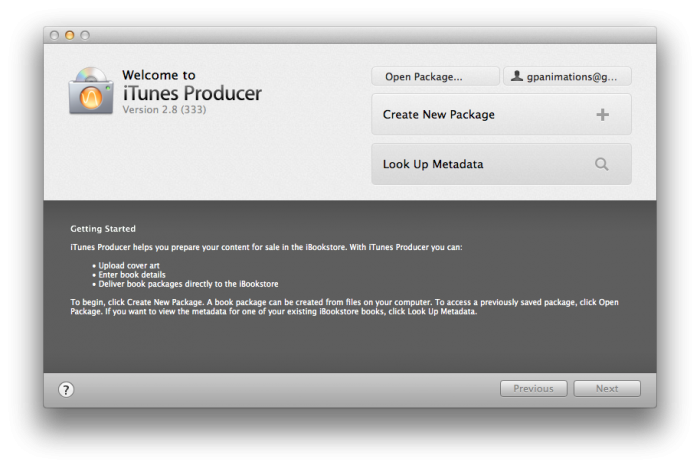
At this point, you’ll be prompted to install iTunes Producer if you have not already done so. If you already have it installed, it should open automatically for you to upload your file:
In iTunes Producer, you’ll need to fill out all of the information about your book. Go through each tab and carefully decide what you’d like to enter in each text field. This is also where you’ll upload your cover artwork and screenshots that appear in iTunes.
Here are some screenshots that show what I filled out to publish this book:
Once you’ve uploaded your file to Apple, you can sign into iTunes Connect and check to see if your book appears under “Manage Your Books”.
Hooray! There’s your book, waiting to be devoured by the masses. :]
If you realize that you’ve made an error in the book after you’ve already sent the file to Apple, you can stop it from being processed by selecting the book in iTunes Connect > Rights and Pricing > Edit Existing Territories then change “Cleared For Sale” to “No”.
At that point, you can edit your book and re-submit it, using the “This is an update to a previously published book” option.
Is is There Yet? — The Approval Process
Approval times for your iBook will vary. In my experience, my book was approved the same day that I submitted it. I was expecting to wait at least two weeks, so I didn’t even bother checking iTunes Connect to see if it had been approved or rejected!
However, when I later logged into my account, I saw that it was approved in less than 24 hours and I had already been making sales.
Personally, I have written an interactive eBook using iBooks Author called A Beginner’s Guide to Creating Mobile Apps with the Corona SDK, and have had a fair bit of success selling it on the iBooks store. Check it out if you’re interested!
Where to Go From Here?
Here is a download for the finished example book which you created in this tutorial.
The sky is the limit from here now that you’ve seen some of the power of iBooks Author. You can create anything from a simple textbook to an enriched multimedia experience using a very friendly editing interface.
And the best part is there’s almost no barrier to entry. You don’t have to worry about printing your books or finding a big publisher – just write your book, and get it out there for everyone to enjoy!
I hope you enjoyed this tutorial, and that it inspired some of you to create an eBook of your own. If you have any questions or comments, please join the forum discussion below!


