Introduction to Google Cardboard for iOS
Dive into the world of virtual reality with Google Cardboard VR and learn how to use the iOS SDK to embark on a worldwide 360 vacation! By Lyndsey Scott.
Sign up/Sign in
With a free Kodeco account you can download source code, track your progress, bookmark, personalise your learner profile and more!
Create accountAlready a member of Kodeco? Sign in
Sign up/Sign in
With a free Kodeco account you can download source code, track your progress, bookmark, personalise your learner profile and more!
Create accountAlready a member of Kodeco? Sign in
Contents
Introduction to Google Cardboard for iOS
25 mins
Making the VR Views Interactive
In Vacation 360, the user can click through images while viewing imageVRView and can play and pause video while viewing videoVRView. The backing classes for each of these inherit from GVRWidgetView, which implements the GVRWidgetViewDelegate protocol. This protocol lets GVRWidgetViewnotify its delegate of various state changes and interactions, which will come in handy while customizing the VR view behaviors.
Directly underneath the closing bracket of the VacationViewController class, add the following:
extension VacationViewController: GVRWidgetViewDelegate {
  func widgetView(_ widgetView: GVRWidgetView!, didLoadContent content: Any!) {
  }

  func widgetView(_ widgetView: GVRWidgetView!, didFailToLoadContent content: Any!,
    withErrorMessage errorMessage: String!)  {
  }

  func widgetView(_ widgetView: GVRWidgetView!, didChange displayMode: GVRWidgetDisplayMode) {
  }

  func widgetViewDidTap(_ widgetView: GVRWidgetView!) {
  }
}
You’ve implemented the GVRWidgetViewDelegate and all of its methods in an extension. It’s time to fill in each method one by one.
widgetView(_:didLoadContent:) is called when a VR view has loaded its content successfully. What’s that you say? How about using this method to only reveal elements of the view once they have loaded? Sounds like a great idea! :]
First, head back to viewDidLoad() and add the following just below super.viewDidLoad():
imageLabel.isHidden = true
imageVRView.isHidden = true
videoLabel.isHidden = true
videoVRView.isHidden = true
This will hide all of the labels and VR views initially, so that they won’t appear until the content loads.
Now, grouped with the other imageVRView code in viewDidLoad(), add the following:
imageVRView.delegate = self
Similarly, add the following with the videoVRView code:
videoVRView.delegate = self
This sets both view’s GVRWidgetViewDelegates to the VacationViewController.
You can now unhide the labels and views once their corresponding content has loaded. Back in widgetView(_:didLoadContent:), add the following:
if content is UIImage {
 imageVRView.isHidden = false
 imageLabel.isHidden = false
} else if content is NSURL {
 videoVRView.isHidden = false
 videoLabel.isHidden = false
}
widgetView(_:didLoadContent:) is passed the loaded content object – in this case a UIImage for GVRPanoramaViews and an NSURL for GVRVideoViews. For the UIImage, unhide the imageVRView and its corresponding label. For an NSURL, unhide the videoVRView and its corresponding label.
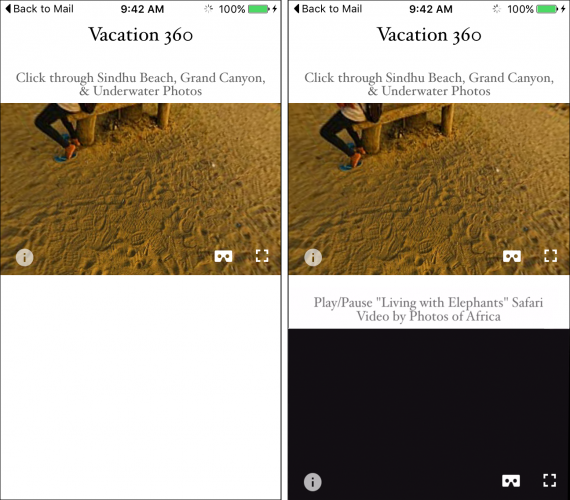
Build and run; you’ll see that each VR view and label now only appears when its corresponding content has loaded:
The VR views now appear after they load. (Left) The image VR view has loaded. (Right) The video VR view has also loaded.

The VR views now appear after they load. (Left) The image VR view has loaded. (Right) The video VR view has also loaded.
Add the following to widgetView(_:didFailToLoadContent:withErrorMessage:):
print(errorMessage)
This is called when there’s an issue loading the content. In that case, you simply print the passed errorMessage.
Next you’ll use widgetView(_:didChange:) to store the current display mode and selected view, so that tapping on the widgets will trigger the appropriate actions only when a VR view is in fullscreen or VR mode. This method is called each time you switch between embedded, fullscreen, or VR mode and passes the involved widgetView.
First, in the main VacationViewController class below the enum Media declaration block, add the following:
var currentView: UIView?
var currentDisplayMode = GVRWidgetDisplayMode.embedded
currentView will maintain a reference to the view currently displayed in fullscreen or VR mode. currentDisplayMode is used to hold the current display mode. It is initialized to GVRWidgetDisplayMode.embedded which represents the initial display mode when the VR views are embedded in the VacationViewController.
Then in widgetView(_:didChange:), add the following:
currentView = widgetView
currentDisplayMode = displayMode
widgetView(_:didChange:) passes the new displayMode as well as the widgetView where the mode was changed. These are stored in currentDisplayMode and currentView, respectively, for later reference.
Knowing the display mode and displayed view, you can finally start to implement the interactive behaviors while in fullscreen or VR mode. Tapping the magnetic widget button on Cardboard or directly tapping the screen should cycle through the photos in Media.photoArray when the imageVRView is in fullscreen or VR mode. To implement this behavior, add the following to widgetViewDidTap(_:):
// 1
guard currentDisplayMode != GVRWidgetDisplayMode.embedded else {return}
// 2
if currentView == imageVRView {
  Media.photoArray.append(Media.photoArray.removeFirst())
  imageVRView?.load(UIImage(named: Media.photoArray.first!),
    of: GVRPanoramaImageType.mono)
}
- Since you only want to handle taps while in fullscreen or VR mode, a
currentDisplayModeof.embeddedtriggers an early return. - If
currentViewisimageVRView, advance theMedia.photoArrayqueue by removing the first element of the array and appending it to the end. SinceMedia.photoArray.removeFirst()returns the removed element, you can remove the first element and append it to the end in a single line of code. Then you loadimageVRView‘sUIImageusing the file now in the first index of the photo array.
Build and run your project; open the image VR view into either fullscreen or VR fullscreen, then tap either the device screen or the widget button respectively. You should be able to click through the images.
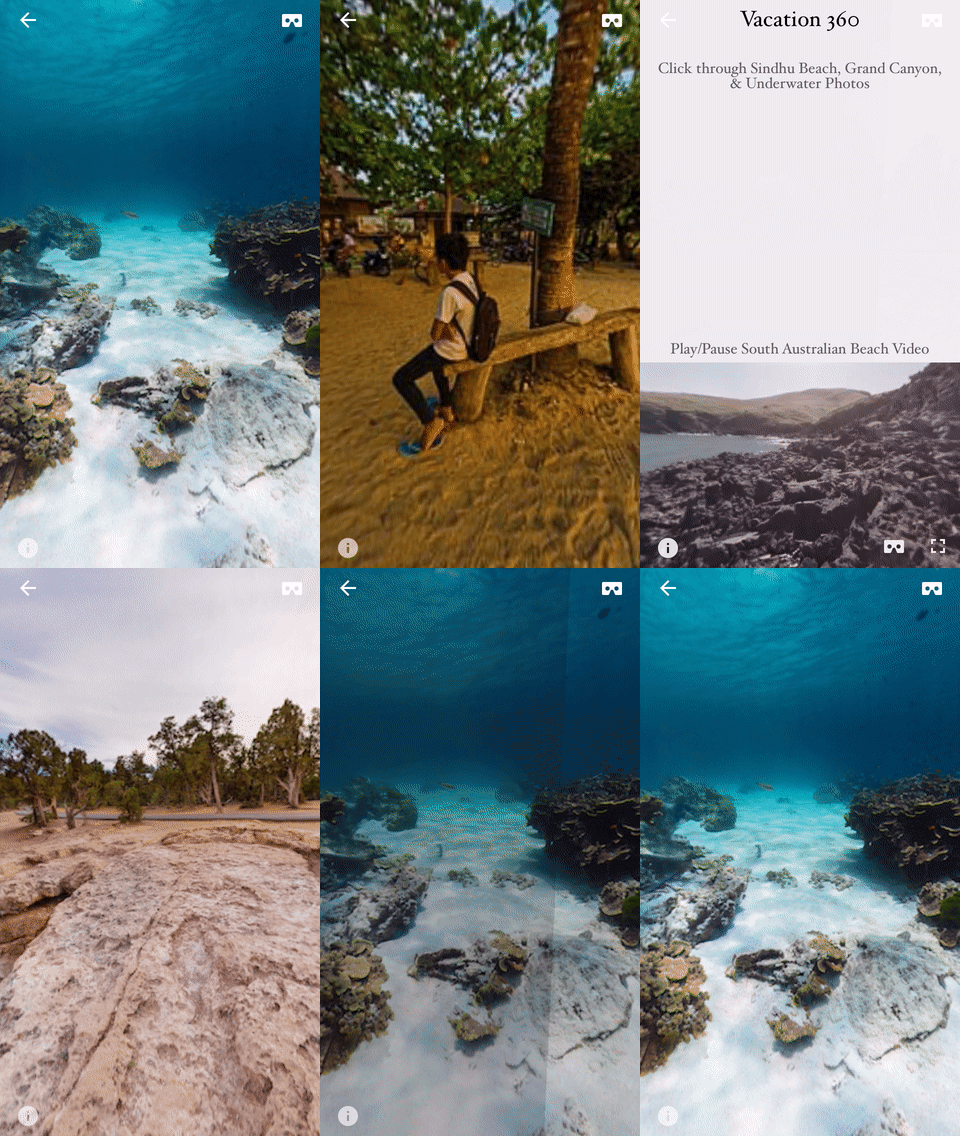
Clicking through images in fullscreen
You may notice one minor issue: the other elements of the view show through between each click. To prevent that, hide the elements whenever you’re not viewing the embedded display mode by adding the following to the end of widgetView(_:didChange:):
if currentView == imageVRView && currentDisplayMode != GVRWidgetDisplayMode.embedded {
  view.isHidden = true
} else {
  view.isHidden = false
}
If the currentView is the imageVRView and the currentDisplayMode isn’t embedded, this means you’re viewing the image view in fullscreen or VR mode. In that case, hide the view controller’s root view; otherwise, unhide it.
Build and run; click through the images again, and the transition between images should be almost seamless:
Clicking through images in fullscreen
Note: Even after setting view.isHidden to true, the GVRPanoramaView stays unhidden because it and the GVRVideoView are not subviews of the VacationViewController‘s view when in fullscreen or VR mode.
Note: Even after setting view.isHidden to true, the GVRPanoramaView stays unhidden because it and the GVRVideoView are not subviews of the VacationViewController‘s view when in fullscreen or VR mode.
Congrats on successfully creating a 360 image slideshow!
But don’t get too lost in your vacation yet. The interactions are only halfway done!
What? It gets even better??


