Introduction to Unity: Getting Started – Part 1/2
Learn about the Unity Interface and how to create your first game in Unity with this Unity Tutorial for Beginners. By Brian Moakley.
Sign up/Sign in
With a free Kodeco account you can download source code, track your progress, bookmark, personalise your learner profile and more!
Create accountAlready a member of Kodeco? Sign in
Contents
Introduction to Unity: Getting Started – Part 1/2
30 mins
Breaking Down the Interface
When Unity first opens, you’ll see a window that looks like this:
The interface can be a bit overwhelming at first. Take a deep breath and tell yourself it’s going to be all right! :]
The interface is highly customizable and can provide you with as much or as little information as you need.
In the upper right hand corner, you’ll see five buttons. Select the last one on the right. This is the Layout Dropdown. From the list of options, select the 2 by 3 option.
Your editor should now look like the image below:
Here’s the breakdown of the various sections:
1. Scene View
The Scene view is where you construct your game. It’s where you add all models, cameras, and other pieces that make up your game. This is a 3D window where you can visually place all the assets you’re using.
As you test your game in Unity, the scene view will update itself with the current game’s state. You can even add new elements on-the-fly to the scene.
When you stop the game, the scene view will revert back to its original state. Any changes you make to the Scene view while you’re playing the game will be lost when it stops.
2. Game View
The Game view represents the player’s perspective of game. This is where you can play your game and see how all the various mechanics work with one another.
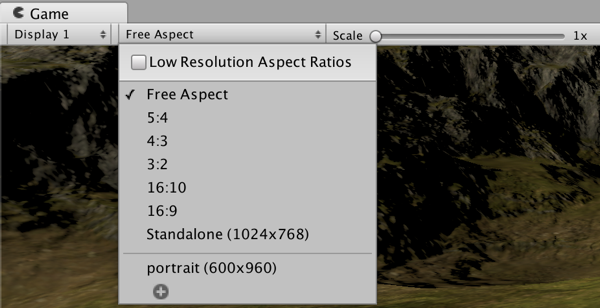
The Game view has an aspect ratio selector, which lets you change the dimensions of the view to match that of a specific screen aspect ratio (e. g. 4:3, 16:9, 16:10 …), or a device screen size such as that of an iPhone or iPad.
This allows you to make sure the game looks good on all aspect ratios and resolutions you want to support, and that no important content is cut off. You can add a custom aspect ratio using the Plus button at the bottom of the dropdown.
3. Hierarchy Window
The Hierarchy window contains a list of all the current GameObjects used in your game. But what is a GameObject? That’s an easy one: A GameObject is an object in your game.
OK, there’s a bit more to it than that! :]
In essence, GameObjects are empty containers that you customize by adding components. Components permit GameObjects to project geometry (from a simple cube to more complex 3d models of towers or monsters), emit light, act as a camera or even create complex behavior via scripts.
GameObjects can also act like folders, containing other GameObjects, which makes them quite useful for organizing your scene. You’ll see GameObjects in action in the second part of this tutorial.
A scene typically represents a single level of your game, although you could theoretically put the entire game inside one scene. Any GameObjects actively used in your game in the current scene will appear in the Hierarchy window.
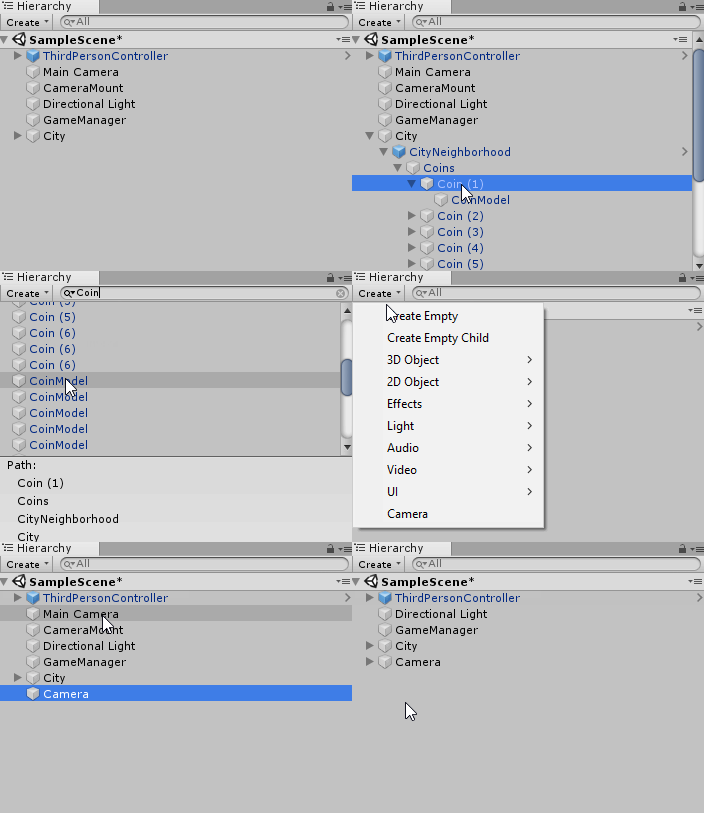
Every new scene starts with a Main Camera and a Directional Light, which are both GameObjects. Mind you, you don’t have to keep them. You can always delete them and add them back at later time. When you delete a GameObject from the Hierarchy, you’re effectively removing it from the scene.
As your scene grows with lots of GameObjects, the search bar will prove to be an invaluable tool.
4. Project Window
The Project window contains all assets used by your game. You can organize your assets by folders. When you wish to use them, you can simply drag those assets from the Project window to the Hierarchy window.
Alternatively, you can drag them from the Project window to the Scene view. If you drag files from your computer into the Project window, Unity will automatically import those as assets.
Unity organizes the assets in the Project window the same as the OS file system does. You may be tempted to make changes directly in the file system instead of in the Project window, but this is a big mistake that will break your assets — and possibly break your game!
Unity maintains metadata for each asset, so moving assets between folders in the file system breaks the metadata. If you need to make any organizational changes to your assets — especially prefabs — always perform those changes in the Project window.
5. Inspector Window
The Inspector window lets you configure any GameObject. When you select a GameObject in the Hierarchy, the Inspector will list all the GameObject’s components and their properties.
For instance, a light will have a color field along with an intensity field. You can also alter values on your GameObjects while the game is being played.
6. Toolbar
You use the toolbar to manipulate the various GameObjects in the Scene view. You’ll use the following tools as you develop your game, so get familiar with them by trying them in your empty project!
However, you won’t be able to see the effect very well in an empty Scene. So first, add a simple Cube to the scene.
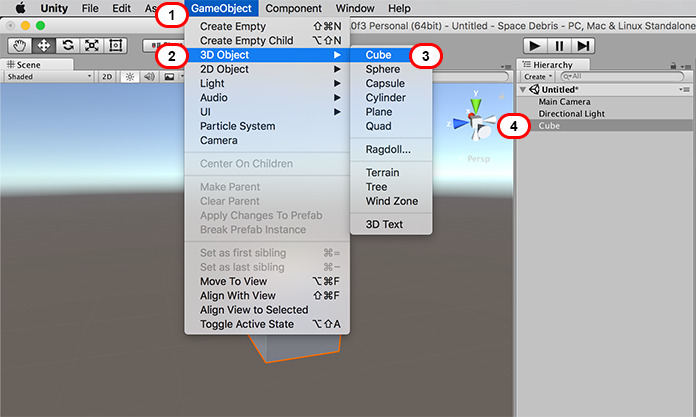
- Open the GameObject dropdown from the Unity Menu.
- Select the 3D Object dropdown.
- Select Cube from the list of available objects.
This will give you a visual reference point while you explore the Toolbar options.
The Hand tool is a “handy” tool (don’t worry folks, the jokes get worse!) with a bunch of useful features built right in.
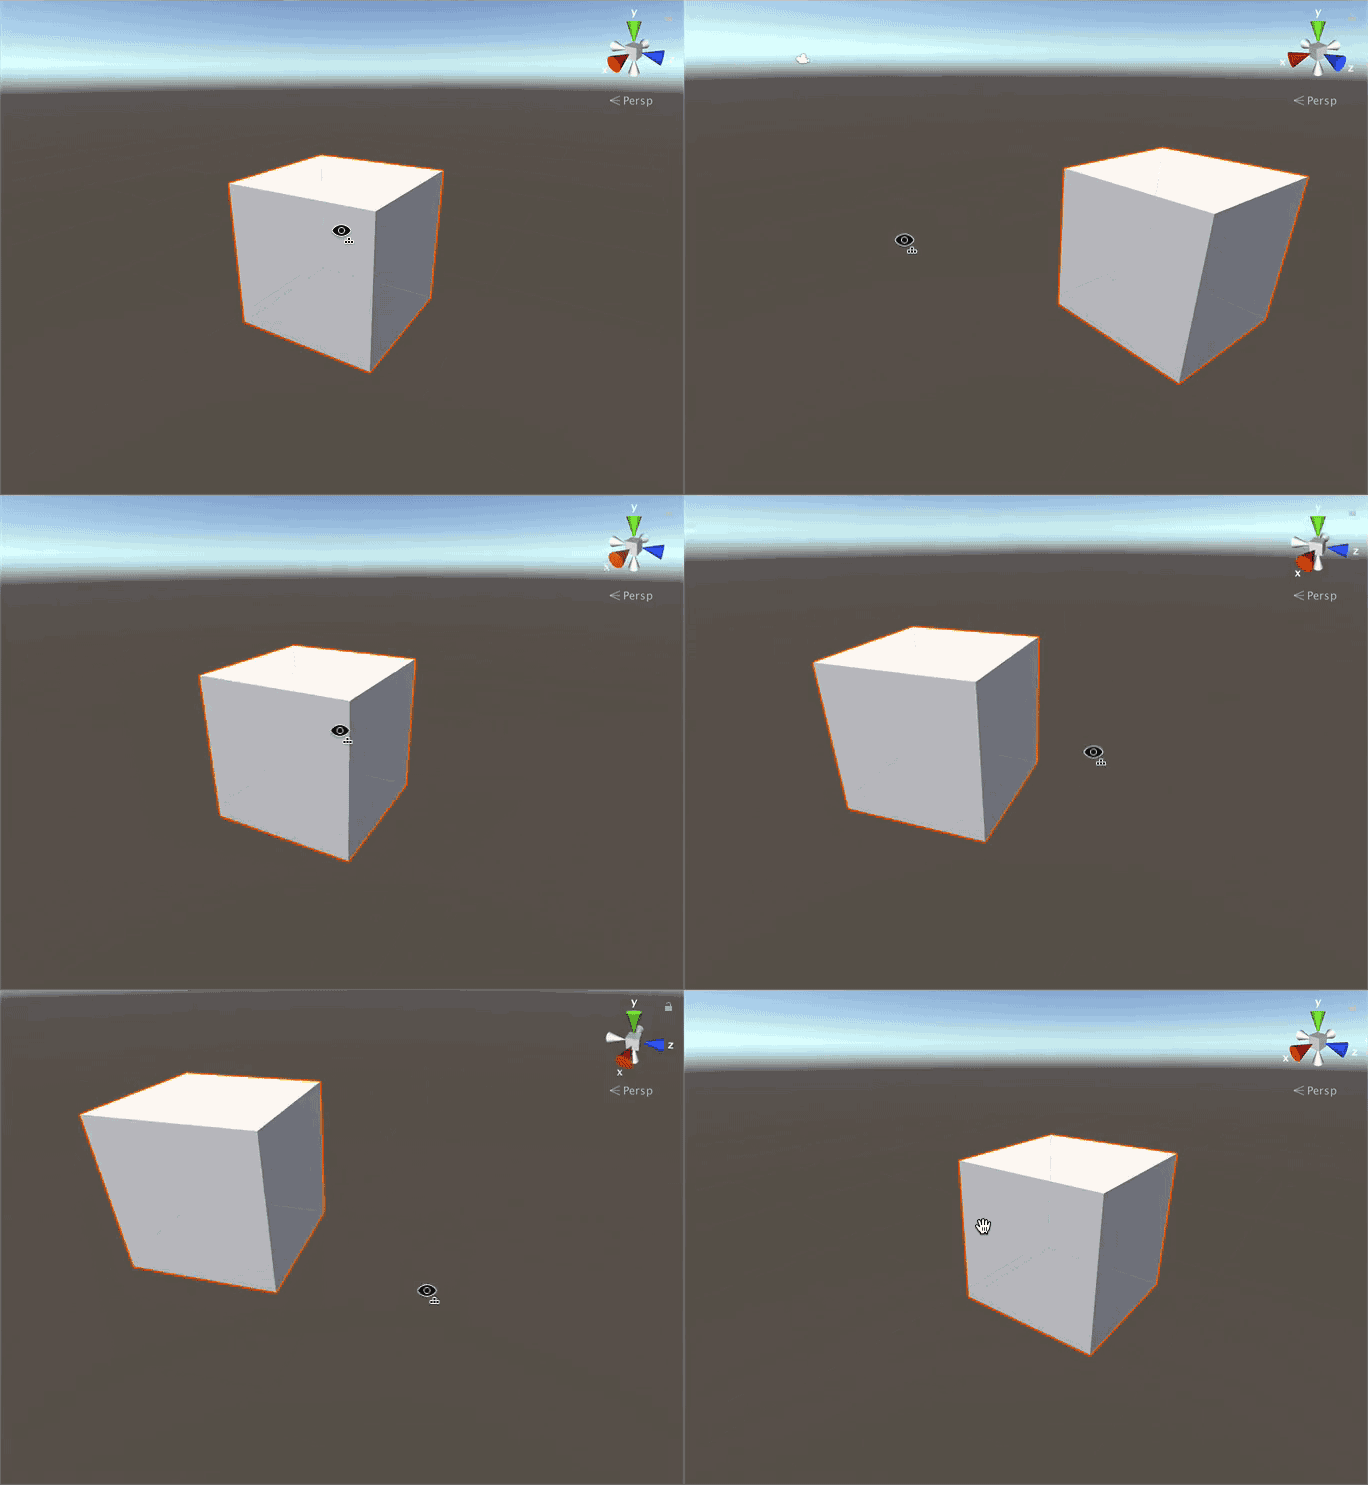
Select the Hand tool, then drag your mouse over the Scene view to pan the entire scene.
Right-click and drag the mouse to rotate the camera around your current position. Notice that the hand icon transforms into an eye.
Next, hold down Ctrl (or Cmd) and Alt (or Option). Right-click and move the mouse up to zoom into the scene.
Moving the mouse down zooms out. Or if you want to do it the easy way, just use the scroll wheel.
Finally, hold down the right mouse button and use your WASD keys to move around the scene like you would in a first person shooter.
Likewise, you can move up and down by pressing E or Q respectively. To move even faster, hold down the Shift key as well.
The hand tool’s default shortcut key is Q. To jump quickly to the hand tool, press the middle mouse button. Once you release it, you’ll return back to the previous tool you were using.
The Translate tool lets you select and position a GameObject in the scene.
You’ll notice when you select a GameObject while the Translate Tool is active, that there are three colored arrows growing from its center. These arrows indicate the three-dimensional axes of the object: The x-axis is the red arrow, the y-axis is the green arrow, and the z-axis is the blue arrow.
Unity’s coordinate system is left-handed. For a deeper explanation about the left- and right-handed coordinate systems, check out this interesting article about the different coordinate systems.
In this case, the gizmo indicates the direction of each axis. As you learn more about Unity, you’ll be able to add your own gizmos to indicate things such as spawn points, the location of cameras, or even the wind direction. The great thing about gizmos is they’re only displayed in the Scene view, and you can turn them off when they’re no longer needed.
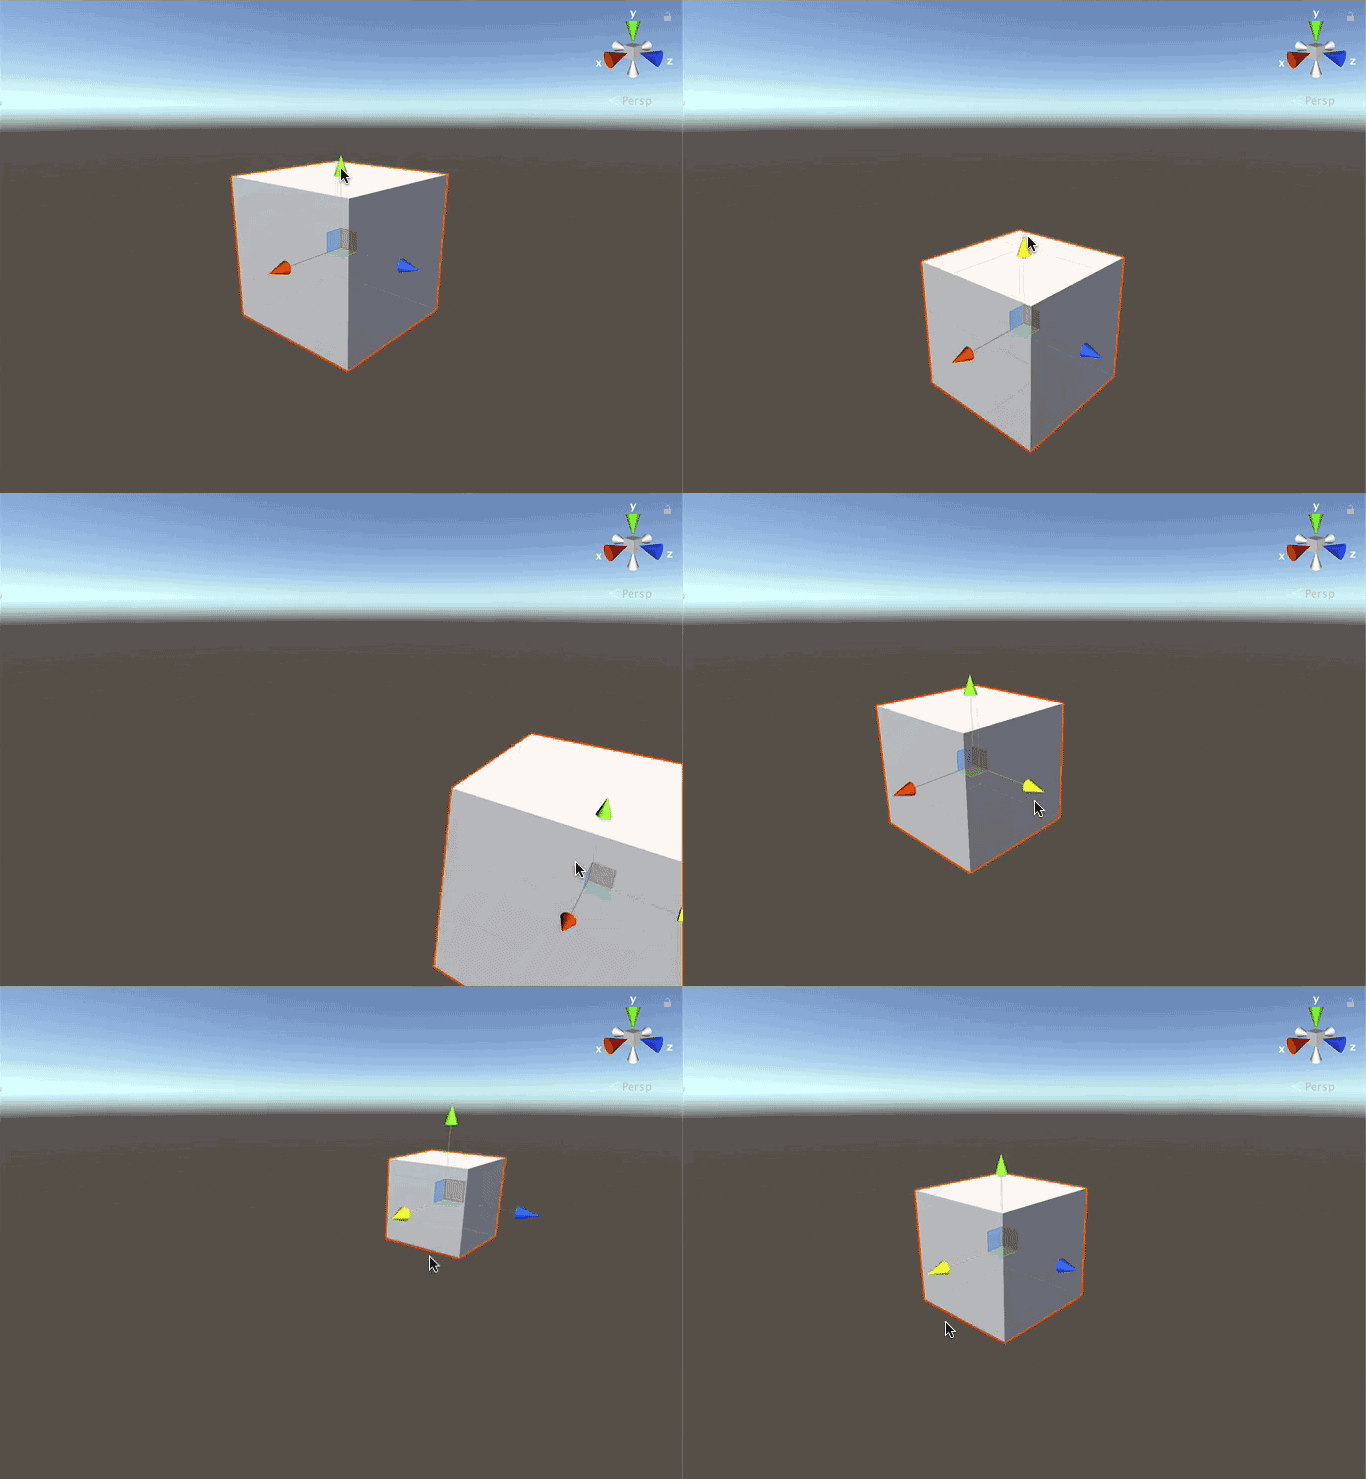
There are many ways to move your GameObject with the Translate tool. You can select one of the arrows (which will turn Yellow when selected), and then move the mouse. The GameObject will only move on that one axis.
For example, if you selected the y-axis and moved an object while facing in a normal orientation, the GameObject would only move up or down.
Detailed view of the three axes and the three planes that you can select to move the GameObject.
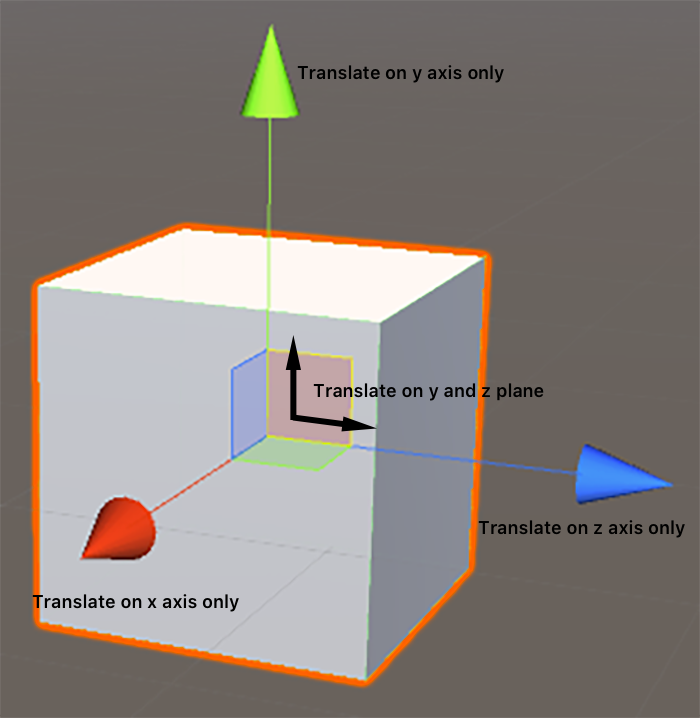
Detailed view of the three axes and the three planes that you can select to move the GameObject.
The three colored planes in the center of the GameObject let you move the GameObject on two axes. The square’s color indicates along what plane it will move. For instance, a green square means you can move an object on the y-plane (which means it can move on the x- and z-axes).
The default shortcut key for the translate tool is W.
The rotate tool, unsurprisingly, lets you rotate objects.
You’ll notice three spherical colored lines when you select an object to rotate. These lines indicate the axis to rotate around. Simply select the line and drag your mouse to rotate the GameObject. To free rotate without being constrained to an axis, select the space between the lines and move your mouse.
Select one of the colored lines to rotate around that axis.
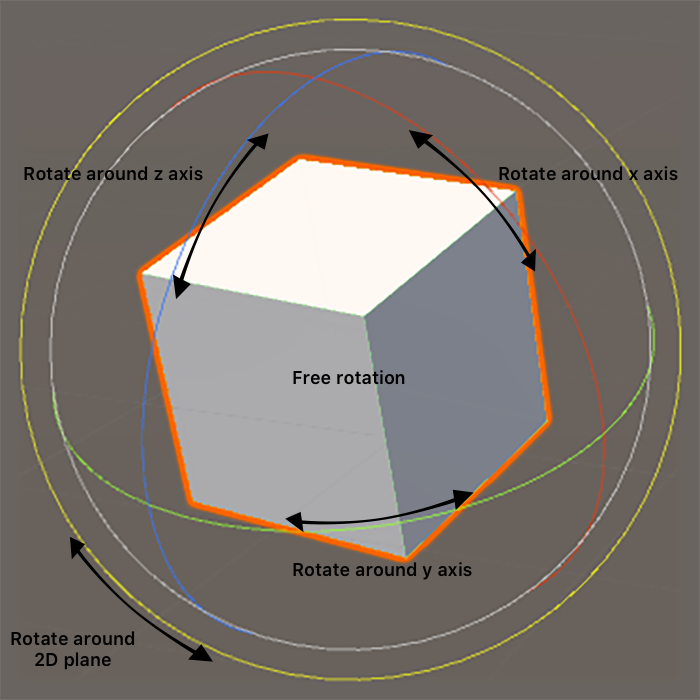
Select one of the colored lines to rotate around that axis.
The default shortcut key for the rotate tool is E.
The Scale tool lets you scale a GameObject either along a single axis, or proportionately on all axes.
To scale an object along an axis, select the GameObject and then drag the square end of an axis line. The GameObject will scale along that axis. To scale the entire GameObject, select the center point of the GameObject and drag the mouse either forward or backward to scale the GameObject up or down respectively.
Scaling details: Select one of the three axes to scale along that axis or the cube at the center of the axis to scale proportionally.
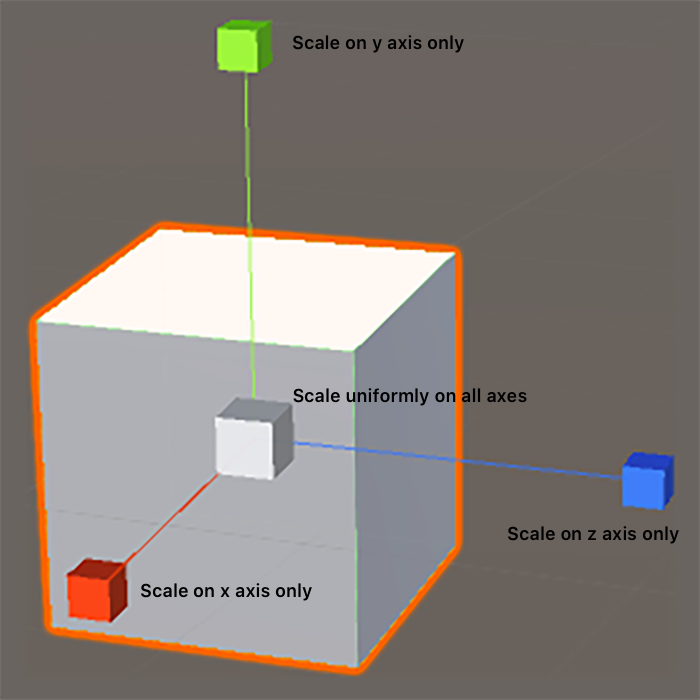
Scaling details: Select one of the three axes to scale along that axis or the cube at the center of the axis to scale proportionally.
The default shortcut key for the scale tool is R.
Note: Some of you may be a bit confused by the shortcut keys. You’d assume the Scale shortcut would be the S key instead of R. Believe it or not, there is a method to the madness. Do you notice a familiar pattern in the shortcut keys…perhaps one right at your fingertips?
Note: Some of you may be a bit confused by the shortcut keys. You’d assume the Scale shortcut would be the S key instead of R. Believe it or not, there is a method to the madness. Do you notice a familiar pattern in the shortcut keys…perhaps one right at your fingertips?
Yep, it’s the top row of the keyboard! :]
Unity assumes you’re using the mouse with your right hand and keyboarding with your left. Your fingers, at rest on the home row, will be on the ASDF keys. You’ll note each shortcut key of the toolbar corresponds to a key above the home position. The keyboard shortcuts for the toolbar corresponds to the QWERT keys, from left to right.
Unfortunately, occasionally you may try to press the W key, but press the 2 key by mistake. This puts the editor into 2D mode and will look a lot like this:
In 2D mode, objects lose their depth
When that happens, simply press 2 key again and the editor will revert back to 3D mode.
The Rect tool is primarily used with 2D GameObjects and User Interface (UI) GameObjects, although you can use it on 3D GameObjects as well.
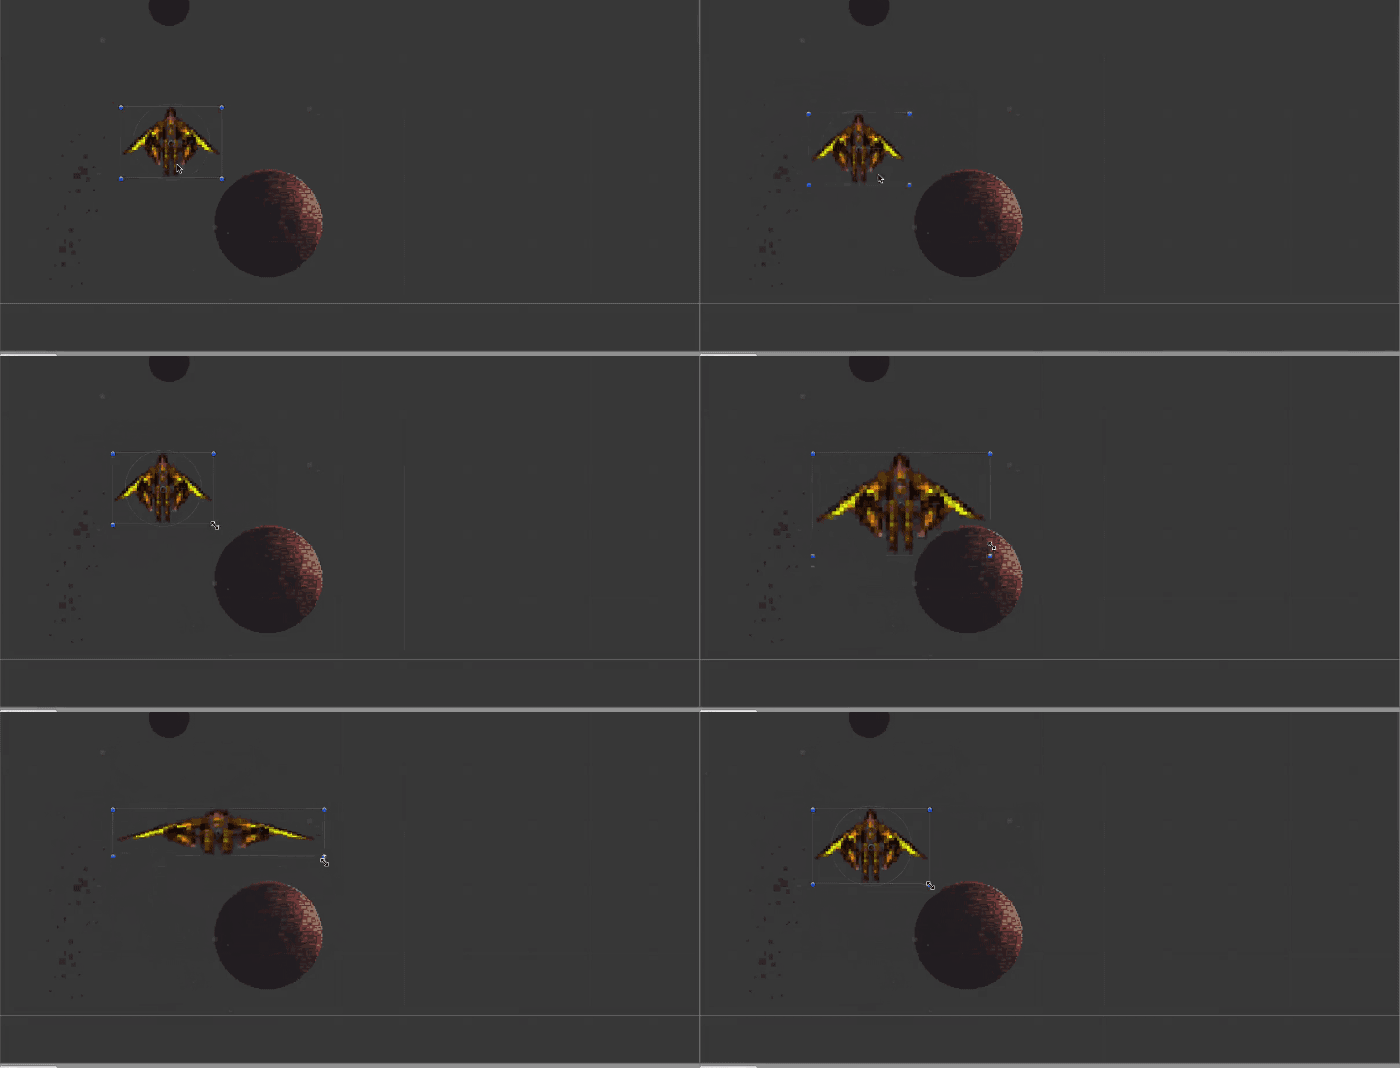
The tool can resize, scale, and rotate 2D assets and also reset the pivot point, which is the center point of rotation for the object. The pivot point is represented by a large circle on the asset.
Can you guess its default shortcut key? That’s right, it’s T.
The Transform tool combines transforming, scaling, and rotating into one tool so that you do everything without switching tools.
The first switch toggles between Center and Pivot mode. When in center mode, if you select two GameObjects, the gizmo will be placed in the center of the two objects. Rotating the GameObjects rotates them around the center gizmo. In pivot mode, each GameObject rotates around its own pivot point, as illustrated below:
The second switch toggles between Global and Local space.
- Global mode: You manipulate your object from the point of view of the world around it. The x-axis goes left to right, the y-axis goes up and down, and the z-axis goes forward and backwards like usual.
- Local mode: Works from the coordinate system of the object itself, and changes the axes to match that of the actual GameObject.


