Disabling View Binding
If for any reason you want to disable View Binding on a specific layout, you can open it up and add the following statement:
<LinearLayout
  ...
  tools:viewBindingIgnore="true" >
  ...
</LinearLayout>
This prevents the view binder compiler from generating the associated binding class.
View Binding Coexisting With Data Binding
As you’ve seen, there’s no reason you can’t use both Data Binding and View Binding on the same project. By default, the view binder compiler generates a binding class for each XML file. But, if you want to use Data Binding instead, you have to add the layout tag, as root, to the XML file.
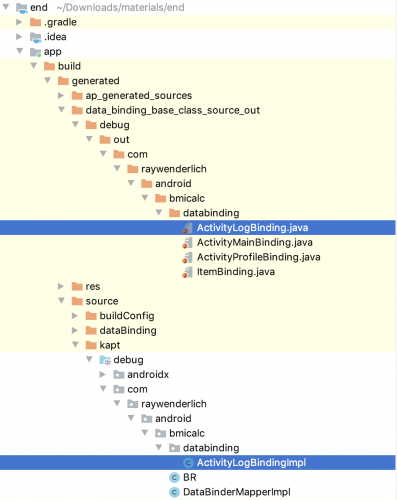
Remember that you didn’t change activity_log.xml, which was using Data Binding. You can find the generated files from the data binding compiler in the following packages, within the project structure:

Where to Go From Here?
Congratulations! You now know how to use View Binding! :]
You can download the begin and end projects by using the Download Materials button at the top or bottom of the tutorial, if you haven’t already, and explore both the projects.
Furthermore, if you want to learn more about the subject, please check the following references:
I hope you enjoyed this introduction to View Binding in Android tutorial. If you have any questions, comments or awesome modifications to this project app, please join the forum discussion below! Happy binding! :]
