Decorating the Room
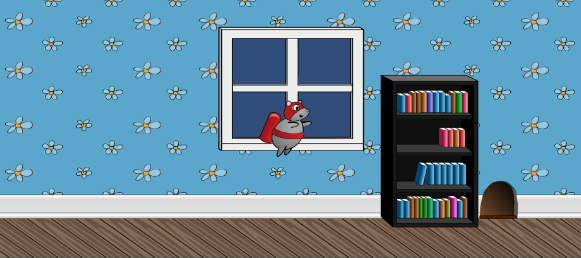
To decorate the room you can use any amount of bookcases and mouse holes from the Sprites folder in the Project browser. You can position them any way you want. Just don’t forget to set their Sorting Layer to Decorations.
Here is a decorated room example:

Need some decorating inspiration? In the Project browser find an image named object_bookcase_short1. Drag it to the scene just as you did with room backgrounds. Don’t try to position it somewhere in particular, just add it to the scene.
Select object_bookcase_short1 in the Hierarchy and set its Sorting Layer to Decorations. Now you will be able to see it.
Set the bookcase Position to (3.42, -0.54, 0) or place it anywhere you want. Now add the object_mousehole sprite. Set its Sorting Layer to Decorations and Position to (5.15, -1.74, 0).
Note: You don’t have to decorate things exactly I did — maybe yours is a rich city mouse and can afford two book cases!
Just don’t cover the window with book cases. You will add something ouside the window to look at later in the tutorial.
Now, this is starting to look like a real game!
Where to Go From Here?
Now that you have your hero flying up and down on a basic background, head in to Part 2 where your mouse will start to move forward through randomly generated rooms. You’ll even add a few animations to keep the game fun and engaging.
You can download the final project for this part in the tutorial materials. The link is at the top or bottom of this tutorial.
I would love to hear your comments and questions below. See you in Part 2!
