Unreal Engine 4 UI Tutorial
In this Unreal Engine 4 UI tutorial, you will learn how to create, display and update a HUD. By Tommy Tran.
Sign up/Sign in
With a free Kodeco account you can download source code, track your progress, bookmark, personalise your learner profile and more!
Create accountAlready a member of Kodeco? Sign in
Contents
Unreal Engine 4 UI Tutorial
25 mins
- Getting Started
- About Widgets
- Creating a Widget
- The UMG UI Designer
- Creating a Text Widget
- Creating an Image Widget
- Anchors
- Creating the Timer
- Displaying the HUD
- Storing References
- Creating the Variable
- Setting the Reference
- Functions
- Organization
- Reusability
- Updating a Widget
- Creating the Update Function
- Calling the Update Function
- Bindings
- Creating a Binding
- Where to Go From Here?
In video games, developers use graphics and text to display relevant information to the player such as health or score. This is known as the user interface (UI).
You can create a UI in Unreal Engine 4 using Unreal Motion Graphics (UMG). UMG allows you to construct a UI easily by dragging and dropping UI elements such as buttons and text labels.
In this tutorial, you will learn how to:
- Create a heads-up display (HUD) that displays a counter and a timer
- Display the HUD
- Update the counter and timer to display variable values
Please note, you will be using Blueprints in this tutorial. If you need a refresher, check out our Blueprints tutorial.
- Part 1: Getting Started
- Part 2: Blueprints
- Part 3: Materials
- Part 4: UI (you are here!)
- Part 5: How To Create a Simple Game
- Part 6: Animation
- Part 7: Audio
- Part 8: Particle Systems
- Part 9: Artificial Intelligence
- Part 10: How to Create a Simple FPS
Getting Started
Download the starter project and unzip it. Go to the project folder and open GeometryCatcher.uproject.
Press Play to control a white cube and try to catch the falling shapes. You can move the catcher horizontally by moving your mouse. After ten seconds, the shapes will stop spawning.

The first thing you will do is create a HUD that displays two things:
- A counter that keeps track of how many shapes the player has collected
- A timer that displays how many seconds remain until the shapes stop spawning
To create all of these, you need to use widgets.
About Widgets
A widget is a UI element that provides some sort of visual functionality to the UI. For example, a Button widget provides an object that the user can see and click on.

The widget itself does not have to be visible. For example, a Grid Panel widget divides its space evenly between its contents. The user cannot see the Grid Panel but can see its effect.

Widgets can also contain other widgets. Here is an example of a custom widget that contains a Text widget (the Name label) and a Text Box widget:

You can even construct a widget to be an entire interface such as a menu screen. Below is an example of a widget constructed to look like a title screen. All the UI elements are also widgets and are contained within the title screen widget.

Now that you know what widgets are, it’s time to create one for the HUD.
Creating a Widget
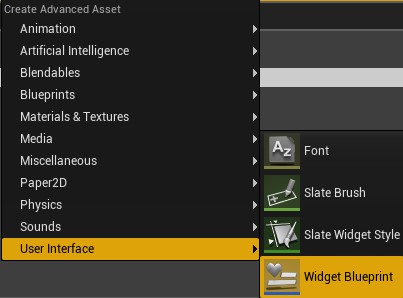
Go to the Content Browser and navigate to the UI folder. Click the Add New button and select User Interface\Widget Blueprint. Rename the new asset to WBP_HUD.
Double-click on WBP_HUD to open it in the UMG UI Designer.
The UMG UI Designer
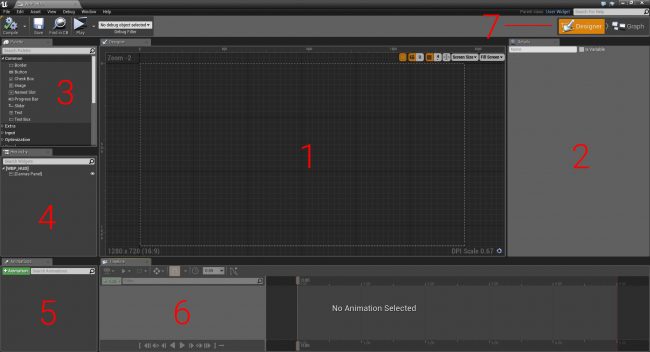
The UMG UI Designer is composed of seven main elements:
- Designer: This area contains the visual representation of your widget. Pan by holding right-click and moving your mouse. Zoom by scrolling your mouse wheel.
- Details: Any widget you select will have its properties displayed here
- Palette: A list of all the widgets you can use. Any user created widgets will also appear here.
- Hierarchy: A list of all the widgets you are currently using
- Animations: Widgets can have certain properties animated such as position and size. This panel lists all your animations.
- Timeline: When you select an animation, this panel will display the animated properties and keyframes
- Editor Mode: Here, you can switch between the Designer and Graph modes. The Graph mode is almost identical to a Blueprint’s Event Graph.
Creating a Text Widget
Text widgets are perfect for displaying numerical information such as the counter and timer.
Go to the Palette panel and search for the Text widget. Add the widget by holding left-click and dragging it into the Designer panel.
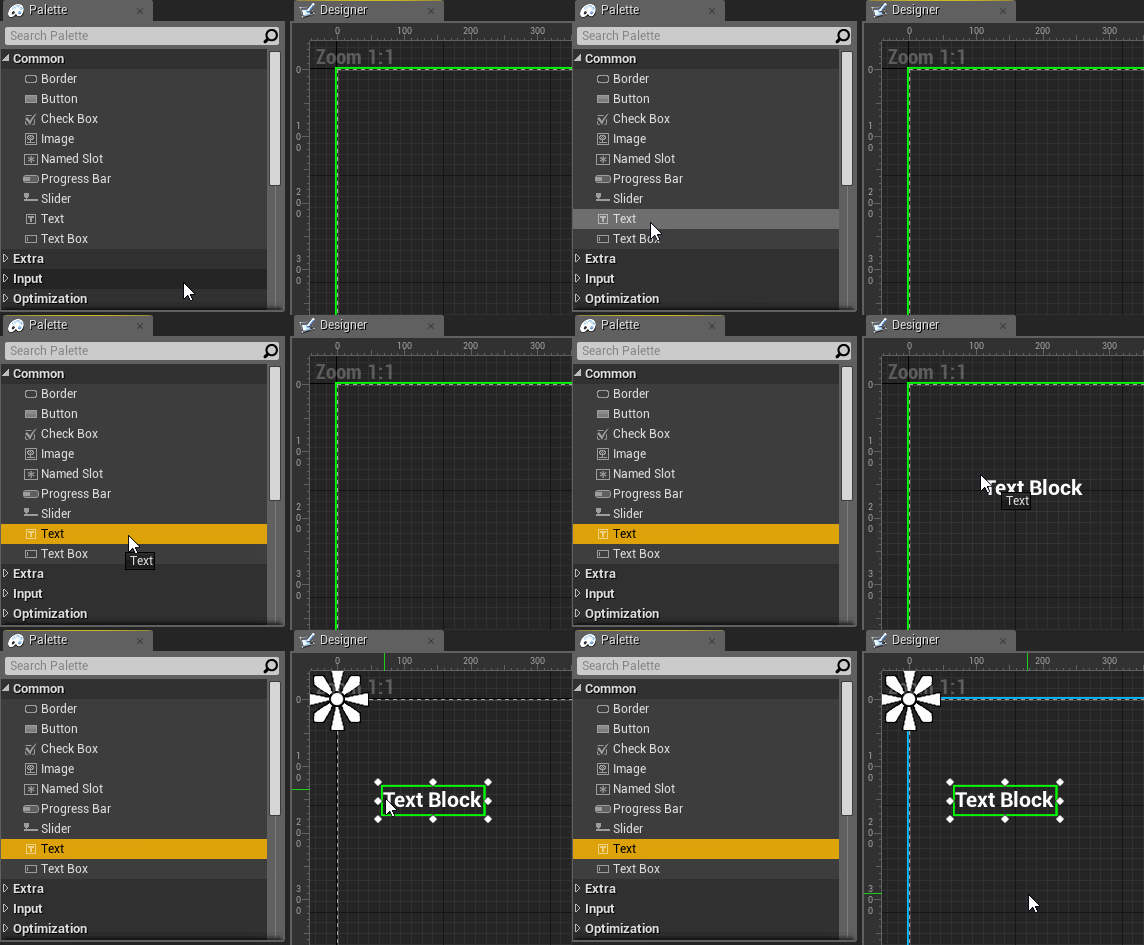
Don’t worry about the text content for now, you will replace it later.
Rename the widget to CounterText. You can do this by selecting the Text widget and going to the Details panel. Type in CounterText into the text box located at the top.

You can move widgets by left-clicking and dragging the widget in the Designer.
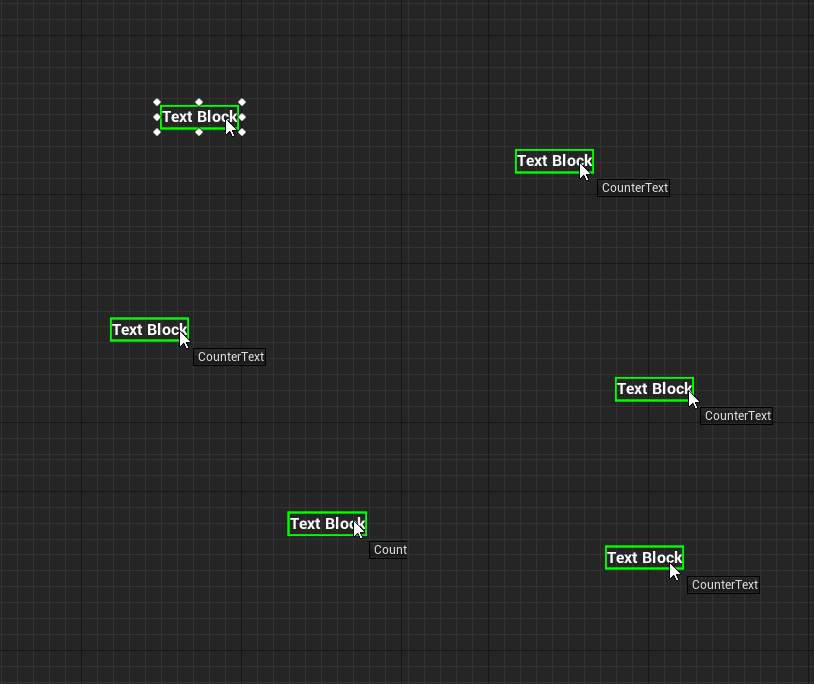
You can also resize widgets by left-clicking and dragging the handles. Resizing allows you to set the bounds for the widget. Unreal will not render anything outside the bounds.
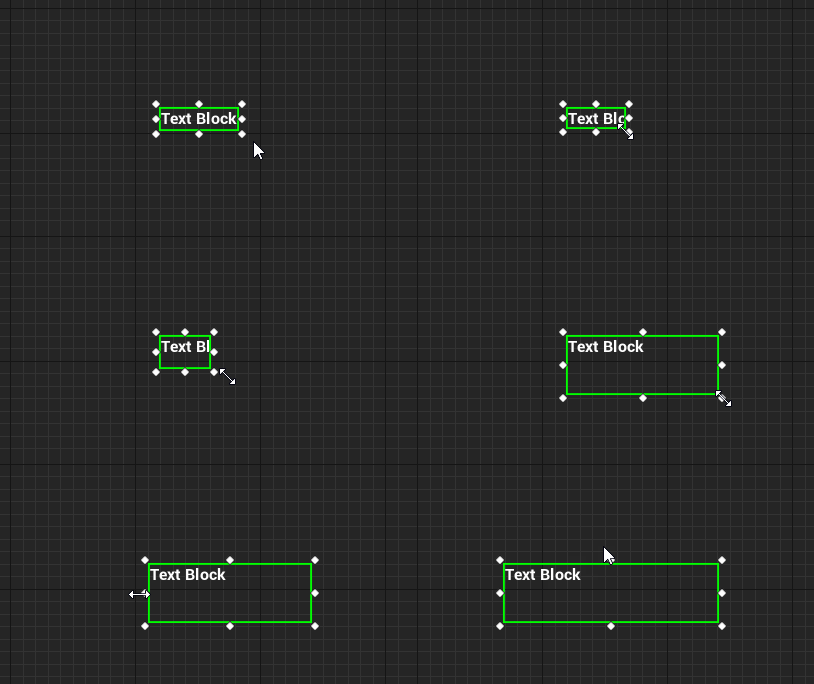
Alternatively, you can set the position and size by modifying the values in the Details panel. Set the following properties and values for CounterText:
- Position X: 200
- Position Y: 50
- Size X: 500
- Size Y: 100

At the moment, the text only takes up a small portion of the box.

You can increase the font size by going to the Details panel and navigating to the Appearance section. At the very right of the Font property, there is a text box to set the font size.

Set the font size to 68.

Let’s make the counter look nicer by adding an icon next to it.
Creating an Image Widget
Image widgets are an easy way to display graphics in your UI such as icons.
Create an Image widget and name it CounterIcon. Set Position X to 75 and Position Y to 50. This will place it next to CounterText.

To set an image, go to the Details panel and go to the Appearance section. Expand the Brush property and then click the drop-down for Image. Select T_Counter.

The image will look stretched because the widget has a different size to the image.

Instead of resizing the widget, you can use the Size To Content option. This option will automatically resize a widget to accommodate for its contents.
While still in the Details panel, go to the Slot (Canvas Panel Slot) section. Check the checkbox next to Size To Content.

The widget will resize itself to fit the image.

When playing the game across different screen sizes, the UI needs to move its widgets accordingly. To maintain the layout of your UI, you can use anchors.
