How to Create a Simple FPS in Unreal Engine 5
In this Unreal Engine 5 tutorial, you’ll create a simple first-person shooter while learning how to create a first-person character equipped with a gun, and you’ll learn how to apply damage to other actors in your game. By Ricardo Santos.
Sign up/Sign in
With a free Kodeco account you can download source code, track your progress, bookmark, personalise your learner profile and more!
Create accountAlready a member of Kodeco? Sign in
Sign up/Sign in
With a free Kodeco account you can download source code, track your progress, bookmark, personalise your learner profile and more!
Create accountAlready a member of Kodeco? Sign in
Contents
How to Create a Simple FPS in Unreal Engine 5
30 mins
- Getting Started
- Creating the Player Pawn
- Creating Movement Mappings
- Implementing Movement
- Setting the Default Pawn
- Creating Look Mappings
- Implementing Looking
- Creating the Gun
- Creating the Base Gun Class
- Creating a Child Gun Class
- Creating the Camera
- Defining the Gun Location
- Spawning and Attaching the Gun
- Shooting Bullets
- Spawning Bullet Impact Particles
- Calling the Shoot Function
- Calculating the Line Trace Locations
- Decreasing the Fire Rate
- Applying Damage
- Handling Damage
- Where to Go From Here?
A first-person shooter (FPS) is a genre where the player uses guns and experiences the game through the eyes of a playable character. FPS games are immensely popular, with such well-known franchises as Call of Duty and Battlefield.
Unreal Engine was built to create FPS games, so it makes sense to create one using it. In this tutorial, you’ll learn how to:
- Create a first-person Pawn that can move and look around.
- Create a gun and attach it to the player Pawn.
- Shoot bullets using a line trace — also known as a raycast.
- Apply damage to actors.
Getting Started
Download the project materials with the Download Materials button at either the start or the end of this article, and unzip it. Navigate to the project folder called BlockBreakerStarter 5.0, and open BlockBreaker.uproject. You’ll see the following scene:
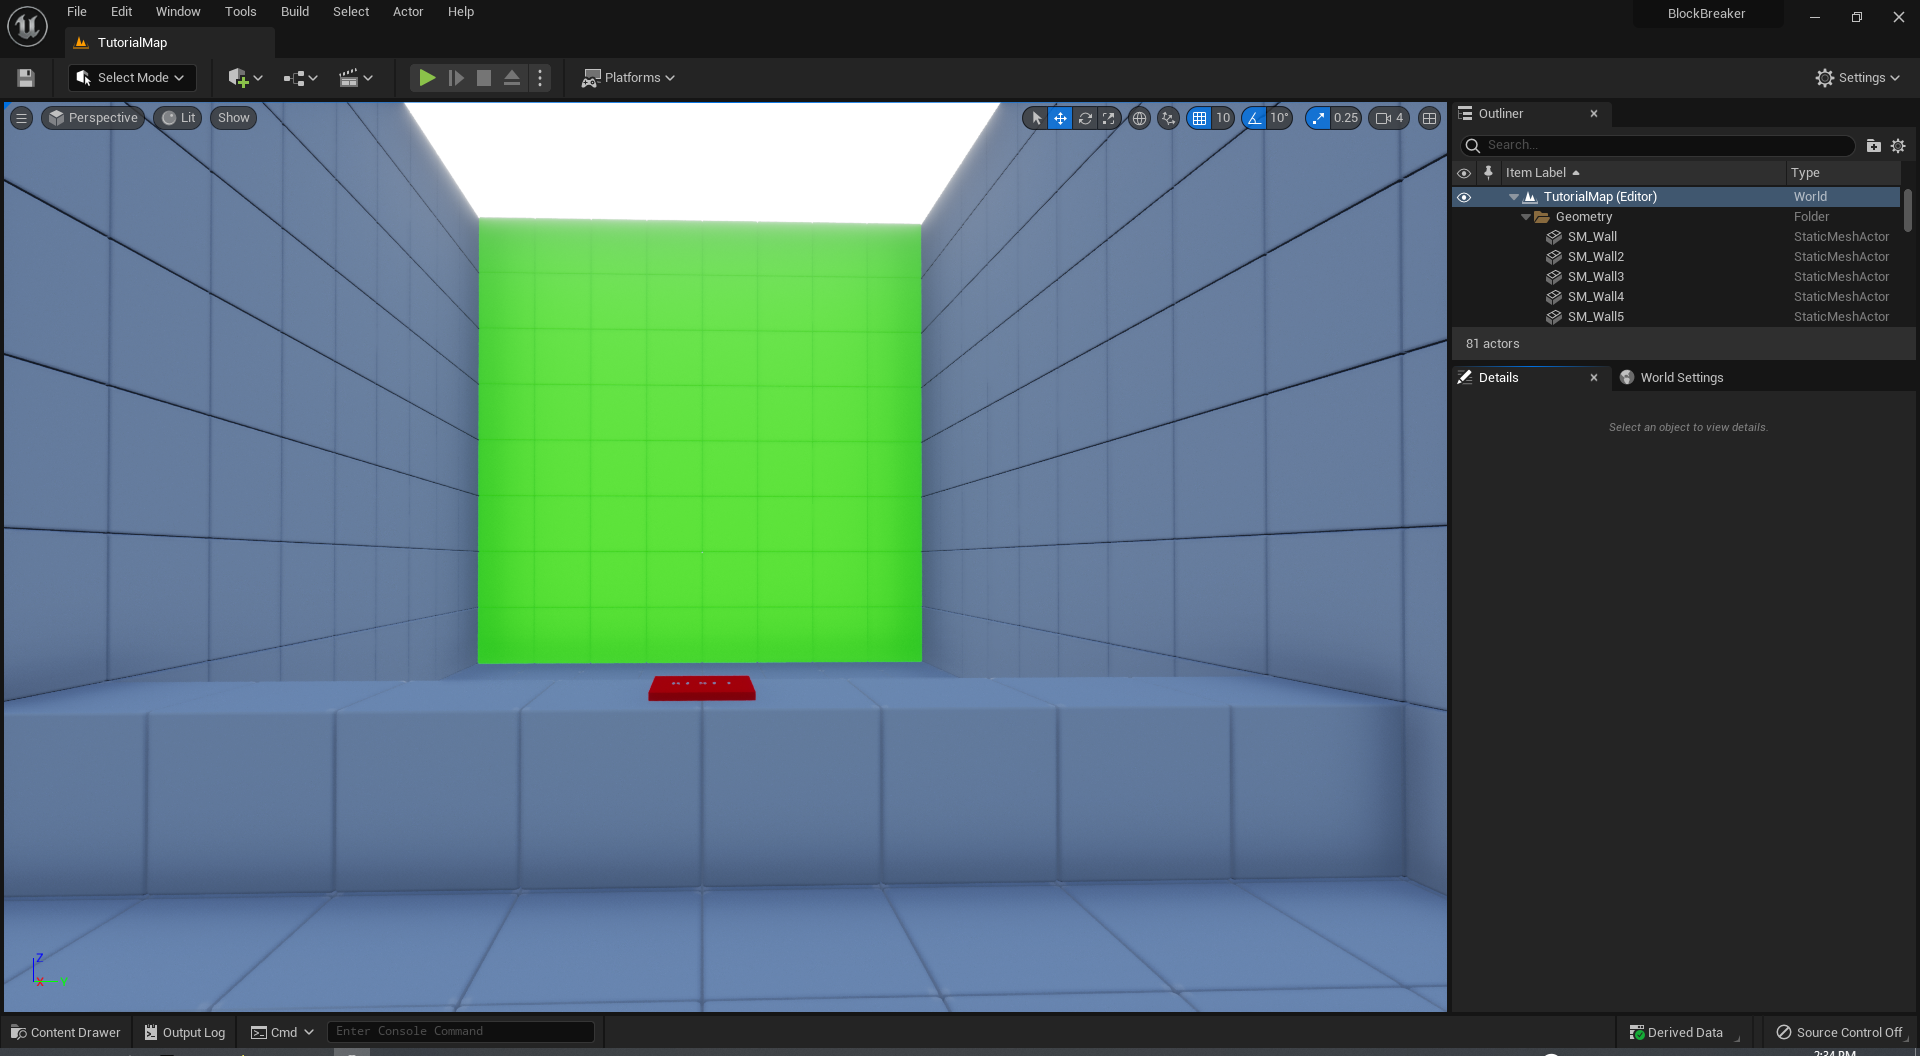
The green wall consists of multiple targets that turn red when they take damage. Once their health reaches zero, they disappear. The red button resets all the targets.
First, you’ll create the player’s Pawn.
Creating the Player Pawn
If you’re coming from UE4, you might’ve noticed that the folders panel seems to be missing. Despair not, as it’s hidden to allow an almost full-screen view of the project. To find the project folders, just click Content Drawer in the lower-left corner of the screen.
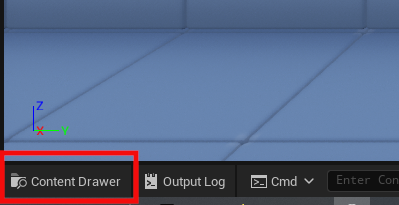
Now, you can see the navigation panel, complete with the folder structure and game assets. If you’d like to have it permanently open at the bottom of your screen, simply click Dock in Layout on the right of this panel.
Navigate to the Blueprints folder and right-click the panel background to create a new Blueprint Class. Select Character as the parent class and name it BP_Player.
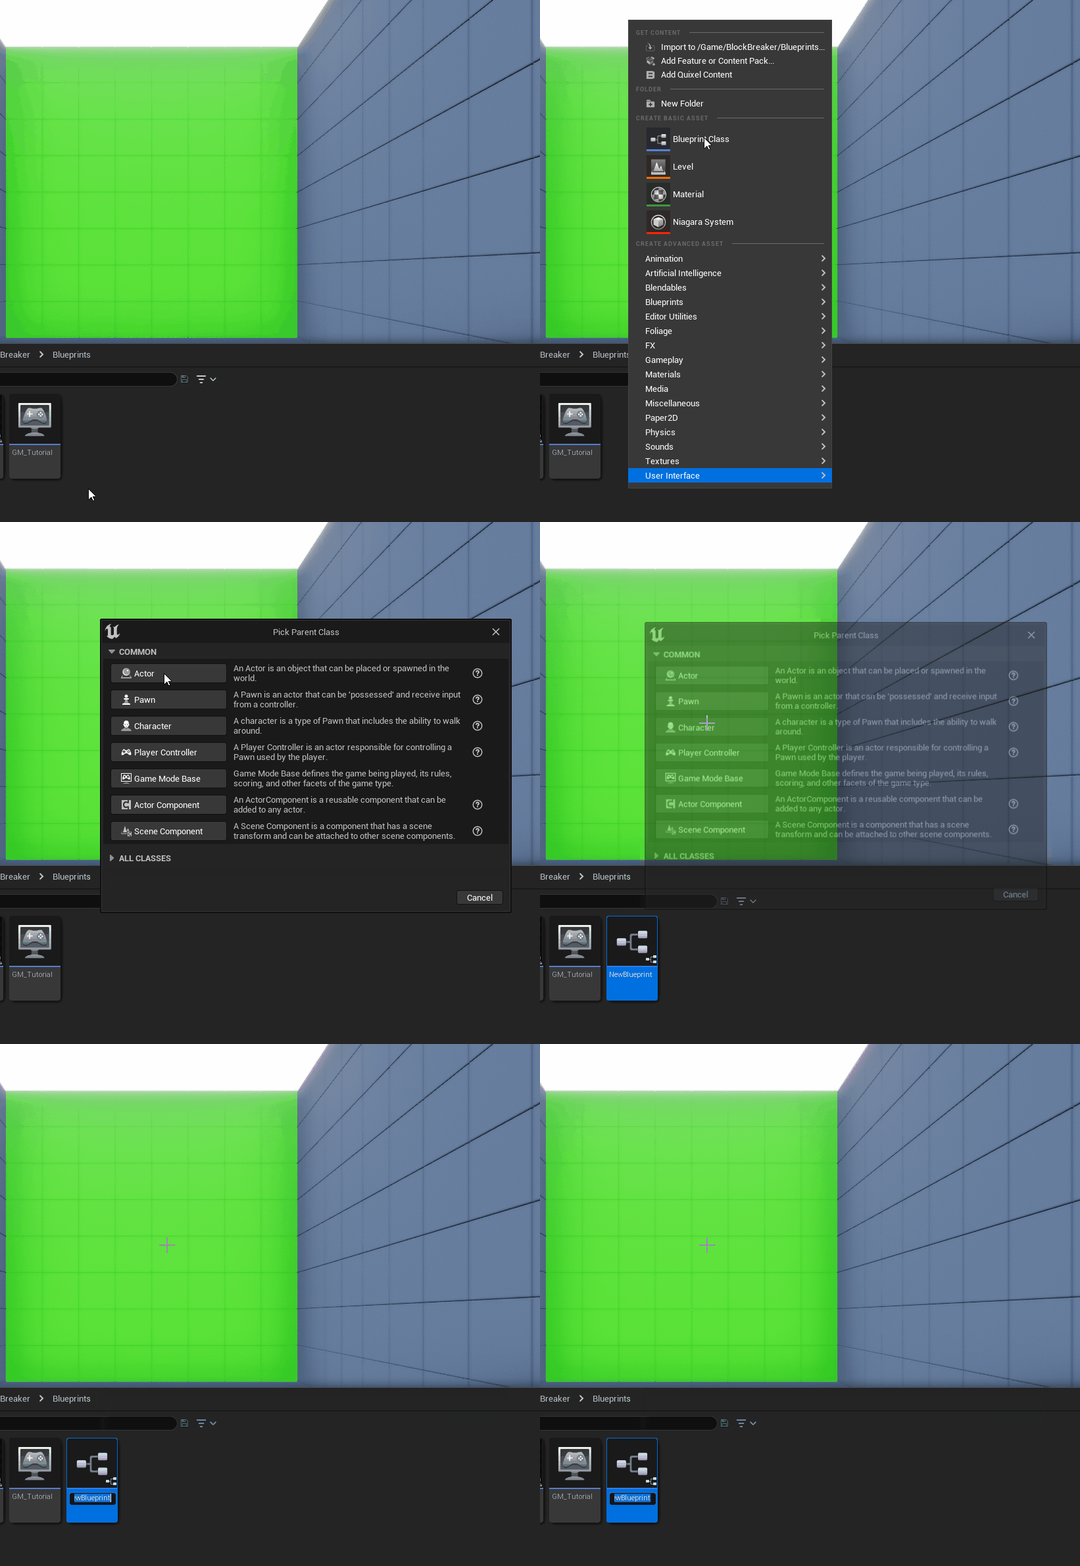
Character is a type of Pawn with additional functionalities, such as the CharacterMovement component that automatically handles movement like walking and jumping. You simply call the appropriate function, and it moves the Pawn. You can also set variables such as walk speed and jump velocity within this component.
Before you can make the Pawn move, it needs to know when the player presses a movement key. To do this, you’ll map movement to the W, A, S and D keys.
Creating Movement Mappings
With key mapping, you can alter an attribute of the player character — such as their position in the X-Y plane or the camera angle of the viewport — and apply it in the game world. This is how you manipulate character displacement and viewing angle.
Select Edit ▸ Project Settings and open the Input settings under the Engine section.
Add two Axis Mappings by clicking the + next to Axis Mappings twice. You may have to expand the Axis Mappings list by clicking the expand triangle in front of Axis Mappings that appears after you add the first mapping. Rename them MoveForward and MoveRight. MoveForward will handle moving forward and backward. MoveRight will handle moving left and right.

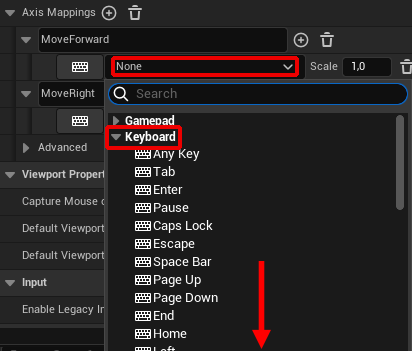
For MoveForward, change the key to W by first selecting the None dropdown list. Then, expand the Keyboard list, and finally, select the letter W right at the bottom of that list.
After that, create another key by clicking the + next to MoveForward, and set it to S. Change the Scale for S to -1.0.

Later, you’ll multiply the scale value with the Pawn’s forward vector. This will give you a vector that points forward if the scale is positive. If the scale is negative, the vector points backward. Using the resulting vector, you can make your Pawn move forward and backward.
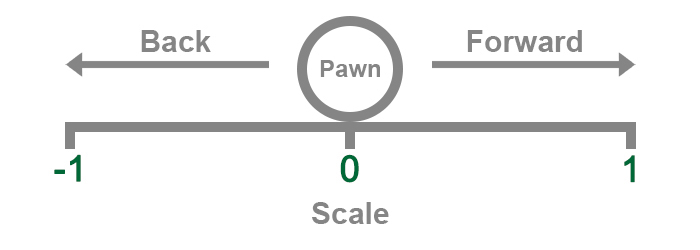
Next, you need to do the same for moving left and right. Change the key for MoveRight to D. After that, create a new key and set it to A. Change the Scale for A to -1.0.

Now that you have the mappings set up, you need to use them to move.
Implementing Movement
Double-click BP_Player to open it, and you’ll see the Viewport view. Navigate to the Event Graph using the tabs at the top of the window.

Right-click the view background to add a MoveForward event, the one listed under Axis Events. This event will execute every frame, even if you don’t press anything.
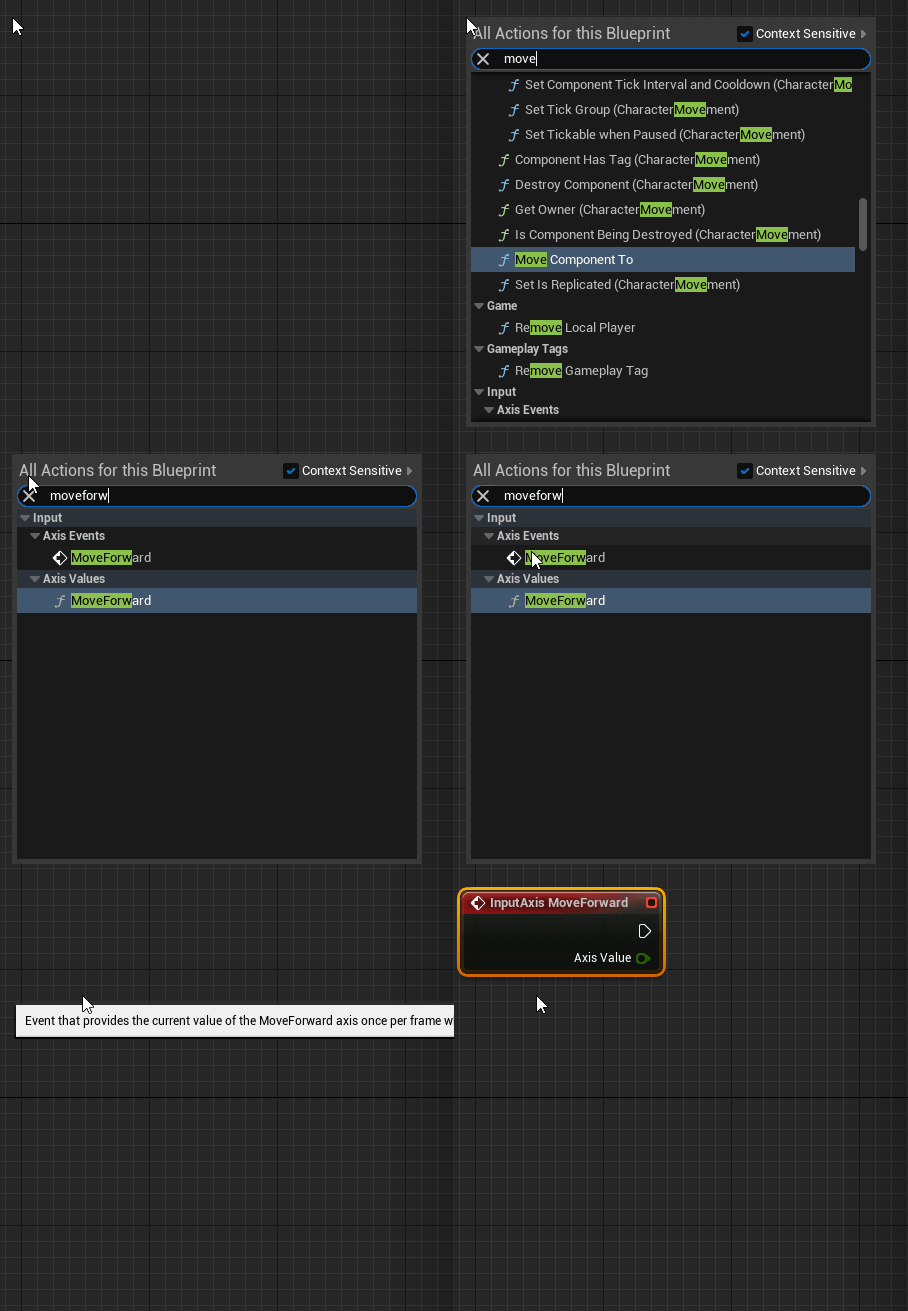
It also outputs an Axis Value, which is the Scale values you set earlier. It outputs 1 if you press W and -1 if you press S. If you don’t press either key, it outputs 0.

Next, you need to tell the Pawn to move. Add an Add Movement Input, and connect it like so:
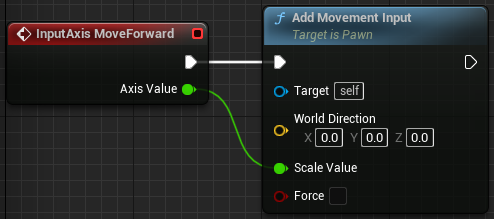
Add Movement Input takes a vector and multiplies it by Scale Value, converting it to the appropriate direction. Since you’re using Character, the CharacterMovement component will move the Pawn in the appropriate direction.
Now, you need to specify which direction to move. Since you want to move forward, use Get Actor Forward Vector to return a vector pointing forward. Create one and connect it like so:
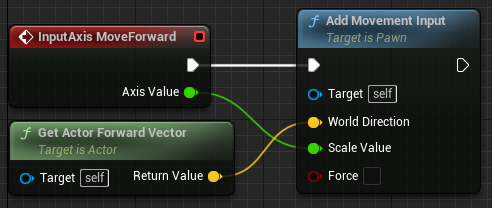
So, to summarize:
- MoveForward runs every frame and outputs an Axis Value. This value is 1 if you press W and -1 if you press S. If you don’t press either, it’s 0.
- Add Movement Input multiplies the Pawn’s forward vector with Scale Value. This causes the vector to point forward or backward, depending on which key you press. If you don’t press any key, the vector doesn’t have a direction, meaning the Pawn doesn’t move.
- The CharacterMovement component gets the result from Add Movement Input and moves the Pawn in the appropriate direction.
Repeat the process for MoveRight, but replace Get Actor Forward Vector with Get Actor Right Vector.
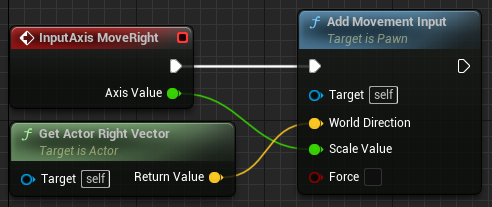
Before testing the movement, you need to set the default Pawn in the game mode.


