Gratuitous Animation
The following is an optional step if you have SpriteHelper and LevelHelper – feel free to skip if you don’t.
Our game is a little stupid at the moment because when you move it doesn’t look like you’re moving – it’s the same sprite frame no matter what.
Well, in LevelHelper you can easily define animations that you can then run in code. Let’s try it out!
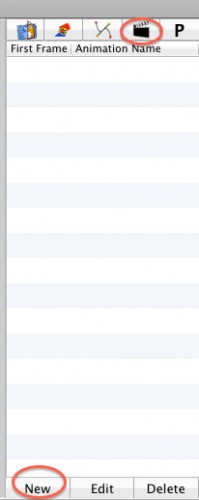
Open up TestLevel.plhs in LevelHelper, select the fourth tab in the sidebar to bring up the Animation Editor, and click the New button:

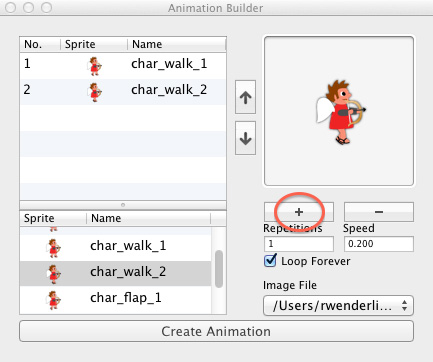
Select char_walk_1 and click the + button to bring it into the animation. Then repeat with char_walk_2. The dialog will show the animations running one after another. You can modify the speed if you want, but the default is actuallly OK for our game. Click Create Animation to finish.

Then double click inside the Animation Name area for the newly create animation and rename it to Walk.
Repeat this process to create an animation containing char_flap_1 and char_flap_2, and rename it to Flap.
Save your LevelHelper project, go back to Xcode, and add two new instance variables to ActionLayer.h:
double _lastGround;
int _numGroundContacts;
Then make the following changes to ActionLayer.mm:
// Replace updateHero with the following
- (void)updateHero:(ccTime)dt {
    if (_playerVelX != 0) {
        b2Vec2 b2Vel = _heroBody->GetLinearVelocity();
        b2Vel.x = _playerVelX / [LevelHelperLoader pixelsToMeterRatio];
        _heroBody->SetLinearVelocity(b2Vel);

        if (_numGroundContacts > 0 && CACurrentMediaTime() - _lastGround > 0.25) {
            _lastGround = CACurrentMediaTime();
            [[SimpleAudioEngine sharedEngine] playEffect:@"ground.wav"];
            if ([_hero numberOfRunningActions] == 0) {
                [_lhelper startAnimationWithUniqueName:@"Walk" onSprite:_hero];
            }
        }

    } else if (_playerVelX == 0 && _numGroundContacts > 0) {
        [_lhelper stopAnimationWithUniqueName:@"Walk" onSprite:_hero];
    }
}

// Add to end of beginContact
if ((spriteA == _hero && spriteB.tag == GROUND) ||
    (spriteB == _hero && spriteA.tag == GROUND)) {
    if (_numGroundContacts == 0) {
        [_lhelper stopAnimationWithUniqueName:@"Flap" onSprite:_hero];
    }
    _numGroundContacts++;
}

// Replace endContact with the following
- (void)endContact:(b2Contact *)contact {

    b2Fixture *fixtureA = contact->GetFixtureA();
    b2Fixture *fixtureB = contact->GetFixtureB();
    b2Body *bodyA = fixtureA->GetBody();
    b2Body *bodyB = fixtureB->GetBody();
    CCSprite *spriteA = (CCSprite *) bodyA->GetUserData();
    CCSprite *spriteB = (CCSprite *) bodyB->GetUserData();

    if ((spriteA == _hero && spriteB.tag == GROUND) ||
        (spriteB == _hero && spriteA.tag == GROUND)) {
        _numGroundContacts--;
    }
}

// Add inside ccTouchesBegan, at end of touch.tapCount > 1 if statement
[_lhelper startAnimationWithUniqueName:@"Flap" onSprite:_hero];
All we’re doing here is keeping track of how many contacts the hero has with the ground, playing the walk animation if the number of contacts is greater than 0, and the flap action if the user double taps.
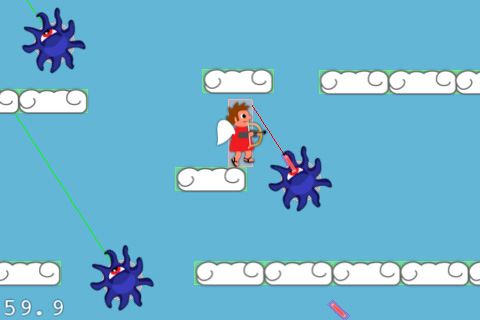
Compile and run, and now you can move in style!

Where To Go From Here?
Here is the sample project we developed in the above tutorial.
Now you have even more techniques to add to your Box2D arsensal! I look forward to seeing some cool physics games from you guys!
There will be one more tutorial using this sample code, to demonstrate adding a HUD layer to a game, per popular request.
If you have any questions or comments on these Box2D techniques or about this tutorial, please join the forum discussion below!


