How to Make an Interactive eBook Without Any Code
This is a post by Tutorial Team Member Greg Pugh, author of the Colin Turtle children’s eBook app series. You can also find him on Google+. When people hear that I have written two children’s book apps, a common response I get is “I have an idea for a children’s book, could you help me […] By .
Sign up/Sign in
With a free Kodeco account you can download source code, track your progress, bookmark, personalise your learner profile and more!
Create accountAlready a member of Kodeco? Sign in
Sign up/Sign in
With a free Kodeco account you can download source code, track your progress, bookmark, personalise your learner profile and more!
Create accountAlready a member of Kodeco? Sign in
Contents
How to Make an Interactive eBook Without Any Code
35 mins
- Getting Started
- Introducing Kwik 2
- Preparing the Project
- The Hills are Alive, with the Sound of… Audio Files :]
- Setting up ‘Shop
- Creating the eBook
- Physics in Action
- Read to Me!
- Adding Page Navigation
- The Third Time’s a Charm
- Lights, Camera, Action!
- He Talks as Much as my Wife!
- Finishing Touches
- Where To Go From Here?
The Third Time’s a Charm
Time to create page 3. In the Photoshop Kwik panel, go to Project and Pages > Add new page and name it “page3” and uncheck all of the checkboxes.
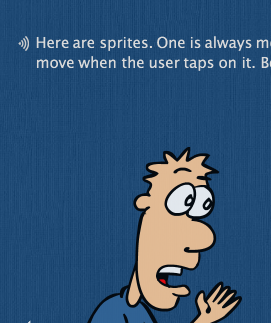
Copy and paste the “bg” layer from page2.psd into page3.psd and name the layer “bg”. Using the text tool, paste in this sentence: “Here are sprites. One is always moving, the other one will move when the user taps on it. Both play sound when tapped.”
Highlight all of the text, change the font to Arial and color to white. Rename the text layer “text.”
In the Kwik panel, just as you did for page 2, go to Project and Pages > Add Audio. Browse for “page3.wav” in the “sound” folder of your project, set it as the Read Me file, disable Play when page starts, Loop 1 time and use channel 1.
Select the “text” layer and in the Kwik panel, go to Layers and Replacements > Sync audio with text replacement. Use native system font, 10 pixel padding, Use page Read Me audio, import page3.txt from Audacity and change the text highlighting color to black.
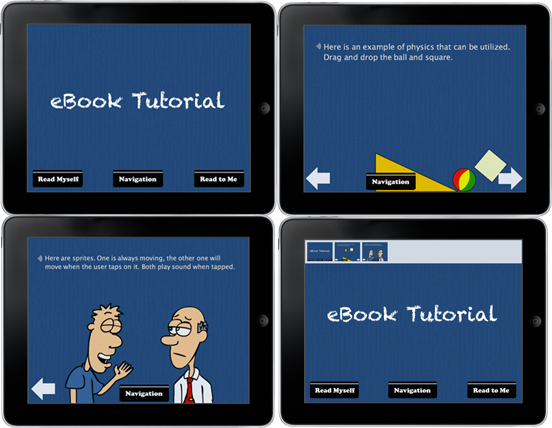
Publish your project and check it out! If you select “Read to Me”, page 2 and 3 should have their narration read aloud with text highlighting.
However, when you get to page 3 — you’re stuck! You need some way to navigate back through previous pages.
Switch back to Photoshop. Since this will be the last page of your book, you’ll only need an instance of “kwkBack”. Find that layer in page2.psd, right click it, and choose “Duplicate layer.” Select page3.psd as the destination, and click OK.
In page3.psd, select the “kwkBack” layer and in the Kwik panel go to Interactions > Add Button. Name it “backBtn” , choose “Go to Page” in the “Common” drop down menu, choose Move from left, 0 seconds, and Previous (auto). This should look very familiar to page 2.
You have narrated text with highlighting along with interactive elements in your eBook — but this book needs to be a little more…animated! :]
Lights, Camera, Action!
This section will show you how to create two different types of animations. One will animate in a loop and play a sound when the user taps on it. The other one will be static until the user taps on it; at that point it will animate and play a sound.
In Photoshop, open “bored00001.png” found in Documents > Kwik > eBook > eBook > images > Bored. Paste it into page3.psd and rename the layer “bored”. Do the same with “talker0001.png” from Documents > Kwik > eBook > eBook > images > Talker except name the layer “talker”.
Now import the sounds for each of your characters. In the Kwik panel, go to Project and Pages > Add Audio, then browse for “blah.wav” in the sound folder. Make it a short file, disable play when page starts and loop 1 time.
Save it, and perform the same steps with the same settings for “yawn.wav”. Just make sure all of your sounds use different channels — it doesn’t matter which sound is tied to which channel, as long as they’re all different.
Now get these guys moving and talking!
Select the “bored” layer, and in the Kwik panel, go to Layers and Replacements > Sprite sheet replacement. Browse for the bored.png and bored.lua files you created in TexturePacker in the “images” folder. The first text area should hold the .png, and the second text area should hold the .lua file.
Also set the start frame for 1, frame count at 6, loop 1 time, play for 1 second and pause at frame 1.
Turn the bored guy into a button by going to Interactions > Add Button in the Kwik panel. Name the button “boredBtn”, choose “Play Audio” from the Audio drop down menu and choose “yawn”. Then go to the Sprites drop down menu and choose “Play Sprite” and select “bored”. Now when you tap on the bored guy, he’ll animate and play a sound.
Publish now to try it out, and see how boring he is in action! :]
He Talks as Much as my Wife!
You’ll notice the talking guy isn’t doing anything though, so set him up in an infinite animation loop.
Select the “talker” layer and go to Layers and Replacements > Sprite sheet replacement. Browse for the talker.png and talker.lua files you created in TexturePacker in the “images” folder. Set the start frame for 1, frame count at 5, loop forever, play for 3 seconds and reverse after last frame.
Since the talker guy is already animated, you’ll just need to make him talk when he is tapped. Go to Interactions > Add Button in the Kwik panel. Name your button “talkBtn”, choose “Play Audio” from the Audio drop down menu and choose “blah”.
Publish and test your book! You’ll see one guy talking, and he plays a sound when tapped. When the other guy is tapped, he animates and plays a sound.
Finishing Touches
Okay! There’s only 2 more steps: adding a navigation button and optimizing your background images to reduce file size.
In Photoshop, open “nav.png” from the “images” folder and paste it into page1.psd. Rename the layer “kwkNav” and make it a button (Interactions > Add button). Name it “navBtn” and from the Common drop down menu, select Show/Hide Navigation. Add this button and follow those same steps on pages 2 and 3.
Publish and test your book — now you should have a working navigation menu that you can toggle with the Navigation button.
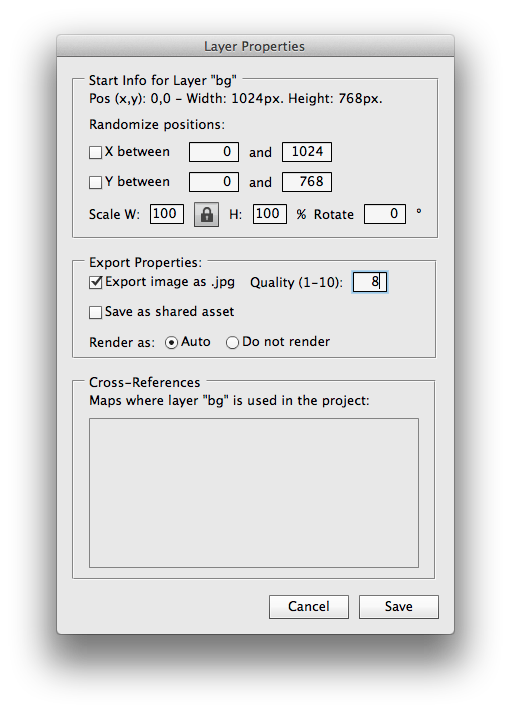
This final step is optional, but can drastically reduce your file size, especially if you develop a full-length book. In page1.psd, select the “bg” layer, go to Layers and Replacements > Layer Properties and choose Export image as .jpg. The default is 6, but even at 8 you’ll reduce the file size substantially without noticing notice a loss in quality. You can do this to every “bg” layer on all of the pages.


