The Phrase that Pays – Adding a Text View
Looks like you have everything you need in order to add a text view to your Mad Libs application! This text view will allow the user to enter a multi-word phrase that will be used in the final rendered Mad Lib.
To add the text view to your application, open MainMenu.xib and then select the Main Window. In the Object Library palette, locate the Label control and drag it onto the window just beneath the Plural Noun label (or duplicate an existing label, as mentioned earlier).
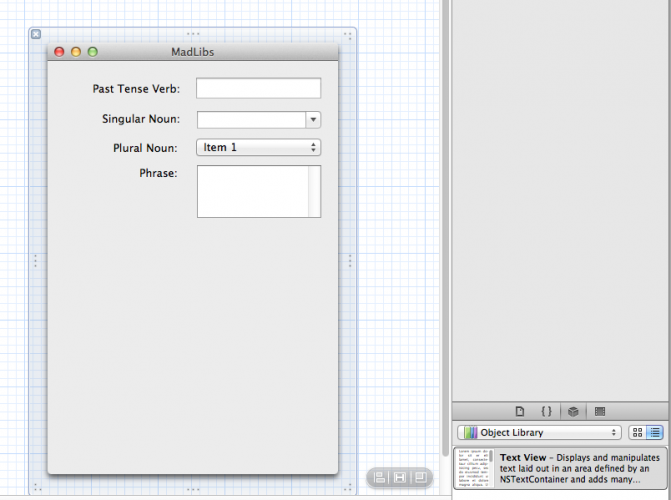
Again, double-click it to edit the default text, changing it to Phrase:. Next, locate the Text View control and drag it onto the window, placing it beside the the label you just created.
Your window should now look like this:

Now you need to add an NSTextView property to the view controller. Again, the same familiar technique is similar to before, but there’s a twist.
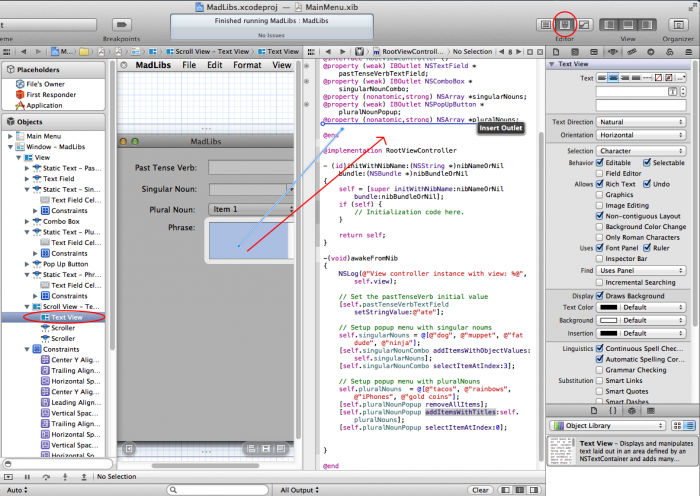
Important: Since text views are contained inside scroll views, it’s important you make sure you’ve actually selected the text view before creating the property. To do so, simply click twice on the text view (or select it from the Object navigator from the left). You can check the text view has been selected by inspecting the Type in the popup window.
Once you’re sure you have the text view selected, as before select the assistant editor, make sure RootViewController.m is selected, and Ctrl-Drag the text view to the RootViewController.m. The result is shown below:

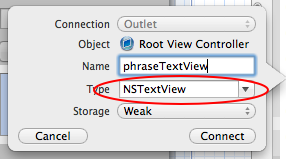
In the popup window, name the property phraseTextView, as shown here:

Now that the NSTextView property is connected to the text view control, you can set a default text phrase in the control to again give the user an idea of what to enter here.
Add the following code to the end of awakeFromNib:
// Setup the default text to display in the text view
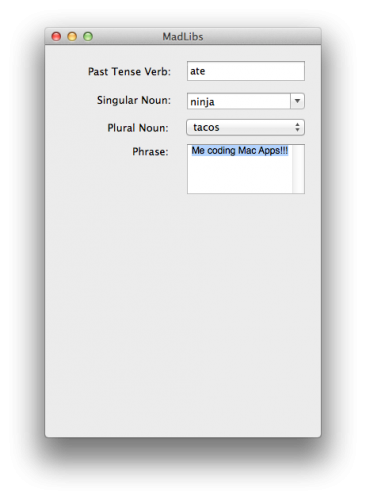
[self.phraseTextView setString:@"Me coding Mac Apps!!!"];
Build and run the application to see the result! :]

Superb! The Mad Libs application is really starting to take shape now! :]
Next Steps — Where to Go From Here?
Here’s the example project containing all the source code from this first part of the series.
In the second part of this tutorial, you’ll learn about more of the core controls in OS X, including sliders, date pickers, push buttons, radio buttons, check boxes and image views — each of which will be added to your Mad Libs application in order to complete it!
In the meantime, if you have any questions or comments about what you’ve done so far, be sure to let me know in the forums!


