How To Build a Monkey Jump Game Using Cocos2d 2.X, PhysicsEditor & TexturePacker – Part 1
Learn how to make a fun 2D physics game called Monkey Jump in this 3-part tutorial series covering Physics Editor, Texture Packer, and Cocos2D. By .
Sign up/Sign in
With a free Kodeco account you can download source code, track your progress, bookmark, personalise your learner profile and more!
Create accountAlready a member of Kodeco? Sign in
Sign up/Sign in
With a free Kodeco account you can download source code, track your progress, bookmark, personalise your learner profile and more!
Create accountAlready a member of Kodeco? Sign in
Contents
How To Build a Monkey Jump Game Using Cocos2d 2.X, PhysicsEditor & TexturePacker – Part 1
65 mins
- Designing the game
- Handling iPhone 5
- Getting Started
- Creating Sprite Sheets
- Creating the Background Sprite Sheet
- Creating the Jungle Sprite Sheet
- Creating the Frame Spritesheet for iPhone5
- Creating Physics Shapes Manually
- A Little Magic: Creating Shapes with the Tracer
- Last But Not Least: the Monkey
- The Xcode Project: Overview
- Basic Setup in Xcode
- Dropping Objects
- Where to Go From Here?
Update 6/26/2013: Updated for Cocos2D 2.X and latest version of Texture Packer and Physics Editor.
In this tutorial, you’ll learn how to make a game about a monkey having a rough day. He’s just minding his own business, but these crazy objects keep falling from the sky!
To see what I mean, check out this cool video:
By the end of this tutorial, you’ll have created a cool physics-enabled game, and learned how using TexturePacker and PhysicsEditor can save you a ton of development time.
To go through this tutorial, you should have some basic familiarity with Cocos2d. If you are new to Cocos2d, check out some of the other tutorials on this site first.
You will also need a copy of TexturePacker and PhysicsEditor. To go through this tutorial you can use an evaluation version from TexturePacker and PhysicsEditor. The trial versions work well with the tutorial.
Ready to make that monkey jump? Keep reading to get started!
Designing the game
Before diving into code, it’s best to think about the design of the game first. Let me give you a brief overview of how the game will work.
As you’ve seen, your main character will be a monkey. You’ll control his movement with the accelerometer – that is, by tilting the iPhone or iPad left and right. The monkey will jump when the screen is tapped.

During the game, items will drop from the top of the screen, and the dropping frequency will increase the longer the game continues. You will have a drop indicator to show the player where the next item will fall. Items will pile up, and the monkey must stay on top to stay alive.
There will be two sorts of items: those that hurt the monkey, and those that heal him – namely, bananas! The monkey’s health will be displayed in the top-left corner as a bar of bananas.
The score will be displayed in the top-right corner, and will be at the height of the highest item on the stack.
Handling iPhone 5
When this tutorial was first written, iPhone 5 was not available yet, so the tutorial only had to support a single aspect ratio (3:2, or 960×640 pixels on retina devices).
With iPhone 5 you have a new wider aspect ration to deal with (16:9). It has a resolution of 1136×640 pixels – which means that you have to fill an additional 176 pixels in the width.
If you were to use the artwork from the original tutorial without any changes, you would have a black bar on the right side of the screen – which is obviously ugly.
One way to deal with the problem is to scale the scene to fit the width.
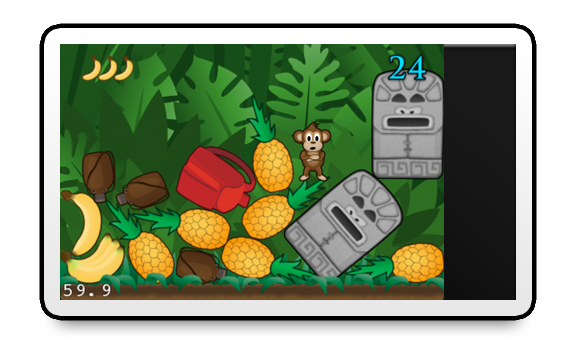
If you were to use the artwork from the original tutorial without any changes, you would have a black bar on the right side of the screen – which is obviously ugly.
One way to deal with the problem is to scale the scene to fit the width.
Scaling up from iPhone 4 with 960×640 results in a virtual screen size of 1136×757 pixels – which is 117 pixels that are not visible on iPhone 5. This is a good solution in many cases.
But it would change the gameplay for MonkeyJump – making it harder for iPhone 5 players since they have less space on the screen.
That’s not fair!
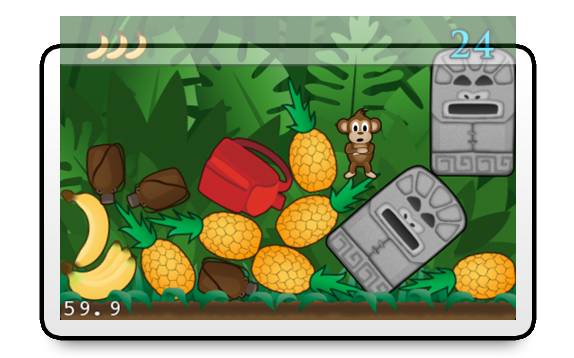
In this tutorial, you are going to do a mixture of both. You’ll use the same sprites and playfield size as on iPhone 4 – but you will scale the background to fit and center the playfield.
The result already looks promising, but not perfect. The objects would pile up near an invisible border. That might be nice for a science fiction game with force fields, but not for the jungle setting.
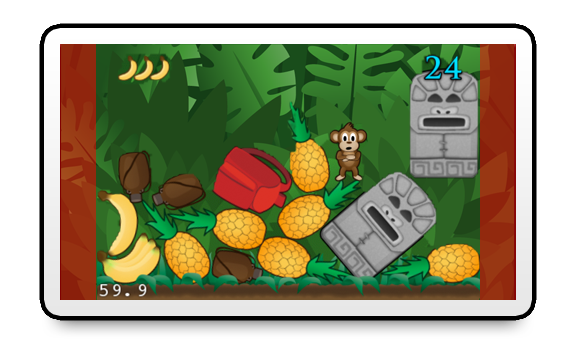
To fix the issue, you’ll add some leaves as a border on each side. They’ll be in the foreground – occluding a bit of the game field – building the barrier to the left and right.
You’ll make them scroll slower when the monkey jumps up. This adds some additional depth to the game and gives a nice visual effect.
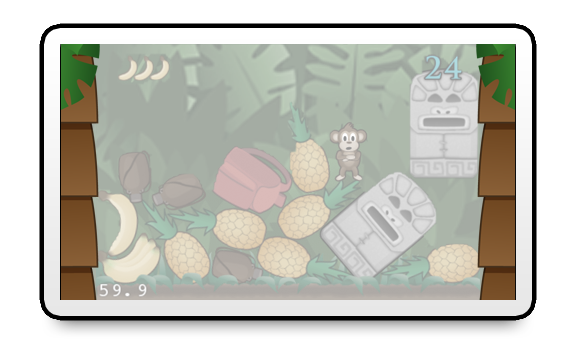
This is how the final game screen will look on iPhone 5. You are going to add the additional space only to iPhone 5 – the “old” devices are left without additional borders.
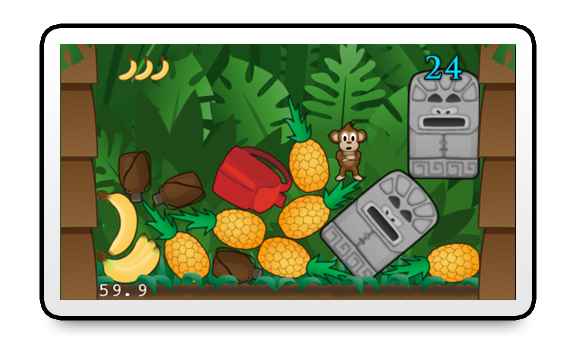
This is how the final game screen will look on iPhone 5. You are going to add the additional space only to iPhone 5 – the “old” devices are left without additional borders.
Getting Started
To get started, download the tutorial source code and unzip it into your preferred location. Your starting point will be 0-BaseProject, which contains the basic Cocos2d setup and some integrated assets.
I’ve added directories for several stages of the development process containing the results you should achieve. These directories will make your life easier in case you get lost, or if you simply want to skip one part of the project.
Each folder contains the complete project and is independent from the rest. Inside each folder are two more folders:
The first is called Assets, and contains such things as the TexturePacker and PhysicsEditor save files, a directory holding the Xcode project, and a free game art pack created by Vicki Wenderlich.
The Assets folder is organized further into the subfolders background, containing the background graphics, and jungle, containing the foreground objects and animation.
The second folder is called MonkeyJump. It contains the Xcode project and the sources, which are contained in a second MonkeyJump folder which has the following subfolders:
- libs: Cocos2d, Box2d, Cocos Denshion… all the Cocos2d stuff
- GBox2D: my ObjectiveC++ Box2d wrapper
- Resources: sounds and music