Localizing Your Icon
There’s one last little bit of localization for you to do to make your app look totally professional: the name of the app as it appears under the icon on the home screen.
Using the skills you’ve already learned, add a new strings file to your project and name it InfoPlist.strings. This is another “magic” name that iOS looks for. For more information, check out the Information Property List Key Reference.
Add the following to InfoPlist.strings:
CFBundleDisplayName = "iLikeIt";
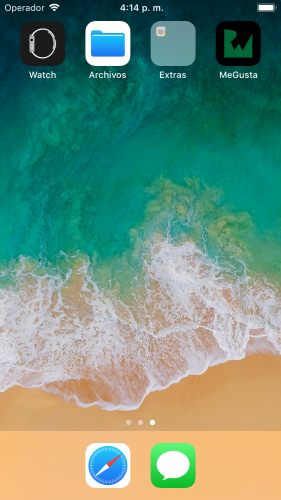
Now localize the file as English and add Spanish and Polish localizations. Change the value of the display name in InfoPlist.strings (Spanish) to MeGusta. In InfoPlist.strings (Polish), make it LubięTo.
Build and run; exit the app and check the home screen. You’ll see it’s still called iLikeIt. Unfortunately, the only way to test this localization is to change the language setting in the simulator itself.
On the simulator, open the Settings app. Navigate to General > Language & Region > iPhone Language to select a new language. Choose either Spanish or Polish and tap Done. Accept the language change and wait while the simulator reboots. Go back to the home screen and check your app now!

Helpfully, the Settings app will have English as the second choice on the screen when you’re ready to return the setting to English.
Where to Go From Here?
You can download the completed project for this tutorial here.
To learn more about internationalization, check out:
Both videos explain more about stringsdict files and the use of size rules as well as plural rules. To save you from endless and fruitless searching in the documentation, the “magic” numbers in size rules are the “M” width of a display — the number of uppercase Ms that fit on a single line.
I hope you enjoyed this tutorial. If you have any questions or comments, please join the forum discussion below!
