Android Accessibility Tutorial: Getting Started
In this Android accessibility tutorial, learn how to make apps that everyone can use, including people with vision, motor, or hearing disabilities. By Victoria Gonda.
Sign up/Sign in
With a free Kodeco account you can download source code, track your progress, bookmark, personalise your learner profile and more!
Create accountAlready a member of Kodeco? Sign in
Sign up/Sign in
With a free Kodeco account you can download source code, track your progress, bookmark, personalise your learner profile and more!
Create accountAlready a member of Kodeco? Sign in
Contents
Android Accessibility Tutorial: Getting Started
25 mins
Most people will have at least a short term disability at some time that makes it difficult to use their mobile device. This includes someone who was born blind, or lost fine motor skills in an accident. This also includes someone who can’t use their hands because they are carrying a wiggly child. You may have experienced difficulties using your phone while wearing gloves when it’s cold outside. Maybe you’ve had a hard time distinguishing items on the screen when it’s bright outside.
With so much of the population experiencing decreased vision, hearing, mobility, and cognitive function, you should do your best to give everyone the best experience in your apps that you can. It’s a small way you can make people’s lives better.
In this tutorial, you are going to learn ways you can make your Android app more accessible by updating a coffee tracking app. There are many things that help, and by the end of this tutorial you will know the most basic ways you can improve your app for accessibility. You will learn:
- What accessibility tools people are using to navigate your app
- How to discover existing accessibility issues, and prevent accessibility regression
- Android attributes you can use to make your app more accessible
- Design guidelines to allow your user to use your app with ease
This tutorial assumes you have basic knowledge of Kotlin and Android. If you’re new to Android, check out our Android tutorials. If you know Android, but are unfamiliar with Kotlin, take a look at Kotlin For Android: An Introduction.
Getting Started
The app you will be improving allows you to set the number of cups of coffee you want to limit yourself to, and keeps track of where you are within that limit. There is an EditText field to enter the number of cups you want to limit consumption to. There is also a button to add cups of coffee that have been consumed. To show how much of the limit has been consumed, there is a coffee cup that fills up as more cups are consumed, reaching full when the limit is reached.
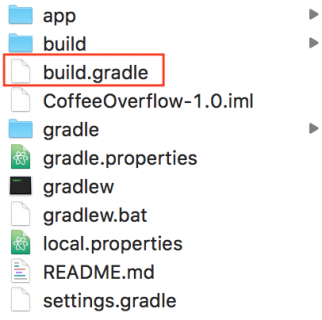
Start by downloading the starter project. Then open the project in Android Studio 3.0.1 or greater by going to File/New/Import Project, and selecting the build.gradle file in the root of the project.


Once it finishes loading and building, you will be able to run the application on a device or emulator. Try setting a new limit, and adding cups of coffee to see how the app works.
The two main files you will be working with for this tutorial are MainActivity.kt and activity_main.xml. Here’s a quick summary of all the files you’ll see in this tutorial.
- MainActivity.kt contains the view code for the main screen. It listens for events from the user updating the limit and how many cups of coffee have been consumed, and updates the view accordingly.
- activity_main.xml is the layout for the main screen. In it you’ll see all the components that make up the view.
- strings.xml holds all the strings you define that are user visible or audible.
- styles.xml contains the app wide styles of the app.
- CoffeeRepository.kt keeps track of how much coffee has been consumed. You won’t need to change anything in it, just know this is what it is used for.
Now that you have the app up and running, and have a basic understanding of how it works, you can look for accessibility shortcomings, and make changes to fix them.
Enabling accessibility tools
There are many tools that people use to interact with their Android devices. This includes TalkBack, Magnification, and Switch Access, to name a few.
TalkBack allows you to explore the view using gestures, while also audibly describing what’s on the screen. Magnification allows you to zoom in on parts of the screen. Both TalkBack and Magnification are helpful for people with limited visibility. People with limited mobility can use Switch Access to allow them to navigate without using the touch screen. You can find all the accessibility features in Settings/Accessibility on your device.
This tutorial is going to look mainly at TalkBack, as it incorporates both screen traversal for navigation and screen reading to understand what is in focus. You can enable all the accessibility tools the same way as you will turn on TalkBack in this tutorial.
By using TalkBack, a user can use gestures, such as swiping left to right, on the screen to traverse the items shown on the screen. As each item is in focus, there is an audible description given. This is useful for people with vision impairments that cannot see the screen well enough to understand what is there, or select what they need to.
Note: TalkBack is only available on physical devices running Lollipop or higher, and cannot be accessed on an emulator.
Note: TalkBack is only available on physical devices running Lollipop or higher, and cannot be accessed on an emulator.
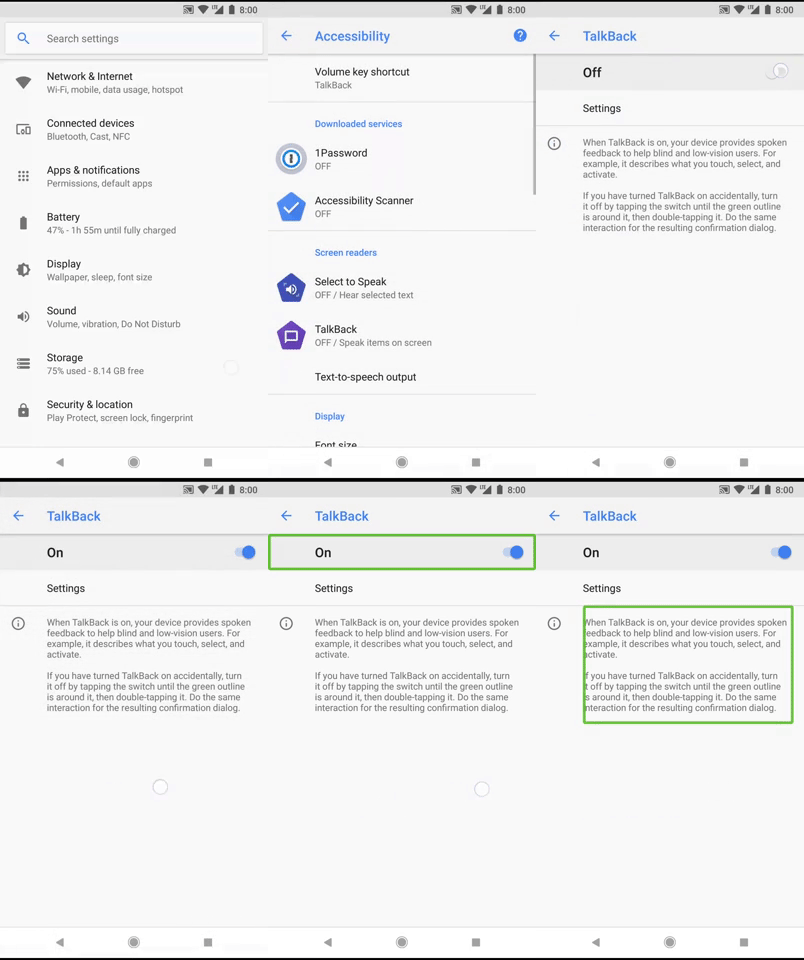
To turn on TalkBack, go to Settings on your Android device. Then find Accessibility/TalkBack, and toggle the tool on.
With the default settings, in a left to right language, swipe right to advance to the next item on the screen, left to go to the previous, and double tap to select. In a right to left language, the swipe directions are reversed.
With these gestures you can start exploring the application using TalkBack. Try closing your eyes while using it to see if you can understand what you’re “looking” at. Don’t be shy to try out the other accessibility tools too. By trying these out you are able to spot things that are hard to access or understand by those that are impaired.
Testing Tools
While using TalkBack and other accessibility tools is helpful for finding accessibility shortcomings, there are a couple other testing tools provided for developers to help identify accessibility issues.
Lint
The simplest of these is the linter that Google provides. This is enabled by default in Android Studio, and will warn you of accessibility issues such as missing contentDescription (Later in this tutorial you’ll learn why using contentDescription in important).


