How To Make a Letter / Word Game with UIKit and Swift: Part 3/3
This third and final part of the series will be the most fun of them all! In this part, you’re going to be adding a lot of cool and fun features By Caroline Begbie.
What’s On the Menu
The gameplay is complete, but the player can only play Level 1, and can’t choose to solve more difficult anagrams. So your final task for this tutorial is to add a game menu.
Add the following methods to the ViewController class in ViewController.swift:
func showLevelMenu() {
  //1 show the level selector menu
  let alertController = UIAlertController(title: "Choose Difficulty Level",
                                          message: nil,
                                    preferredStyle:UIAlertControllerStyle.Alert)

  //2 set up the menu actions
  let easy = UIAlertAction(title: "Easy-peasy", style:.Default,
                    handler: {(alert:UIAlertAction!) in
                            self.showLevel(1)
                    })
  let hard = UIAlertAction(title: "Challenge accepted", style:.Default,
                    handler: {(alert:UIAlertAction!) in
                            self.showLevel(2)
                    })
  let hardest = UIAlertAction(title: "I'm totally hard-core", style: .Default,
                    handler: {(alert:UIAlertAction!) in
                            self.showLevel(3)
                    })

  //3 add the menu actions to the menu
  alertController.addAction(easy)
  alertController.addAction(hard)
  alertController.addAction(hardest)

  //4 show the UIAlertController
  self.presentViewController(alertController, animated: true, completion: nil)
}

//5 show the appropriate level selected by the player
func showLevel(levelNumber:Int) {
  controller.level = Level(levelNumber: levelNumber)
  controller.dealRandomAnagram()
}
Here’s what’s going on:
- You create a UIAlertController with a title.
- Set up a UIAlertAction for each difficulty level with a title, and also define what happens when the player taps the option.
- Add the actions to the UIAlertController.
- Show the UIAlertController.
- When the player selects a level, the action handler calls showLevel. In this method, you create a new
Levelinstance for the selected level, assign it to the game controller and calldealRandomAnagram()on the game controller.
You would like to show the game menu as soon as the game appears on the screen, so add the following implementation of viewDidAppear to ViewController.swift:
//show the game menu on app start
override func viewDidAppear(animated: Bool) {
  super.viewDidAppear(animated)
  self.showLevelMenu()
}
This calls showLevelMenu() to display the menu to the player.
Woop, woop!
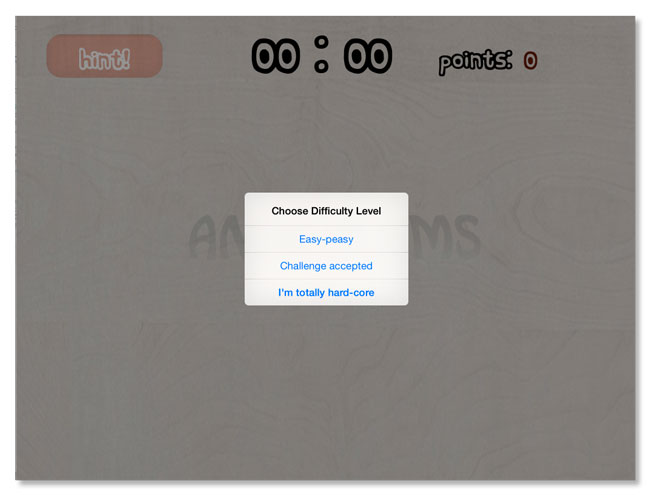
Build and run the project. You’ll see that you have things a bit mixed up – the game appears with an anagram already loaded, while the player still sees the menu:

To make matters worse, if you choose an item from the menu, it displays it on top of the existing anagram!

To fix the first problem, scroll inside ViewController.swift, find these two lines inside viewDidLoad() and delete them:
controller.level = level1
controller.dealRandomAnagram()
In the same method, but a bit above, also delete this line:
let level1 = Level(levelNumber: 1)
These were all test code chunks that you no longer need.
Build and run again. Now the player sees the menu first, and when they choose the difficulty level the game starts. Nice!
But now, when the game is over the player cannot go back to the menu screen!
You could make the ViewController be a delegate of GameController, so that when the game is over GameController could send a message straight to ViewController. That would be overkill for this situation, however. And since you want to know tricks for flexible game design with UIKit, why don’t you add a closure to show the game menu that gets executed upon game completion.
Open up GameController.swift and add the following to the list of properties:
var onAnagramSolved:( () -> ())!
This is how you declare a closure that does not take arguments or return a result. The idea here is that GameController will call this closure when the player solves an anagram. It’ll be up to ViewController to fill in this property with some code to show the game menu.
Add the following helper method to the GameController class that you’ll call between levels:
//clear the tiles and targets
func clearBoard() {
  tiles.removeAll(keepCapacity: false)
  targets.removeAll(keepCapacity: false)

  for view in gameView.subviews  {
    view.removeFromSuperview()
  }
}
The method removes all tiles and targets from the controller and the view. You’ll use this to fix the problem you saw earlier, where new anagrams are displayed on top of old ones.
Inside checkForSuccess(), find the line stars.removeFromSuperview(). This is when the final win animation ends. Just below that line, but still inside the block where it is located, add:
//when animation is finished, show menu
self.clearBoard()
self.onAnagramSolved()
Here you call clearBoard() to clean up between levels, and then you call the closure stored in onAnagramSolved.
And finally, add the end-game code closure! Switch for the last time to ViewController.swift and at the end of viewDidLoad(), add:
controller.onAnagramSolved = self.showLevelMenu
Very simple and elegant! You just set the game controller onAnagramSolved closure to call showLevelMenu().
Build and run one last time:
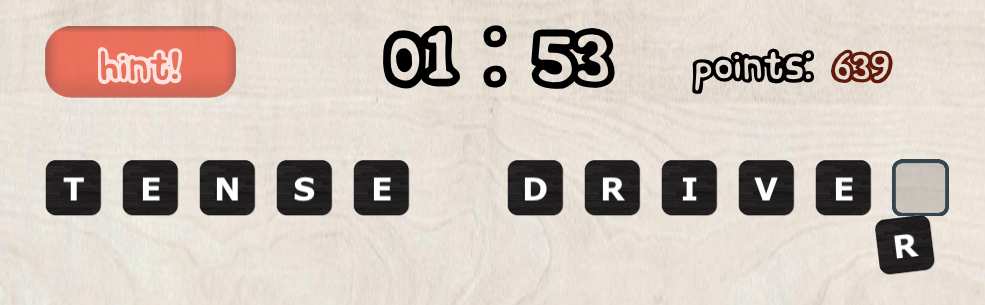
Congratulations, you have made a complete and polished letter / word game with UIKit!
Where to Go from Here?
Here is a link to the final source code for the tutorial.
You made it! It was a long tutorial, but you learned a ton of cool stuff, from particle effects to game logic to timers. And maybe even improved your vocabulary and anagram skill? ;]
The game is complete, but there are all sorts of ways you could expand it. Here are some ideas off the top of my head:
- Think about how to make this game (or your own) multi-player via Game Center.
- You could also simply implement leaderboards via Game Center.
- Add more explosions, more levels and more anagrams.
- Implement local high score tracking for different players. You could load and save scores from a plist or JSON file.
That’s all for today. Thanks for sticking with this tutorial, and do leave a comment in the forums below!