Deploying to Vapor Cloud 2 Tutorial
Learn how to deploy your Vapor app to Vapor Cloud 2, and take advantage of the free database tier in the new version of their cloud service! By Joe Howard.
Creating a New Vapor Cloud Application
Select Applications in the Vapor Cloud menu and click the + button in the upper right:
New Vapor Cloud Application

New Vapor Cloud Application
Choose a Generated name, to let Vapor Cloud generate an app name and app-slug for your application. Choose Dev Free for the Plan, and choose the only available Region for your server.
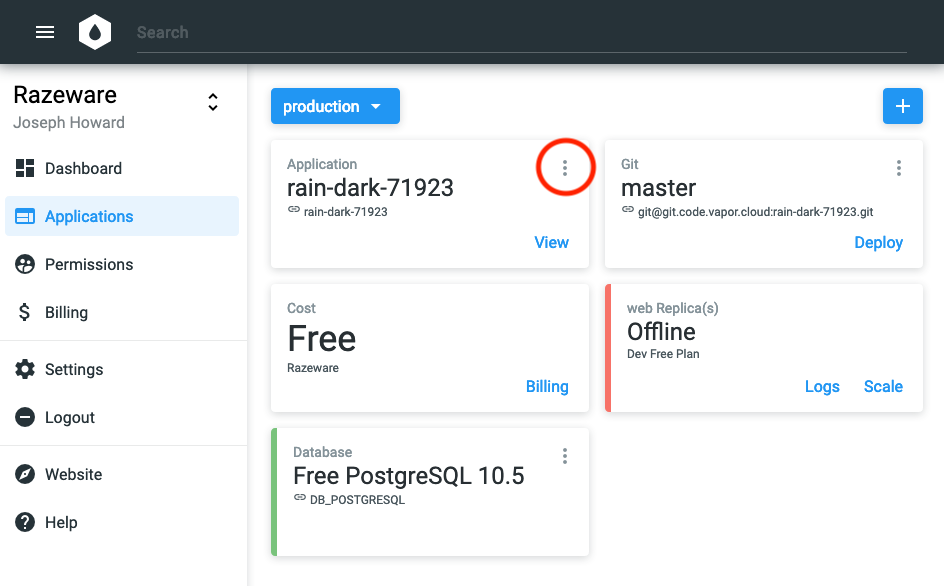
Click Create, and the Applications screen will display your new cloud application:
Vapor Cloud app with app-slug

Vapor Cloud app with app-slug
In this case, the app-slug is rain-dark-71923. Store this value in creds.txt, and use this value whenever this tutorial specifies YOUR_APP_SLUG.
Setting Up Your Database
Version 2 of Vapor Cloud provides a free database tier for your cloud apps. The Vapor TIL app uses PostgreSQL for persistence, so you’ll add support for it to your cloud app now.
Click the + button in the upper right to open the New Service menu, and choose Database.
New Service: Database

New Service: Database
Then set up your database as follows:
Set up database

Set up database
Set Plan to Dev free: This opens the Engine field. Choose PostgreSQL 10.5 for the database engine, set the Region, then click Create.
New database added
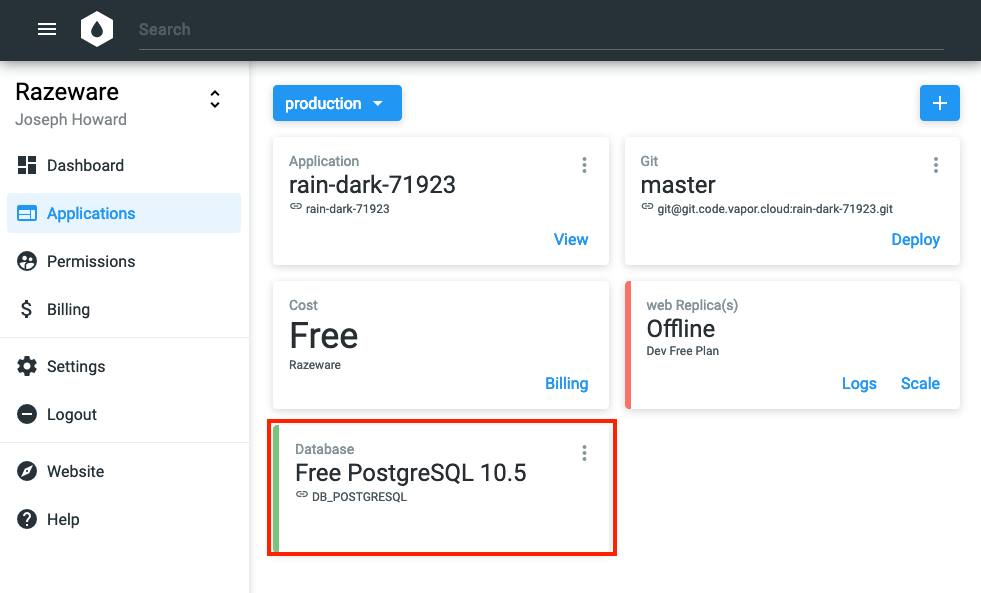
New database added
You’ll see the new database instance running as part of your cloud app.
Note: This tutorial uses the default production environment for your new cloud application, but the Environment item under the + button menu lets you add more environments that you might need for other purposes, such as staging.
Note: This tutorial uses the default production environment for your new cloud application, but the Environment item under the + button menu lets you add more environments that you might need for other purposes, such as staging.
Setting Up Vapor’s Git Server
Next, you need to set up Vapor’s private Git server as a remote for your project. Click the highlighted More button on the Git card, then click Setup Instructions:
Git card menu

Git card menu
You’ll see two variations of the instructions:

Use the Existing Project instructions to set up Vapor Cloud as a new remote for your project:
git remote add cloud git@git.code.vapor.cloud:YOUR_APP_SLUG.git
git push cloud master
The Vapor TIL app uses Google and GitHub for authentication, and also uses SendGrid for sending registration emails. Third-party services like these typically provide security keys to use for your app, and it’s a best practice to not include such keys in your app’s source code, but instead provide them as environment variables on your server instance. So, you need to configure the environment variables in Vapor Cloud for use with your app.
Configuring OAuth Credentials
First, you’ll get a SendGrid API key. In the rest of this section, you’ll see how to determine the environment variables for Google and GitHub authentication. You’ll then configure all these environment variables for your cloud app.
Getting Your SendGrid API Key
In your browser, open SendGrid, sign up for a Free account, then click the link in the verification email.
Click Start for the Integrate using our Web API or SMTP relay option:

Then Choose Web API:

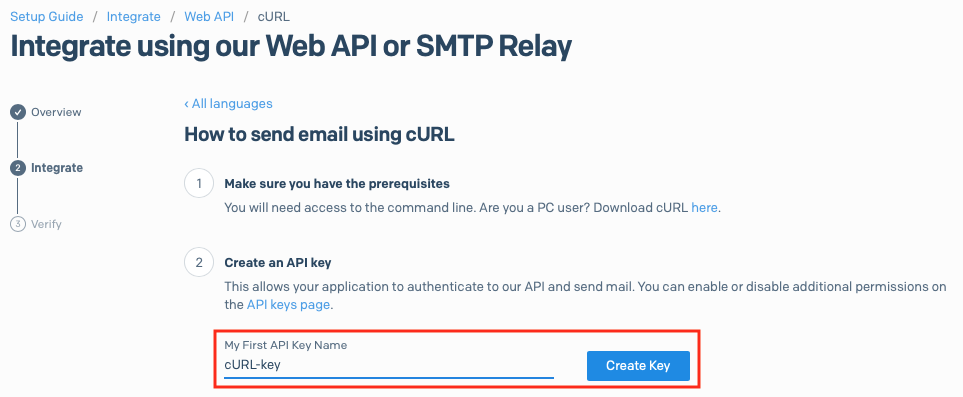
On the next page, it doesn’t matter which language you choose. I chose cURL, because, well, cURL.

Finally, enter a name for your API key, and click Create Key. Store this key in creds.txt.
Setting Up Google OAuth
To use Google OAuth in your application, you must first register the application with Google. In your browser, open Google APIs Credentials.
If this is the first time you’ve used Google’s credentials, the site will prompt you to create a project:
Google Credentials: Create Project

Google Credentials: Create Project
Note: You might have to widen your browser window to see the Create button, as the button hovers on the right edge of the screen.
Note: You might have to widen your browser window to see the Create button, as the button hovers on the right edge of the screen.
Click Create to create a project for the TIL application. Fill in the form with an appropriate name like Vapor TIL:

Click Create, and you’ll return to the Credentials page. Click Create Credentials, and choose OAuth client ID:

Note: If you’d already created other projects in the past, click Select, and choose the project you just created.
Note: If you’d already created other projects in the past, click Select, and choose the project you just created.
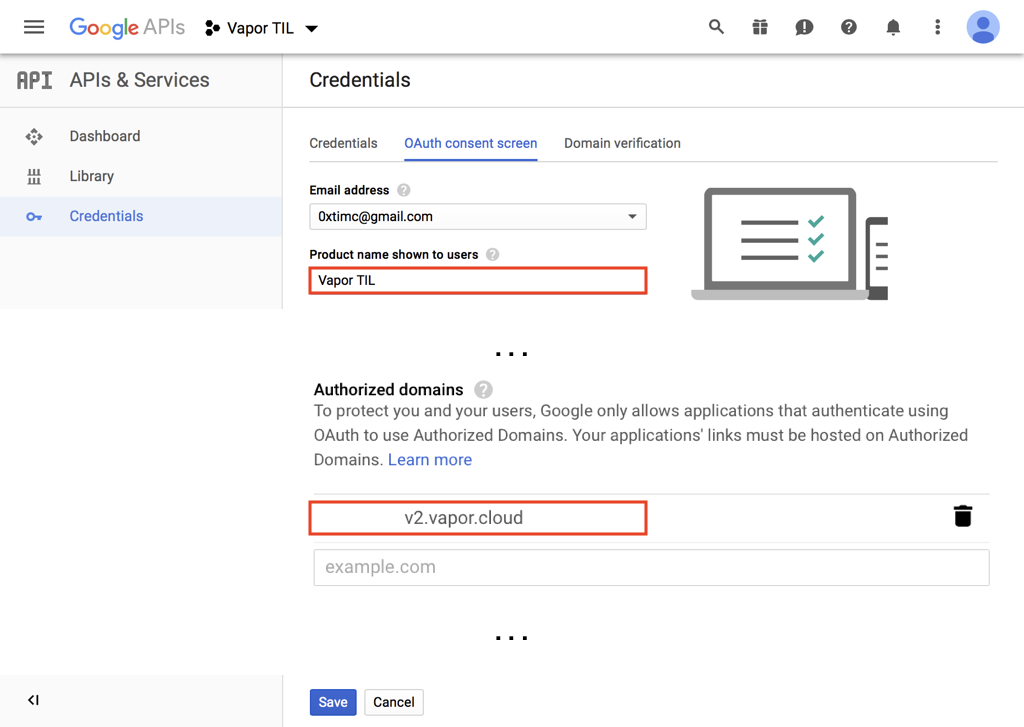
Next, click Configure consent screen to set up the page that Google will present to users so they can authorize access to their details for your application.
Add your product or application name, Vapor TIL, then scroll down to Authorized domains. Enter v2.vapor.cloud, then click Save:
Google OAuth Consent Screen
Google OAuth Consent Screen
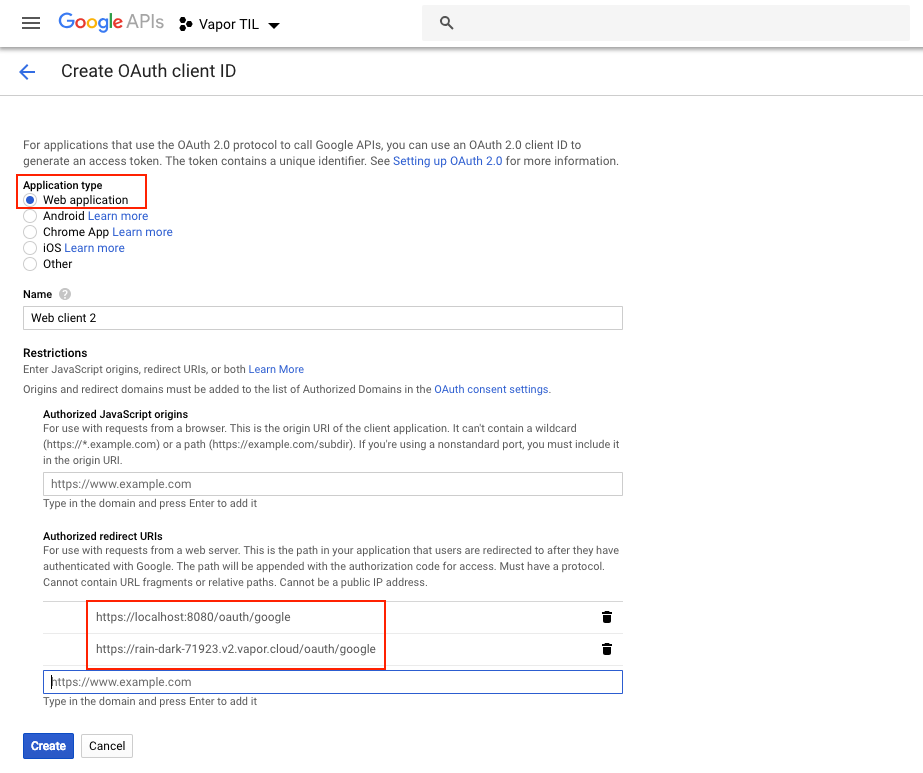
This takes you to the next step: Create OAuth client ID. Choose Web application, and add an Authorized redirect URI for testing your application — http://localhost:8080/oauth/google.
This is the URL that Google redirects back to once users have allowed your application access to their data.
But you also you want to deploy your application to the internet, just as you are doing here with Vapor Cloud 2. Therefore, you’ll need to add another redirect for the URL for that site, using your app-slug: https://YOUR_APP_SLUG.v2.vapor.cloud/oauth/google.
Create Google OAuth client ID
Create Google OAuth client ID
Store this URL in creds.txt as GOOGLE_CALLBACK_URL.
Click Create, and the site will provide you with you your client ID and client secret:

Store these credentials in creds.txt.
Note: You must keep these credentials safe and secure. Your secret provides access to Google’s APIs, and you absolutely must not share those credentials or keep your secret under source control. You should treat it, in effect, just as you would treat any of your passwords.
Note: You must keep these credentials safe and secure. Your secret provides access to Google’s APIs, and you absolutely must not share those credentials or keep your secret under source control. You should treat it, in effect, just as you would treat any of your passwords.
Setting Up GitHub OAuth
To use GitHub OAuth in your application, you must first register the application with GitHub. Fortunately, this process will go a little faster than it did when setting things up under Google.
In your browser, go to GitHub Developer settings. Click Register a new application:

Fill in the form with an appropriate name like Vapor TIL. Set the Homepage URL to https://YOUR_APP_SLUG.v2.vapor.cloud for this application, and provide a sensible description. Set the Authorization callback URL to https://YOUR_APP_SLUG.v2.vapor.cloud/oauth/github. This is the URL that GitHub redirects your users to, once they have authorized access to their data.
Store this URL in creds.txt as GITHUB_CALLBACK_URL.

Click Register application. After GitHub creates the application, you’ll be taken back to the application’s information page, where you’ll see the client ID and client secret that you need:

Store these credentials in creds.txt
Note: Again, you must keep these keys safe and secure. Your secret allows you access to GitHub’s APIs, and you should not share or check the secret into source control. Treat any API key or secret like a password.
Note: Again, you must keep these keys safe and secure. Your secret allows you access to GitHub’s APIs, and you should not share or check the secret into source control. Treat any API key or secret like a password.
Configuring Vapor Cloud Environment Variables
Having obtained your Google, GitHub, and SendGrid keys, you now need to configure them for your Vapor Cloud application.
Click the highlighted More button on the Application card:
Then click Config Vars:

Now copy and paste the keys and values from creds.txt, except for the “Vapor Cloud app-slug”, to set up the environment variables for your app. Be careful not to click anywhere outside the Config Vars window until you’ve clicked the Update button, or you’ll have to start over.

You’ve pushed your application code to the Vapor Cloud private Git server, and you’ve fully configured your app for deployment. It’s time to deploy your app to Vapor Cloud!