Sensors Tutorial for Android: Getting Started
In this sensors tutorial, you’ll learn about different types of sensors and how to use sensor fusion (accelerometer with magnetometer) to develop a compass. By Aaqib Hussain.
Sign up/Sign in
With a free Kodeco account you can download source code, track your progress, bookmark, personalise your learner profile and more!
Create accountAlready a member of Kodeco? Sign in
Sign up/Sign in
With a free Kodeco account you can download source code, track your progress, bookmark, personalise your learner profile and more!
Create accountAlready a member of Kodeco? Sign in
Sign up/Sign in
With a free Kodeco account you can download source code, track your progress, bookmark, personalise your learner profile and more!
Create accountAlready a member of Kodeco? Sign in
Contents
Sensors Tutorial for Android: Getting Started
20 mins
- Getting Started
- Types of Sensors
- List of Sensors
- Combining Sensor Data With Sensor Fusion
- Setting up Sensors
- Getting Values From the Accelerometer and Magnetometer
- Calculating Orientation in onSensorChanged
- Adding Direction Based on Angle
- Sending Data to MainActivity
- Handling Events in the Background
- Where to Go From Here?
Handling Events in the Background
When you implemented the Service, you enabled handling sensor events in the background. However, Android enforces a lot of restrictions on background processing. In its current implementation sensor events are handled when the app goes into the background. If, say, the system or user kills the app, no events will be processed.
This is not ideal when using a compass. To handle this case, you need to start your service as a foreground service and show a persistent notification.
To do so, you’ll need to add some more code to LocatyService:
- Keep track of when the service is backgrounded
- Create a notification
- Start the service as Foreground Service
Start by opening LocatyService and adding the following variable:
private var background = false
Also, update your onStartCommand as below:
override fun onStartCommand(intent: Intent?, flags: Int, startId: Int): Int {
  intent?.let {
     // 1
     background = it.getBooleanExtra(KEY_BACKGROUND, false)
   }
  return START_STICKY
}
Here’s what this does:
- Gets the application state from
MainActivity, which you pass when you start the service.
Next, add the following constants in LocatyService:
private val notificationActivityRequestCode = 0
private val notificationId = 1
private val notificationStopRequestCode = 2
These are the request codes you use when creating a PendingIntent. Each PendingIntent should have a unique request code.
To create a notification when the app is in the background, first import androidx.core.app.NotificationCompat, then add the following function:
private fun createNotification(direction: String, angle: Double): Notification {
  // 1
  val notificationManager =
            getSystemService(Context.NOTIFICATION_SERVICE) as NotificationManager

  if (Build.VERSION.SDK_INT >= Build.VERSION_CODES.O) {
      val notificationChannel = NotificationChannel(
                application.packageName,
                "Notifications", NotificationManager.IMPORTANCE_DEFAULT
            )

       // Configure the notification channel.
      notificationChannel.enableLights(false)
      notificationChannel.setSound(null, null)
      notificationChannel.enableVibration(false)
      notificationChannel.vibrationPattern = longArrayOf(0L)
      notificationChannel.setShowBadge(false)
      notificationManager.createNotificationChannel(notificationChannel)
  }

  val notificationBuilder = NotificationCompat.Builder(baseContext, application.packageName)
  // 2
  val contentIntent = PendingIntent.getActivity(
            this, notificationActivityRequestCode,
            Intent(this, MainActivity::class.java), PendingIntent.FLAG_UPDATE_CURRENT)
  // 3
  val stopNotificationIntent = Intent(this, ActionListener::class.java)
  stopNotificationIntent.action = KEY_NOTIFICATION_STOP_ACTION
  stopNotificationIntent.putExtra(KEY_NOTIFICATION_ID, notificationId)
  val pendingStopNotificationIntent =
            PendingIntent.getBroadcast(this, notificationStopRequestCode, stopNotificationIntent, PendingIntent.FLAG_UPDATE_CURRENT)

  notificationBuilder.setAutoCancel(true)
            .setDefaults(Notification.DEFAULT_ALL)
            .setContentTitle(resources.getString(R.string.app_name))
            .setContentText("You're currently facing $direction at an angle of $angle°")
            .setWhen(System.currentTimeMillis())
            .setDefaults(0)
            .setVibrate(longArrayOf(0L))
            .setSound(null)
            .setSmallIcon(R.mipmap.ic_launcher_round)
            .setContentIntent(contentIntent)
            .addAction(R.mipmap.ic_launcher_round, getString(R.string.stop_notifications), pendingStopNotificationIntent)


 return notificationBuilder.build()
}
Here’s a breakdown of what it does:
- Creates a
NotificationManager. - Opens the main screen of the app on a notification tap.
- Adds an intent to stop the notifications from appearing.
Now, you’ll create a BroadcastReceiver named ActionListener. This will listen to broadcast for stop action when you tap the Stop Notifications button from the notification.
Add the code block below inside LocatyService:
class ActionListener : BroadcastReceiver() {
  override fun onReceive(context: Context?, intent: Intent?) {

   if (intent != null && intent.action != null) {
       // 1
       if (intent.action.equals(KEY_NOTIFICATION_STOP_ACTION)) {
            context?.let {
               // 2
               val notificationManager =
                            context.getSystemService(Context.NOTIFICATION_SERVICE) as NotificationManager
               val locatyIntent = Intent(context, LocatyService::class.java)
               // 3
               context.stopService(locatyIntent)
               val notificationId = intent.getIntExtra(KEY_NOTIFICATION_ID, -1)
               if (notificationId != -1) {
                  // 4
                  notificationManager.cancel(notificationId)
               }
            }
         }
      }
   }
}
Here’s what this code does:
- Checks if the broadcast’s action is same as for Stop Notifications.
- Gets a reference to NotificationManager.
- Stops the service.
- Removes the persistent notification from the Notification Drawer.
Now, add the ActionListener to AndroidManifest:
<receiver android:name=".LocatyService$ActionListener"/>
Here, you register the ActionListener in AndroidManifest. You could have invoked the registeration/deregiteration during runtime also inside the class.
When starting a foreground service, you need to register a notification if you want the service to keep running in the background. This applies to Android version Oreo and above.
In onCreate of LocatyService, add the following:
// 1
val notification = createNotification(getString(R.string.not_available), 0.0)
// 2
startForeground(notificationId, notification)
Here’s what this code block does:
- Create a notification
- Start the service with the notification as a Foreground Service
Finally, add the following snippet to the end of updateOrientationAngles:
if (background) {
   // 1
   val notification = createNotification(direction, angle)
   startForeground(notificationId, notification)
   } else {
   // 2
   stopForeground(true)
}
Here’s what this code does:
- Creates and shows a notification when the app goes into the background.
- Hides the notification as soon as the app comes into the foreground.
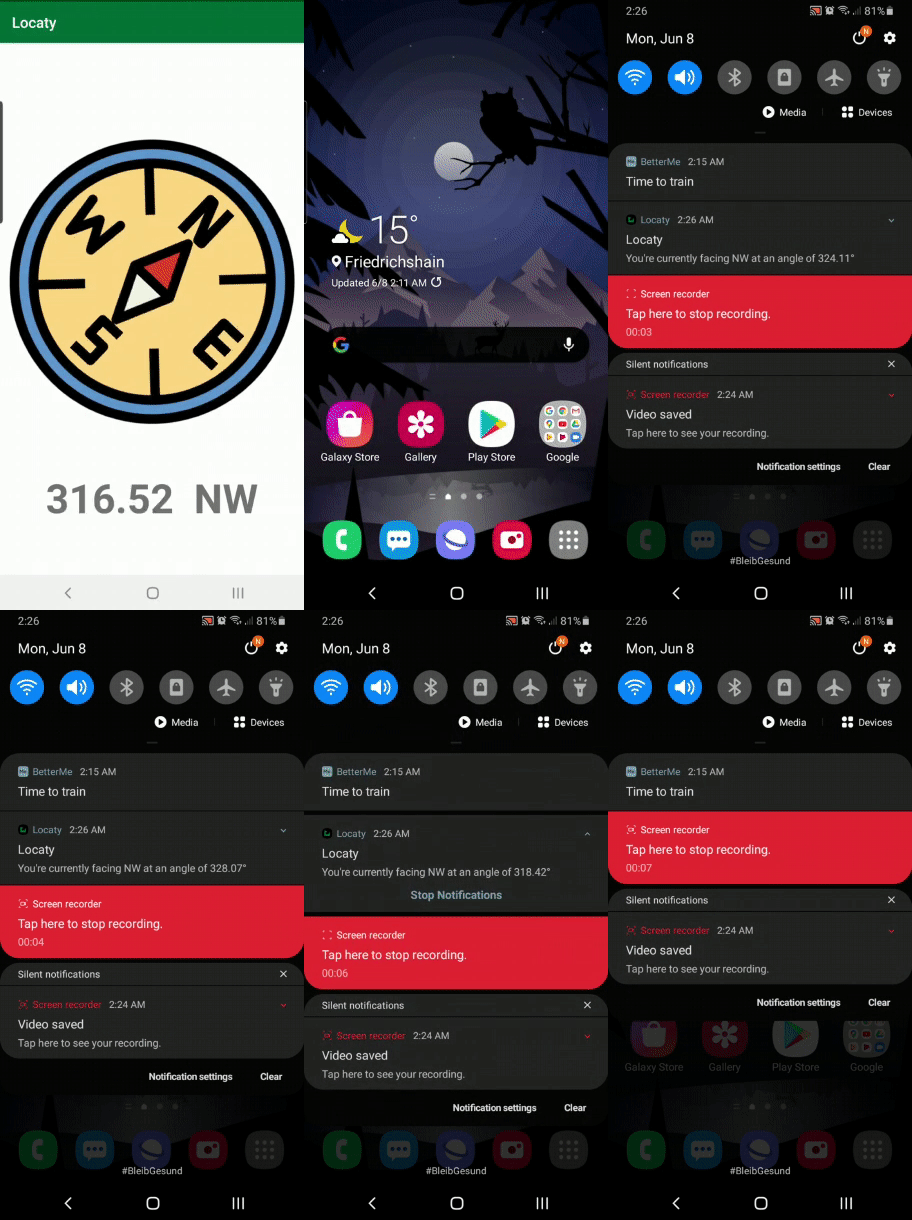
That’s it! Finally, it’s time to run the app to see how the compass works.
Now, build and run.
Press the Home button and you’ll see the notification.
It works!
Where to Go From Here?
Congratulations, you’ve learned a lot about sensors and have a better understanding of their ins and outs. After following this tutorial to make a real compass, you must be yearning to use sensors in one of your next apps. :]
Feel free to download the completed project using the Download Materials button at the top or bottom of this tutorial.
If you want to learn more about sensors in-depth, go to the official Android documentation.
If you have any questions or queries please feel free to post them in the comments section below. :]


