Augmented Reality in Android with Google’s Face API
You’ll build a Snapchat Lens-like app called FaceSpotter which draws cartoony features over faces in a camera feed using augmented reality. By Joey deVilla.
Sign up/Sign in
With a free Kodeco account you can download source code, track your progress, bookmark, personalise your learner profile and more!
Create accountAlready a member of Kodeco? Sign in
Sign up/Sign in
With a free Kodeco account you can download source code, track your progress, bookmark, personalise your learner profile and more!
Create accountAlready a member of Kodeco? Sign in
Contents
Augmented Reality in Android with Google’s Face API
30 mins
If you’ve ever used Snapchat’s “Lenses” feature, you’ve used a combination of augmented reality and face detection.
Augmented reality — AR for short — is technical and an impressive-sounding term that simply describes real-world images overlaid with computer-generated ones. As for face detection, it’s nothing new for humans, but finding faces in images is still a new trick for computers, especially handheld ones.
Writing apps that feature AR and face detection used to require serious programming chops, but with Google’s Mobile Vision suite of libraries and its Face API, it’s much easier.
In this augmented reality tutorial, you’ll build a Snapchat Lens-like app called FaceSpotter. FaceSpotter draws cartoony features over faces in a camera feed.
In this tutorial, you’ll learn how to:
- Incorporate Google’s Face API into your own apps
- Programmatically identify and track human faces from a camera feed
- Identify points of interest on faces, such as eyes, ears, nose, and mouth
- Draw text and graphics over images from a camera feed
What can Google’s Face API do?
Google’s Face API performs face detection, which locates faces in pictures, along with their position (where they are in the picture) and orientation (which way they’re facing, relative to the camera). It can detect landmarks (points of interest on a face) and perform classifications to determine whether the eyes are open or closed, and whether or not a face is smiling. The Face API also detects and follows faces in moving images, which is known as face tracking.
Note that the Face API is limited to detecting human faces in pictures. Sorry, cat bloggers…

The Face API doesn’t perform face recognition, which connects a given face to an identity. It can’t perform that Facebook trick of detecting a face in an image and then identifying that person.
Once you’re able to detect a face, its position and its landmarks in an image, you can use that data to augment the image with your own reality! Apps like Pokemon GO, or Snapchat make use of augmented reality to give users a fun way to use their cameras, and so can you!
Getting Started
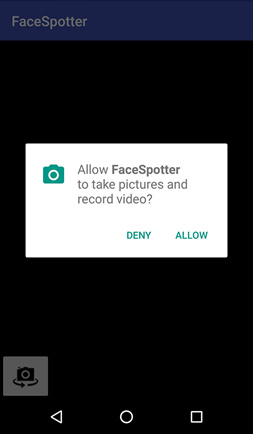
Download the FaceSpotter starter project here and open it in Android Studio. Build and run the app, and it will ask for permission to use the camera.

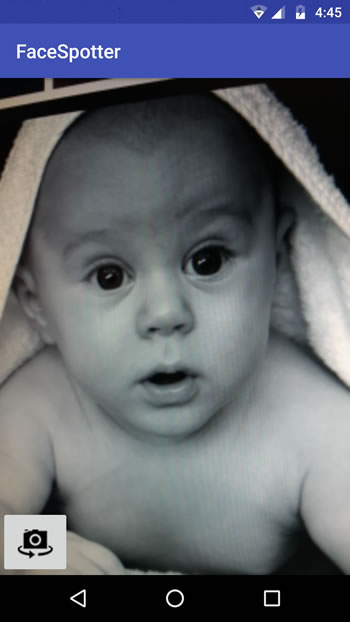
Click ALLOW, then point the camera at someone’s face.

The button in the app’s lower left-hand corner toggles between front and back camera.
This project was made so that you can start using face detection and tracking quickly. Let’s review what’s included.
Project Dependencies
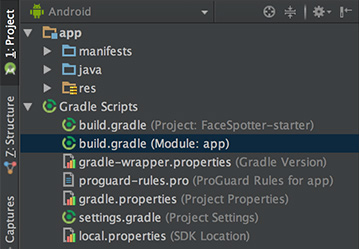
Open the project’s build.gradle (Module: app):

At the end of the dependencies section, you’ll see the following:
compile 'com.google.android.gms:play-services-vision:10.2.0'
compile 'com.android.support:design:25.2.0'
The first of these lines imports the Android Vision API, which supports not just face detection, but barcode detection and text recognition as well.
The second brings in the Android Design Support Library, which provides the Snackbar widget that informs the user that the app needs access to the cameras.
Using the Cameras
FaceSpotter specifies that it uses the camera and requests the user’s permission to do so with these lines in AndroidManifest.xml:

<uses-feature android:name="android.hardware.camera" />
<uses-permission android:name="android.permission.CAMERA" />
Pre-defined Classes
The starter project comes with a few pre-defined classes:
- FaceActivity: The main activity of the app which shows the camera preview.
- FaceTracker: Follows faces that are detected in images from the camera, and gathers their positions and landmarks.
- FaceGraphic: Draws the computer-generated images over faces in the camera images.
-
FaceData: A data class for passing
FaceTrackerdata toFaceGraphic. - EyePhysics: Provided by Google in their Mobile Vision sample apps on GitHub, it’s a simple physics engine that will animate the AR irises as the faces they’re on move.
- CameraSourcePreview: Another class from Google. It displays the live image data from the camera in a view.
-
GraphicOverlay: One more Google class;
FaceGraphicsubclasses it.
Let’s take a moment to get familiar with how they work.
FaceActivity defines the app’s only activity, and along with handling touch events, also requests for permission to access the device’s camera at runtime (applies to Android 6.0 and above). FaceActivity also creates two objects which FaceSpotter depends on, namely CameraSource and FaceDetector.
Open FaceActivity.java and look for the createCameraSource method:
private void createCameraSource() {
  Context context = getApplicationContext();

  // 1
  FaceDetector detector = createFaceDetector(context);

  // 2
  int facing = CameraSource.CAMERA_FACING_FRONT;
  if (!mIsFrontFacing) {
    facing = CameraSource.CAMERA_FACING_BACK;
  }

  // 3
  mCameraSource = new CameraSource.Builder(context, detector)
    .setFacing(facing)
    .setRequestedPreviewSize(320, 240)
    .setRequestedFps(60.0f)
    .setAutoFocusEnabled(true)
    .build();
}
Here’s what the above code does:
- Creates a
FaceDetectorobject, which detects faces in images from the camera’s data stream. - Determines which camera is currently the active one.
- Uses the results of steps 1 and 2 and the Builder pattern to create the camera source. The builder methods are:
- setFacing: Specifies which camera to use.
- setRequestedPreviewSize: Sets the resolution of the preview image from the camera. Lower resolutions (like the 320×240 resolution specified) work better with budget devices and provide faster face detection. Higher resolutions (640×480 and higher) are for higher-end devices and offer better detection of small faces and facial features. Try out different settings.
- setRequestedFps: Sets the camera frame rate. Higher rates mean better face tracking, but use more processor power. Experiment with different frame rates.
- setAutoFocusEnabled: Turns autofocus off or on. Keep this set to true for better face detection and user experience. This has no effect if the device doesn’t have autofocus.
Now let’s check out the createFaceDetector method:
@NonNull
private FaceDetector createFaceDetector(final Context context) {
  // 1
  FaceDetector detector = new FaceDetector.Builder(context)
    .setLandmarkType(FaceDetector.ALL_LANDMARKS)
    .setClassificationType(FaceDetector.ALL_CLASSIFICATIONS)
    .setTrackingEnabled(true)
    .setMode(FaceDetector.FAST_MODE)
    .setProminentFaceOnly(mIsFrontFacing)
    .setMinFaceSize(mIsFrontFacing ? 0.35f : 0.15f)
    .build();

  // 2
  MultiProcessor.Factory<Face> factory = new MultiProcessor.Factory<Face>() {
    @Override
    public Tracker<Face> create(Face face) {
      return new FaceTracker(mGraphicOverlay, context, mIsFrontFacing);
    }
  };

  // 3
  Detector.Processor<Face> processor = new MultiProcessor.Builder<>(factory).build();
  detector.setProcessor(processor);

  // 4
  if (!detector.isOperational()) {
    Log.w(TAG, "Face detector dependencies are not yet available.");

    // Check the device's storage.  If there's little available storage, the native
    // face detection library will not be downloaded, and the app won't work,
    // so notify the user.
    IntentFilter lowStorageFilter = new IntentFilter(Intent.ACTION_DEVICE_STORAGE_LOW);
    boolean hasLowStorage = registerReceiver(null, lowStorageFilter) != null;

    if (hasLowStorage) {
      Log.w(TAG, getString(R.string.low_storage_error));
      DialogInterface.OnClickListener listener = new DialogInterface.OnClickListener() {
        public void onClick(DialogInterface dialog, int id) {
          finish();
        }
      };
      AlertDialog.Builder builder = new AlertDialog.Builder(this);
      builder.setTitle(R.string.app_name)
        .setMessage(R.string.low_storage_error)
        .setPositiveButton(R.string.disappointed_ok, listener)
        .show();
    }
  }
  return detector;
}
Taking the above comment-by-comment:
- Creates a
FaceDetectorobject using the Builder pattern, and sets the following properties:-
setLandmarkType: Set to
NO_LANDMARKSif it should not detect facial landmarks (this makes face detection faster) orALL_LANDMARKSif landmarks should be detected. -
setClassificationType: Set to
NO_CLASSIFICATIONSif it should not detect whether subjects’ eyes are open or closed or if they’re smiling (which speeds up face detection) orALL_CLASSIFICATIONSif it should detect them. - setTrackingEnabled: Enables/disables face tracking, which maintains a consistent ID for each face from frame to frame. Since you need face tracking to process live video and multiple faces, set this to true.
-
setMode: Set to
FAST_MODEto detect fewer faces (but more quickly), orACCURATE_MODEto detect more faces (but more slowly) and to detect the Euler Y angles of faces (we’ll cover this topic later). -
setProminentFaceOnly: Set to
trueto detect only the most prominent face in the frame. - setMinFaceSize: Specifies the smallest face size that will be detected, expressed as a proportion of the width of the face relative to the width of the image.
-
setLandmarkType: Set to
- Creates a factory class that creates new
FaceTrackerinstances. - When a face detector detects a face, it passes the result to a processor, which determines what actions should be taken. If you wanted to deal with only one face at a time, you’d use an instance of
Processor. In this app, you’ll handle multiple faces, so you’ll create aMultiProcessorinstance, which creates a newFaceTrackerinstance for each detected face. Once created, we connect the processor to the detector. - The face detection library downloads as the app is installed. It’s large enough that there’s a chance that it may not be downloaded when the user runs the app for the first time. This code handles that case, as well as the when the device doesn’t have enough storage for the library.
With the intro taken care of, it’s time to detect some faces!