Photo Stacking in iOS with Vision and Metal
In this tutorial, you’ll use Metal and the Vision framework to remove moving objects from pictures in iOS. You’ll learn how to stack, align and process multiple images so that any moving object disappears. By Yono Mittlefehldt.
Sign up/Sign in
With a free Kodeco account you can download source code, track your progress, bookmark, personalise your learner profile and more!
Create accountAlready a member of Kodeco? Sign in
Sign up/Sign in
With a free Kodeco account you can download source code, track your progress, bookmark, personalise your learner profile and more!
Create accountAlready a member of Kodeco? Sign in
Sign up/Sign in
With a free Kodeco account you can download source code, track your progress, bookmark, personalise your learner profile and more!
Create accountAlready a member of Kodeco? Sign in
Contents
Photo Stacking in iOS with Vision and Metal
25 mins
What is Photo Stacking? Well, imagine this. You’re on vacation, somewhere magical. You’re traveling around the UK visiting all the Harry Potter filming locations!
It’s time to see the sites and capture the most amazing photos. How else are you going to rub it in your friends’ faces that you were there? There’s only one problem: There are so many people. :[
Ugh! Every single picture you take is full of them. If only you could cast a simple spell, like Harry, and make all those people disappear. Evanesco! And, poof! They’re gone. That would be fantastic. It would be the be[a]st. ;]
Maybe there is something you can do. Photo Stacking is an emerging computational photography trend all the cool kids are talking about. Do you want to know how to use this?
In this tutorial, you’ll use the Vision framework to learn how to:
- Align captured images using a
VNTranslationalImageRegistrationRequest. - Create a custom
CIFilterusing a Metal kernel. - Use this filter to combine several images to remove any moving objects.
Exciting, right? Well, what are you waiting for? Read on!
Getting Started
Click the Download Materials button at the top or bottom of this tutorial. Open the starter project and run it on your device.
Evanesco startup screenshot

Evanesco startup screenshot
You should see something that looks like a simple camera app. There’s a red record button with a white ring around it and it’s showing the camera input full screen.
Surely you’ve noticed that the camera seems a bit jittery. That’s because it’s set to capture at five frames per second. To see where this is defined in code, open CameraViewController.swift and find the following two lines in configureCaptureSession():
camera.activeVideoMaxFrameDuration = CMTime(value: 1, timescale: 5)
camera.activeVideoMinFrameDuration = CMTime(value: 1, timescale: 5)
The first line forces the maximum frame rate to be five frames per second. The second line defines the minimum frame rate to be the same. The two lines together require the camera to run at the desired frame rate.
If you tap the record button, you should see the outer white ring fill up clockwise. However, when it finishes, nothing happens.
You’re going to have to do something about that right now.
Saving Images to the Files App
To help you debug the app as you go along, it would be nice to save the images you’re working with to the Files app. Fortunately, this is much easier than it sounds.
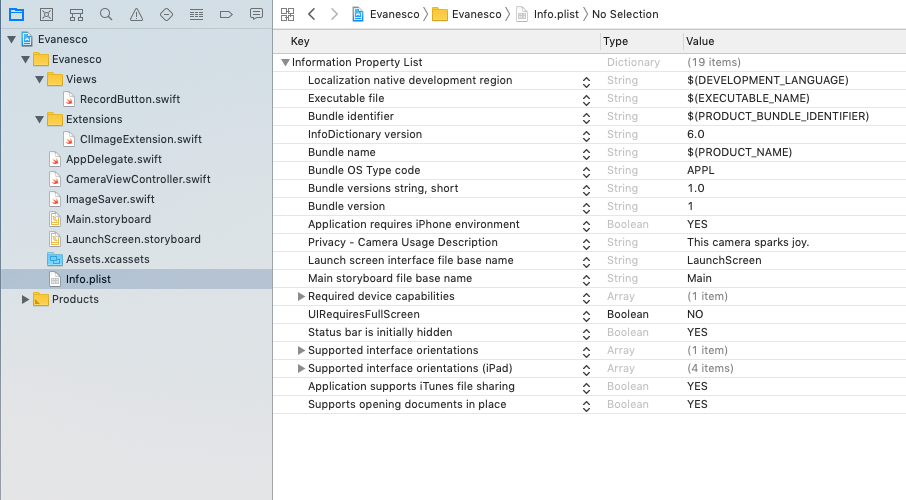
Add the following two keys to your Info.plist:
- Application supports iTunes file sharing.
- Supports opening documents in place.
Set both their values to YES. Once you’re done, the file should look like this:
The first key enables file sharing for files in the Documents directory. The second lets your app open the original document from a file provider instead of receiving a copy. When both of these options are enabled, all files stored in the app’s Documents directory appear in the Files app. This also means that other apps can access these files.
Now that you’ve given the Files app permission to access the Documents directory, it’s time to save some images there.
Bundled with the starter project is a helper struct called ImageSaver. When instantiated, it generates a Universally Unique Identifier (UUID) and uses it to create a directory under the Documents directory. This is to ensure you don’t overwrite previously saved images. You’ll use ImageSaver in your app to write your images to files.
In CameraViewController.swift, define a new variable at the top of the class as follows:
var saver: ImageSaver?
Then, scroll to recordTapped(_:) and add the following to the end of the method:
saver = ImageSaver()
Here you create a new ImageSaver each time the record button is tapped, which ensures that each recording session will save the images to a new directory.
Next, scroll to captureOutput(_:didOutput:from:) and add the following code after the initial if statement:
// 1
guard
  let imageBuffer = CMSampleBufferGetImageBuffer(sampleBuffer),
  let cgImage = CIImage(cvImageBuffer: imageBuffer).cgImage()
  else {
    return
}
// 2
let image = CIImage(cgImage: cgImage)
// 3
saver?.write(image)
With this code, you:
- Extract the
CVImageBufferfrom the captured sample buffer and convert it to aCGImage. - Convert the
CGImageinto aCIImage. - Write the image to the Documents directory.
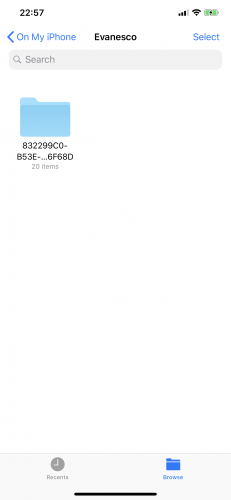
CIImage, then to a CGImage, and finally back into a CIImage again? This has to do with who owns the data. When you convert the sample buffer into a CIImage, the image stores a strong reference to the sample buffer. Unfortunately, for video capture, this means that after a few seconds, it will start dropping frames because it runs out of memory allocated to the sample buffer. By rendering the CIImage to a CGImage using a CIIContext, you make a copy of the image data and the sample buffer can be freed to be used again.Now, build and run the app. Tap the record button and, after it finishes, switch to the Files app. Under the Evanesco folder, you should see a UUID-named folder with 20 items in it.
UUID named folder

UUID named folder
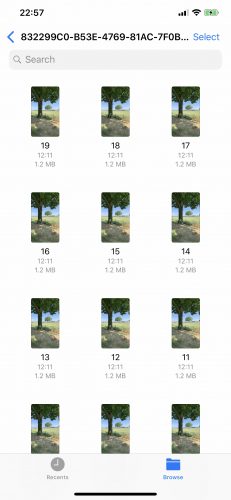
If you look in this folder, you’ll find the 20 frames you captured during the 4 seconds of recording.
Captured frames

Captured frames
OK, cool. So what can you do with 20 nearly identical images?
Photo Stacking
In computational photography, photo stacking is a technique where multiple images are captured, aligned and combined to create different desired effects.
For instance, HDR images are obtained by taking several images at different exposure levels and combining the best parts of each together. That’s how you can see detail in shadows as well as in the bright sky simultaneously in iOS.
Astrophotography also makes heavy use of photo stacking. The shorter the image exposure, the less noise is picked up by the sensor. So astrophotographers usually take a bunch of short exposure images and stack them together to increase the brightness.
In macro photography, it is difficult to get the entire image in focus at once. Using photo stacking, the photographer can take a few images at different focal lengths and combine them to produce an extremely sharp image of a very small object.
To combine the images together, you first need to align them. How? iOS provides some interesting APIs that will help you with it.
