Runtime Mesh Manipulation With Unity
One of the benefits of using Unity as your game development platform is its powerful 3D engine. In this tutorial, you’ll get an introduction to the world of 3D objects and mesh manipulation. By Sean Duffy.
Sign up/Sign in
With a free Kodeco account you can download source code, track your progress, bookmark, personalise your learner profile and more!
Create accountAlready a member of Kodeco? Sign in
Sign up/Sign in
With a free Kodeco account you can download source code, track your progress, bookmark, personalise your learner profile and more!
Create accountAlready a member of Kodeco? Sign in
Contents
Runtime Mesh Manipulation With Unity
35 mins
- Getting Started
- Understanding Meshes
- Setting Up the Project
- Poking and Prodding Meshes With a Custom Editor
- Customizing the Editor Script
- Cloning a Mesh
- Resetting a Mesh
- Understanding Vertices and Triangles With Unity
- Visualizing Vertices
- Moving a Single Vertex
- Looking at the Vertices Array
- Finding All Similar Vertices
- Manipulating Meshes
- Collecting the Selected Indices
- Deforming the Sphere Into a Heart Shape
- Making the Vertices Move Smoothly
- Saving Your Mesh in Real Time
- Putting It All Together
- Using the Curve Method
- Where to Go From Here?
Putting It All Together
In the previous section, you learned how to modify a mesh by selecting individual vertices. While this is cool, you can do more interesting things if you know how to select vertices procedurally.
In the previous scene, DisplaceVertices uses a Gaussian falloff formula to determine how much to "pull" each vertex within the radius of the effect. But there are other mathematical functions you can use to calculate the 'fall off' point; that is, where the pull strength starts decaying. Each function produces a different shape:
Like cupcake toppings...
In this section, you will learn how to manipulate vertices using a calculated curve.
Based on the principle that velocity equals distance divided by time (v=(d/t)), you can determine the vector's position by referencing its distance divided by its time factor.
Using the Curve Method
Save your current scene, then open 03 Customize Heart Mesh from the Scenes folder.
Find the instance of your CustomHeart prefab in the hierarchy and click on the arrow icon next to it to expand its content. Select the Child object.
View its properties in the Inspector. You'll see Mesh Filter with the Heart Mesh asset. Attach Custom Heart to Child. The asset should now change from HeartMesh to clone.

Open CustomHeart.cs and add the following right above Start:
public enum CurveType
{
    Curve1, Curve2
}

public CurveType curveType;
Curve curve;
This creates a public enum named CurveType and makes it available in the Inspector.
Go to CurveType1 and add the following:
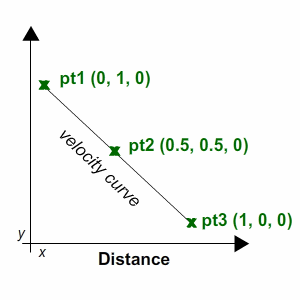
Vector3[] curvepoints = new Vector3[3]; //1
curvepoints[0] = new Vector3(0, 1, 0);
curvepoints[1] = new Vector3(0.5f, 0.5f, 0);
curvepoints[2] = new Vector3(1, 0, 0);
curve = new Curve(curvepoints[0], curvepoints[1], curvepoints[2], false); //2
What's going on?
- The basic curve consists of three points. This code sets and plots the points for the first curve.
- Generates the first curve with
Curveand assigns its values tocurve. You can set the last parameter totrueto draw the curve as a preview.
Now go to CurveType2 and add the following:
Vector3[] curvepoints = new Vector3[3]; //1
curvepoints[0] = new Vector3(0, 0, 0);
curvepoints[1] = new Vector3(0.5f, 1, 0);
curvepoints[2] = new Vector3(1, 0, 0);
curve = new Curve(curvepoints[0], curvepoints[1], curvepoints[2], false); //2
This works much like CurveType1.
- Sets and plots the points for the second curve.
- Generates the second curve with the
Curvemethod and assigns its values tocurve.
In StartDisplacement, before the closing braces, add the following:
if (curveType == CurveType.Curve1)
{
    CurveType1();
}
else if (curveType == CurveType.Curve2)
{
    CurveType2();
}
This will generate different curves depending on what you select as the Curve Type in the Custom Heart component.
In DisplaceVertices, inside the for loop, before the closing braces, add the following:
float increment = curve.GetPoint(distance).y * force; //1
Vector3 translate = (vert * increment) * Time.deltaTime; //2
Quaternion rotation = Quaternion.Euler(translate);
Matrix4x4 m = Matrix4x4.TRS(translate, rotation, Vector3.one);
modifiedVertices[i] = m.MultiplyPoint3x4(modifiedVertices[i]);
This might look familiar — it's much like the code you added to HeartMesh.
- Gets the curve's position at the given
distanceand multiplies itsyvalue byforceto getincrement. - Creates a new
Vector3calledtranslateto store the new position for the current vertex and applies its Transform accordingly.
Save the file and return to Unity. Check out the properties in Custom Heart on the Child GameObject.
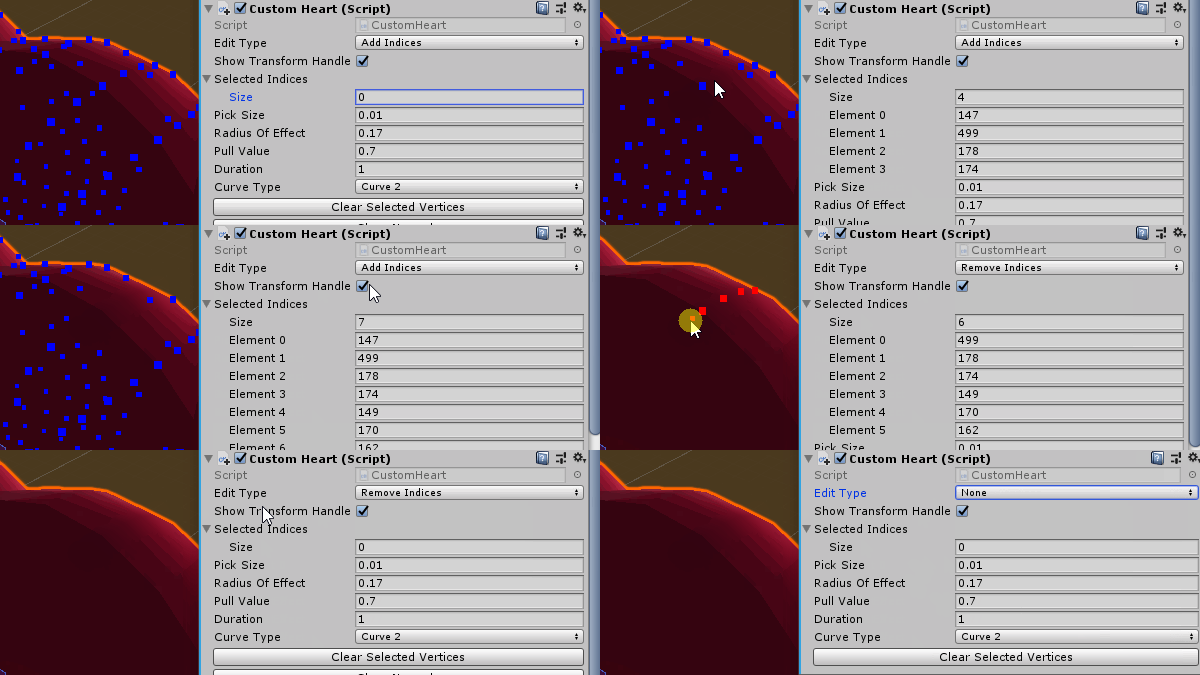
In the Edit Type drop-down menu, you can now select Add Indices or Remove Indices to update your list of vertices. Select None to exit Edit mode, then click Play see the results. Experiment with different settings and vertex selections.

To see an example of the different curve types, enter these values:

Set Curve Type to Curve1, check that Edit Type is set to None and press Play.

You should see how the mesh fans out into a pattern. Move the model around to its side-view so you can see the shape this curve produces. Exit Play and try it again with Curve 2 to compare the results of both curve types:
That's it! You can click Clear Selected Vertices to reset the Selected Indices and experiment with your own patterns. Don't forget that there are several factors that will affect the final shape of the mesh:
- The size of the radius.
- The spread of vertices within the area.
- The pattern position of the selected vertices.
- The method that you choose for displacement.
Where to Go From Here?
You can get all of the files for the final project by using the Download Materials button at the top and bottom of this tutorial.
Don't stop here! Try out more advanced techniques with Procedural Maze Generation.
I hope you have enjoyed this tutorial and found the information useful. Special credit to Jasper Flick from Catlike Coding for his great tutorials, which helped me put together the demos for this project.
Feel free to join the discussion forum below for any questions or comments!


