Adding a Lives Label
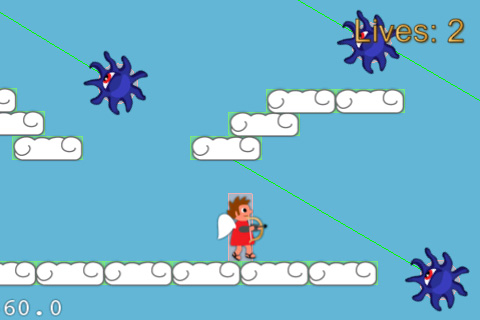
Now that we have our HUD in place, let’s add one more feature – displaying the remaining lives!
Open up HUDLayer.h and make the following changes:
// Add inside @interface
CCLabelBMFont * _statusLabel;

// Add after @interface
- (void)setStatusString:(NSString *)string;
Then switch to HUDLayer.mm and replace init with the following:
- (id)init {

    if ((self = [super init])) {

        CGSize winSize = [CCDirector sharedDirector].winSize;
        if (UI_USER_INTERFACE_IDIOM() == UIUserInterfaceIdiomPad) {
            _statusLabel = [CCLabelBMFont labelWithString:@"" fntFile:@"Arial-hd.fnt"];
        } else {
            _statusLabel = [CCLabelBMFont labelWithString:@"" fntFile:@"Arial.fnt"];
        }
        _statusLabel.position = ccp(winSize.width* 0.85, winSize.height * 0.9);
        [self addChild:_statusLabel];
    }
    return self;
}

- (void)setStatusString:(NSString *)string {
    _statusLabel.string = string;
}
This just creates a label in the upper right, and creates a method that can be used to set the display string.
Let’s use it! Switch over to ActionLayer.mm and replace updateLives with the following:
- (void)updateLives {
    [_hud setStatusString:[NSString stringWithFormat:@"Lives: %d", _lives]];
}
Simple eh – we just call the new method we wrote on the HUDLayer! Note it’s good practice to have the HUD layer not really know anything about the state of the game – it just displays what the game tells it to.
Compile and run, and now you have your lives displayed!

Where To Go From Here?
Here is the example project with all of the code from the above tutorial.
At this point, you know how to create extra layers to serve as a HUD (or for other purposes) and easily send messages to them from your main layer! You can add anything you want to the HUD just like your main layer.
If you have any questions or comments, please join the forum discussion below!
