Documenting Kotlin Code for Android Using KDoc and Dokka
Learn how to use KDoc to document your Kotlin code and generate beautiful-looking documentation pages using Dokka. By Rajdeep Singh.
Sign up/Sign in
With a free Kodeco account you can download source code, track your progress, bookmark, personalise your learner profile and more!
Create accountAlready a member of Kodeco? Sign in
Sign up/Sign in
With a free Kodeco account you can download source code, track your progress, bookmark, personalise your learner profile and more!
Create accountAlready a member of Kodeco? Sign in
Contents
Documenting Kotlin Code for Android Using KDoc and Dokka
25 mins
- Getting Started
- Understanding the Project Structure
- Making a Case for Documentation
- Going Beyond Code Comments
- Learning From Examples
- Introducing KDoc
- Defining Block Tags
- Documenting Modules and Packages
- Introducing Dokka
- Integrating Dokka
- Generating Documentation
- Customizing Dokka
- Adding External Documentation
- Customizing Member Visibility
- Customizing Module and Package Pages
- Using Custom Assets
- Where to Go From Here?
Customizing Module and Package Pages
Remember the changes you did in the Documenting Modules and Packages section? It’s time to start using those custom module.md files from each of the modules.
Open the root-level build.gradle file and add includes.from("module.md") below includeNonPublic.set(true) for both the custom tasks. It will look something like this:
// Truncated code above

named("main") {
  includeNonPublic.set(true)
  includes.from("module.md")

// Truncated code below
If you try generating the documentation now, the custom markdown for packages will work, but the one for modules won’t. This is because the actual module names and the ones used in module.md don’t match.
To fix this, you need to customize the module names in the documentation. Open the root-level build.gradle and add the following snippet in tasks.named("dokkaHtml") and tasks.named("dokkaHtmlPartial"):
moduleName.set("$rootProject.name-$project.name")
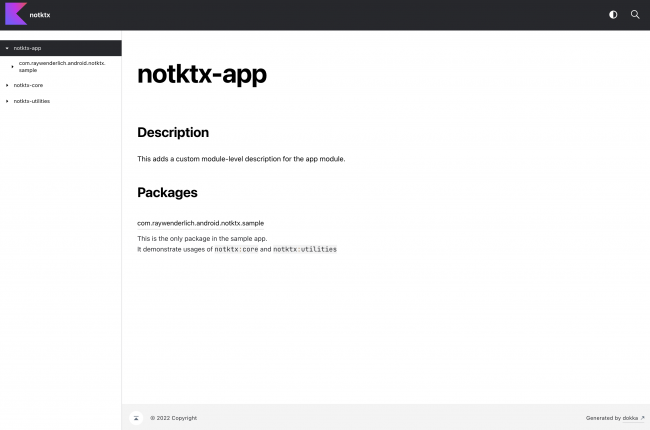
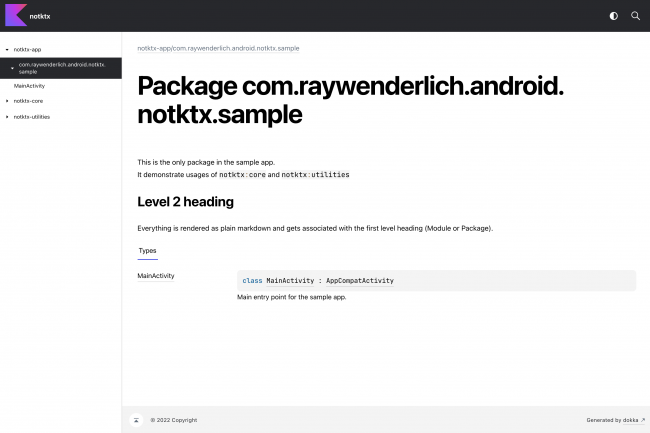
Run ./gradlew clean dokkaHtmlMultiModule to see the changes:
Take some time to explore all three module.md files and see how their first-level heading maps to module- and package-level documentation pages.
Using Custom Assets
In this section, you’ll add a custom footer message and learn to add and replace custom CSS files.
Open the root-level build.gradle file and replace TODO:18 with the following snippet:
customFooterMessage = "Made with ❤️ at raywenderlich.com"
customLogoFile = projectDir.toString() + "/logo-style.css"
This defines extra properties for custom footer messages and CSS file paths in the project object.
In the root-level build.gradle file, add the following snippet under dokkaHtml and dokkaHtmlPartial tasks:
pluginsMapConfiguration.set(
  [
    "org.jetbrains.dokka.base.DokkaBase": """{
      "footerMessage": "$customFooterMessage",
      "customStyleSheets": ["$customLogoFile"]
     }"""
  ]
)
This snippet adds a custom footer message and the path to logo-style.css in pluginsMapConfiguration. Dokka uses it to customize documentation properties.
The CSS file is already added to the project for you. The customStyleSheets property in Dokka adds new files or replaces old files if a file with the same name exists.
Dokka also uses logo-style.css to add a logo in the top left corner. The custom file that you used replaces that logo with another one.
Adding the snippet in those two tasks will customize the pages for standalone module documentation as well as module-level pages in the multimodule documentation.
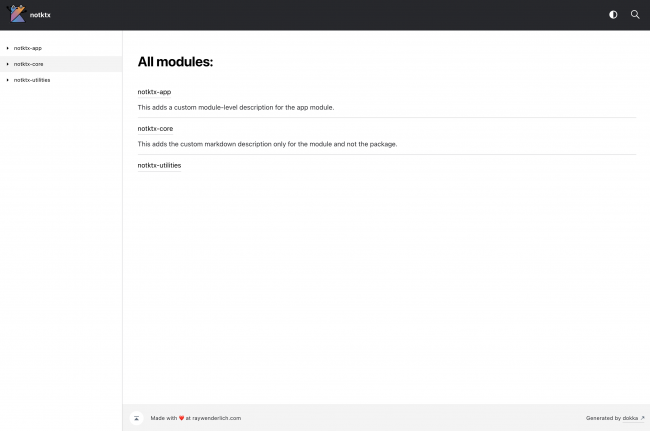
In case of multimodule projects, the dokkaHtmlMultiModule task generates the page that lists all the modules and not the dokkaHtmlPartial task.
To customize that page, you need to add the same snippet in the dokkaHtmlMultiModule task, too. You’ll add this in the afterEvaluate block so that it gets executed after all the definitions in the build script are applied. Replace TODO:20 with the snippet below:
afterEvaluate {
  tasks.named("dokkaHtmlMultiModule") {
    pluginsMapConfiguration.set(
      [
        "org.jetbrains.dokka.base.DokkaBase": """{
          "footerMessage": "$customFooterMessage",
          "customStyleSheets": ["$customLogoFile"]
         }"""
      ]
    )
  }
}
Run ./gradlew clean dokkaHtmlMultiModule to see the changes:
Congratulations — you’ve completed this tutorial!
Where to Go From Here?
Download the completed project files by clicking the Download Materials button at the top or bottom of the tutorial.
Dokka uses a plugin system and provides extension points to write your custom plugins. Check that out here.
As a challenge from this article, you can generate documentation in other formats, such as JavaDoc and GFM.
We hope you enjoyed this tutorial. If you have any questions or comments, please join the forum discussion below!


