Beginning Twitter in iOS 5 Tutorial
Update 10/26/12: Check out this new version fully updated for iOS 6! Note from Ray: This is the eleventh iOS 5 tutorial in the iOS 5 Feast! This tutorial is a free preview chapter from our new book iOS 5 By Tutorials. Enjoy! This is a blog post by iOS Tutorial Team member Felipe Laso, […] By Felipe Laso-Marsetti.
Sign up/Sign in
With a free Kodeco account you can download source code, track your progress, bookmark, personalise your learner profile and more!
Create accountAlready a member of Kodeco? Sign in
Sign up/Sign in
With a free Kodeco account you can download source code, track your progress, bookmark, personalise your learner profile and more!
Create accountAlready a member of Kodeco? Sign in
Contents
Beginning Twitter in iOS 5 Tutorial
20 mins
Making Some Connections
Next we need to make some connections from our storyboard to the view controller. Open MainStoryboard.storyboard file and make sure the Assistant Editor is visible, and displaying ViewController.h.
Control-drag from each of the four labels to below the @interface, and connect them to Outlets named button1Label, button2Label, button3Label, and button4Label.
Similarly, control-drag from each of the four buttons to below the @interface, and connect them to Actions named button1Tapped, button2Tapped, button3Tapped, and button4Tapped.
Finally, control-drag from the “Tweet” button to below the @interface, and connect it to an action named tweetTapped.
When you are done, your header file should like this:
#import <UIKit/UIKit.h>

@interface ViewController : UIViewController

@property (weak, nonatomic) IBOutlet UILabel *button1Label;
@property (weak, nonatomic) IBOutlet UILabel *button2Label;
@property (weak, nonatomic) IBOutlet UILabel *button3Label;
@property (weak, nonatomic) IBOutlet UILabel *button4Label;

- (IBAction)button1Tapped:(id)sender;
- (IBAction)button2Tapped:(id)sender;
- (IBAction)button3Tapped:(id)sender;
- (IBAction)button4Tapped:(id)sender;
- (IBAction)tweetTapped:(id)sender;

@end
Awesome! Now let’s implement these methods to send out some tweets!
In order for us to use the TWTweetComposeViewController we need to add the Twitter framework to our project. Select your project in the project navigator and then the SimpleTweet target. Go to the Build Phases tab and click on the + button inside the Link Binary With Libraries section, on the window that appears navigate to the Twitter.framework file and click Add:
Next, open ViewController.m and add the following import at the top of the file:
#import <Twitter/Twitter.h>
That’s all we need in order for our file to see the Twitter API, let’s now add some code so we display the tweet sheet when the user taps the Tweet button. Go to your tweetTapped method add the following code:
- (IBAction)tweetTapped:(id)sender {
{
    if ([TWTweetComposeViewController canSendTweet])
    {
        TWTweetComposeViewController *tweetSheet =
            [[TWTweetComposeViewController alloc] init];
        [tweetSheet setInitialText:
            @"Tweeting from iOS 5 By Tutorials! :)"];
	    [self presentModalViewController:tweetSheet animated:YES];
    }
    else
    {
        UIAlertView *alertView = [[UIAlertView alloc]
            initWithTitle:@"Sorry"
            message:@"You can't send a tweet right now, make sure
                your device has an internet connection and you have
                at least one Twitter account setup"
            delegate:self
            cancelButtonTitle:@"OK"
            otherButtonTitles:nil];
        [alertView show];
    }
}
Yes, believe it or not that’s all we need to do in order to send a tweet (mind you we haven’t included any links or images), it doesn’t get any easier than this! Let’s go over the code we added to our tweetTapped method.
First thing we do is check to see if we can send a tweet, we accomplish this by calling the canSendTweet class method on TWTweetComposeViewController. This method will return NO if the device cannot access the network or if the user hasn’t setup a Twitter account yet.
If our application can send a tweet then all we do is create an instance of the TWTweetComposeViewController, use the setInitialText: method to load up the tweet sheet with some default text and present it modally. If we cannot send a tweet then we just show a simple alert view to provide the user with feedback.
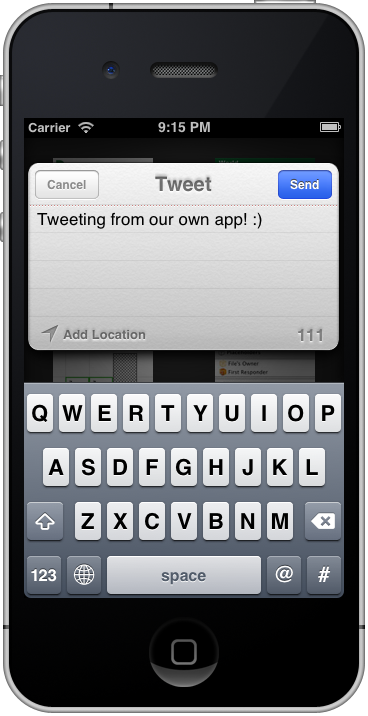
Build and run your project, touch the Tweet button and this is what we get:
Awesome, huh? If you get the Alert dialog, be sure you have your Twitter account set up by loading the Settings app and selecting the Twitter category.
There is one thing worth mentioning and that is that the TWTweetComposeViewController has a completion handler property which you can use to pass in your own block of code once the tweet sheet is dismissed.
By default the completion handler dismisses the modal tweet sheet, though you can customize it to do whatever you need to. Just keep in mind that if you do implement your own completion handler then you need to dismiss the tweet sheet yourself.
Adding Images and Links
Now let’s implement the logic to allow the user to select one of the tutorials and have its image and link added to the tweet. Add the following category before the implementation inside ViewController.m:
@interface ViewController ()
@property (strong, nonatomic) NSString *imageString;
@property (strong, nonatomic) NSString *urlString;
- (void)clearLabels;
@end
All we are doing here is creating two private string properties to store the image’s name and the link to the tutorial website as well as a private method to set our labels’ text color back to white.
Then add the synthesize statements for these variables:
@synthesize imageString = _imageString;
@synthesize urlString = _urlString;
And set the properties to nil inside viewDidUnload:
self.imageString = nil;
self.urlString = nil;
Next, implement the clearLabels method to set the text color of each label to white:
- (void)clearLabels
{
    self.button1Label.textColor = [UIColor whiteColor];
    self.button2Label.textColor = [UIColor whiteColor];
    self.button3Label.textColor = [UIColor whiteColor];
    self.button4Label.textColor = [UIColor whiteColor];
}
Yup, that’s all this private method will do for us.
The way we are going to implement this is as follows: when the user selects a tutorial we store its image name and link within our private properties and we set the label’s color to red in order to indicate the current selection.
If the user selects another tutorial then we just set all the labels back to white, store the new image and url and set it’s label to red. Add the following code for your button tapped methods:
- (IBAction)button1Tapped:(id)sender {

    [self clearLabels];

    self.imageString = @"CheatSheetButton.png";
    self.urlString = @"http://www.raywenderlich.com/4872/
        objective-c-cheat-sheet-and-quick-reference";

    self.button1Label.textColor = [UIColor redColor];
}

- (IBAction)button2Tapped :(id)sender {

    [self clearLabels];

    self.imageString = @"HorizontalTablesButton.png";
    self.urlString = @"http://www.raywenderlich.com/4723/
        how-to-make-an-interface-with-horizontal-tables-like-the-
        pulse-news-app-part-2";

    self.button2Label.textColor = [UIColor redColor];
}

- (IBAction)button3Tapped:(id)sender {

    [self clearLabels];

    self.imageString = @"PathfindingButton.png";
    self.urlString = @"http://www.raywenderlich.com/4946/
        introduction-to-a-pathfinding";

    self.button3Label.textColor = [UIColor redColor];
}

- (IBAction)button4Tapped:(id)sender {

    [self clearLabels];

    self.imageString = @"UIKitButton.png";
    self.urlString = @"http://www.raywenderlich.com/4817/
        how-to-integrate-cocos2d-and-uikit";

    self.button4Label.textColor = [UIColor redColor];
}
In each of the methods we just clear the labels, set the image string to the appropriate image, set the URL to the corresponding tutorial and change the label’s text color to red. We could have implemented things a bit differently in order to avoid writing the same code in all 4 methods but since this example is very simple, we’ll leave it at that.
Now go over to the tweetTapped method and add the following code right before the call to [self presentModalViewController:…]:
if (self.imageString)
{
    [tweetSheet addImage:[UIImage imageNamed:self.imageString]];
}

if (self.urlString)
{
    [tweetSheet addURL:[NSURL URLWithString:self.urlString]];
}
We just added two if statements to check whether we have an image and url, if we do then we just add them to our tweet sheet by using the addImage: and addURL: methods respectively.
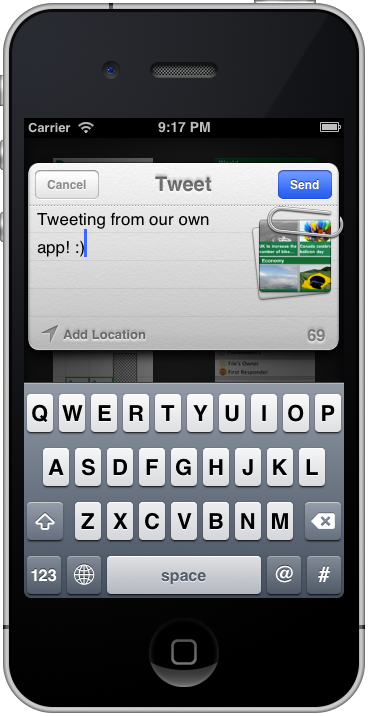
Once again, this is all we need! Go ahead and run your project; this time make sure you select one of the tutorials and hit the Tweet button. This is what we get:
If you look at the tweet sheet you will notice a paper clip with 2 attachments, one is the link to our website and the other is the image we added. When the user sees the Tweet, they’ll see two URLs in the tweet – one for the image, and one for the link. Try it out and see what it looks like!
And with that my friends, we are done!


