Building Games in Flutter with Flame: Getting Started
Learn how to build a beautiful game in Flutter with Flame. In this tutorial, you’ll build a virtual world with a movable and animated character. By Vincenzo Guzzi.
Sign up/Sign in
With a free Kodeco account you can download source code, track your progress, bookmark, personalise your learner profile and more!
Create accountAlready a member of Kodeco? Sign in
Sign up/Sign in
With a free Kodeco account you can download source code, track your progress, bookmark, personalise your learner profile and more!
Create accountAlready a member of Kodeco? Sign in
Contents
Building Games in Flutter with Flame: Getting Started
30 mins
- Getting Started
- The Flame Game Engine
- Setting up Your Flame Game Loop
- Creating Your Player
- Adding Movement to Your Player
- Executing on Player Movement
- Animating Your Player
- What Is a Sprite Sheet?
- Adding Sprite Sheet Animations to Your Player
- Adding a World
- Adding World Collision to Your Game
- Creating Tile Maps
- Creating World Collision in RayWorld
- Bonus Section: Keyboard Input
- Where to Go From Here?
Adding Movement to Your Player
To move your player, you first need to know what direction the joypad is dragged.
The joypad direction is retrieved from the Joypad Flutter widget that lives outside the game loop. The direction then gets passed to the GameWidget in main_game_page.dart. In turn, this can pass it to Player, which can react to the direction change with movement.
Start with the Player.
Open your player.dart file and add the import for direction:
import '../helpers/direction.dart';
Then, declare a Direction variable in the top of Player and instantiate it to Direction.none:
Direction direction = Direction.none;
The joypad will change to either up, down, left, right, or none. With each new position, you want to update the direction variable.
Open ray_world_game.dart and add a function to update the direction of your player in RayWorldGame:
void onJoypadDirectionChanged(Direction direction) {
   _player.direction = direction;
}
Also add the direction import to the top of ray_world_game.dart:
import '../helpers/direction.dart';
Now, head back to main_game_page.dart and replace // TODO 2 with a call to your game direction function:
game.onJoypadDirectionChanged(direction);
And voilà, you’ve passed a user input from a Flutter widget into your game and player components.
Now that your player component knows what direction it should be moving in, it’s time to execute on that information and actually move your player!
Executing on Player Movement
To start acting on the information passed through to the player component, head back to player.dart and add these two functions:
@override
 void update(double delta) {
   super.update(delta);
   movePlayer(delta);
 }

 void movePlayer(double delta) {
   // TODO
 }
update is a function unique to Flame components. It will be called each time a frame must be rendered, and Flame will ensure all your game components update at the same time. The delta represents how much time has passed since the last update cycle and can be used to move the player predictably.
Replace // TODO in the movePlayer function with logic to read the direction:
switch (direction) {
  case Direction.up:
    moveUp(delta);
    break;
  case Direction.down:
    moveDown(delta);
    break;
  case Direction.left:
    moveLeft(delta);
    break;
  case Direction.right:
    moveRight(delta);
    break;
  case Direction.none:
    break;
}
movePlayer will now delegate out to other more specific methods to move the player. Next, add the logic for moving the player in each direction.
Start by adding a speed variable to the top of your Player class:
final double _playerSpeed = 300.0;
Now, add a moveDown function to the bottom of your Player class:
void moveDown(double delta) {
   position.add(Vector2(0, delta * _playerSpeed));
}
Here, you update the Player position value — represented as an X and a Y inside Vector2 — by your player speed multiplied by the delta.
You can picture your game view drawn on a 2-D plane like so:
If the game view is 2500×2500 pixels in diameter, your player starts in the middle at the coordinates of x:1250, y:1250. Calling moveDown adds about 300 pixels to the player’s Y position each second the user holds the joypad in the down direction, causing the sprite to move down the game viewport.
You must add a similar calculation for the other three missing methods: moveUp, moveLeft and moveRight.
See if you can add these methods yourself, thinking about how your sprite moves on a 2-D plane.
Need help? Just open the spoiler below.
[spoiler title="Solution"]
void moveUp(double delta) {
  position.add(Vector2(0, delta * -_playerSpeed));
}

void moveLeft(double delta) {
  position.add(Vector2(delta * -_playerSpeed, 0));
}

void moveRight(double delta) {
  position.add(Vector2(delta * _playerSpeed, 0));
}
[/spoiler]
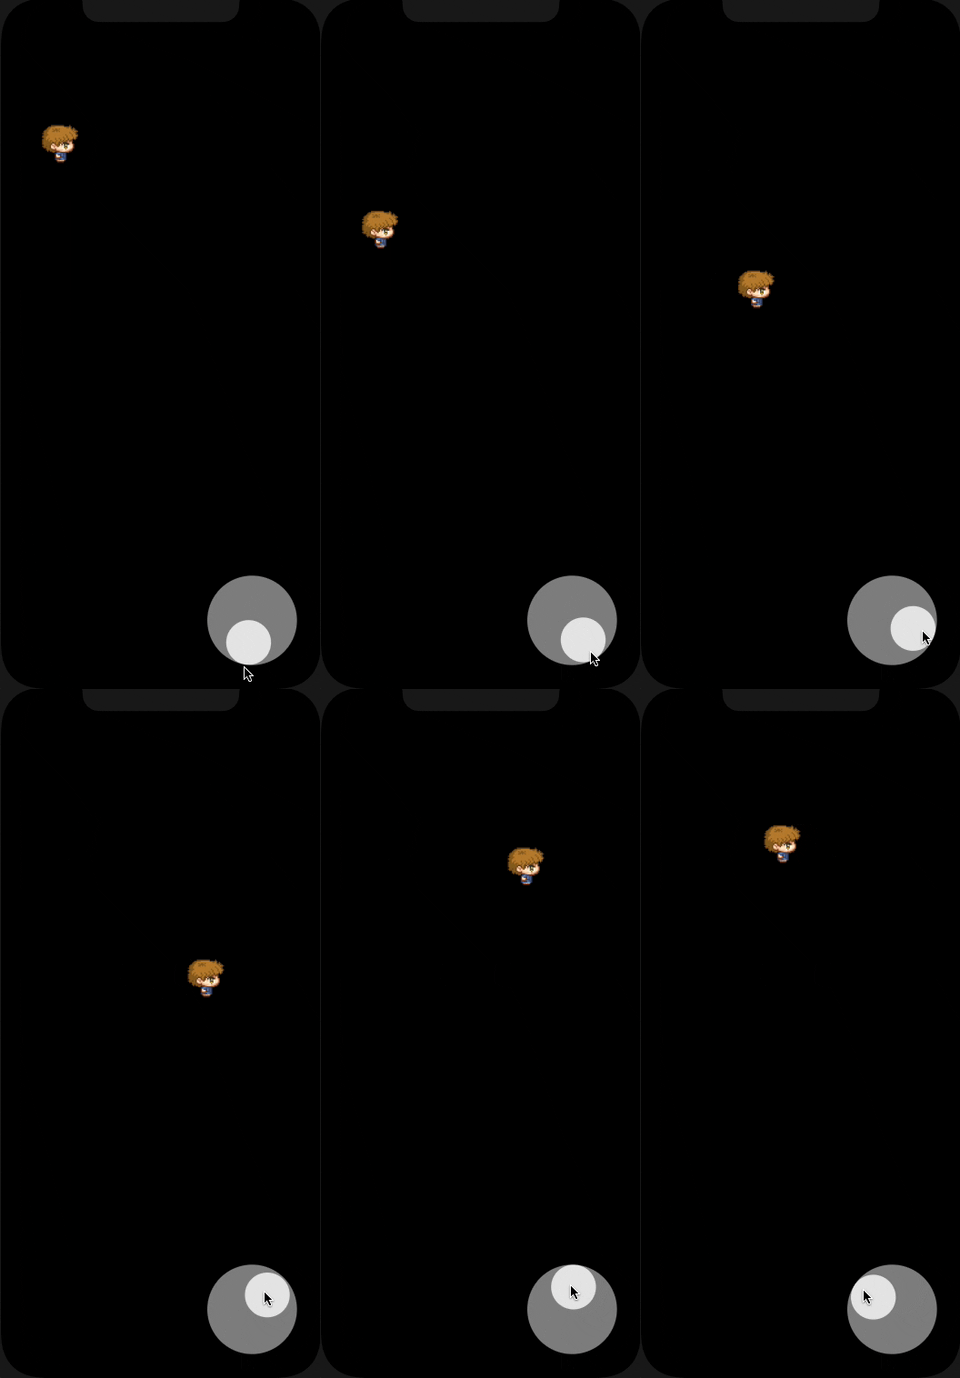
Run your application once more, and your little dude will move around the screen in all directions based on your joypad input.
Animating Your Player
Your player is moving around the screen like a boss – but it looks a bit off because the player is always facing in the same direction! You’ll fix that next using sprite sheets.
What Is a Sprite Sheet?
A sprite sheet is a collection of sprites in a single image. Game developers have used them for a long time to save memory and ensure quick loading times. It’s much quicker to load one image instead of multiple images. Game engines like Flame can then load the sprite sheet and render only a section of the image.
You can also use sprite sheets for animations by lining sprites up next to each other in animation frames so they can easily be iterated over in the game loop.
This is the sprite sheet you’ll use for your playable character in RayWorld:
Each row is a different animation set and simulates moving left, right, up and down.
Adding Sprite Sheet Animations to Your Player
In player.dart, change your Player class extension from SpriteComponent to SpriteAnimationComponent. With this new type of component, you’ll be able to set an active animation, which will run on your player Sprite.
Import the package sprite.dart. You’ll need this for setting up a SpriteSheet:
import 'package:flame/sprite.dart';
Add these six new variables to your Player class:
final double _animationSpeed = 0.15;
late final SpriteAnimation _runDownAnimation;
late final SpriteAnimation _runLeftAnimation;
late final SpriteAnimation _runUpAnimation;
late final SpriteAnimation _runRightAnimation;
late final SpriteAnimation _standingAnimation;
Replace the onLoad method with new logic to load your animations:
@override
 Future<void> onLoad() async {
   _loadAnimations().then((_) => {animation = _standingAnimation});
}
_loadAnimations will be an async call. This method waits for the animations to load and then sets the sprite’s first active animation to _standingAnimation.
Create the _loadAnimations method and instantiate your player SpriteSheet:
Future<void> _loadAnimations() async {
   final spriteSheet = SpriteSheet(
     image: await gameRef.images.load('player_spritesheet.png'),
     srcSize: Vector2(29.0, 32.0),
   );

   // TODO down animation

   // TODO left animation

   // TODO up animation

   // TODO right animation

   // TODO standing animation
 }
This code loads a sprite sheet image from your Flutter assets folder that you saw previously.
The image is 116×128 pixels, and each frame is 29×32 pixels. The latter is what you’re setting the srcSize SpriteSheet parameter to. Flame will use these variables to create sprites from the different frames on your sprite sheet image.
Replace // TODO down animation with logic to initialize _runDownAnimation:
_runDownAnimation =
       spriteSheet.createAnimation(row: 0, stepTime: _animationSpeed, to: 4);
This code sets up an animation that loops across the first row of the player sprite sheet from the first frame until the fourth. It’s effectively a “while” loop that repeats from 0 until less than 4, where the sprite viewport moves in 32 pixel increments across 4 rows.
Using this logic, initialize the rest of your animation variables.
Need help? Reveal the spoiler below.
[spoiler title="Solution"]
_runLeftAnimation =
       spriteSheet.createAnimation(row: 1, stepTime: _animationSpeed, to: 4);

_runUpAnimation =
       spriteSheet.createAnimation(row: 2, stepTime: _animationSpeed, to: 4);

_runRightAnimation =
       spriteSheet.createAnimation(row: 3, stepTime: _animationSpeed, to: 4);

_standingAnimation =
       spriteSheet.createAnimation(row: 0, stepTime: _animationSpeed, to: 1);
[/spoiler]
Update your movePlayer function to assign the correct animations based on the player’s direction:
void movePlayer(double delta) {
   switch (direction) {
     case Direction.up:
       animation = _runUpAnimation;
       moveUp(delta);
       break;
     case Direction.down:
       animation = _runDownAnimation;
       moveDown(delta);
       break;
     case Direction.left:
       animation = _runLeftAnimation;
       moveLeft(delta);
       break;
     case Direction.right:
       animation = _runRightAnimation;
       moveRight(delta);
       break;
     case Direction.none:
       animation = _standingAnimation;
       break;
   }
 }
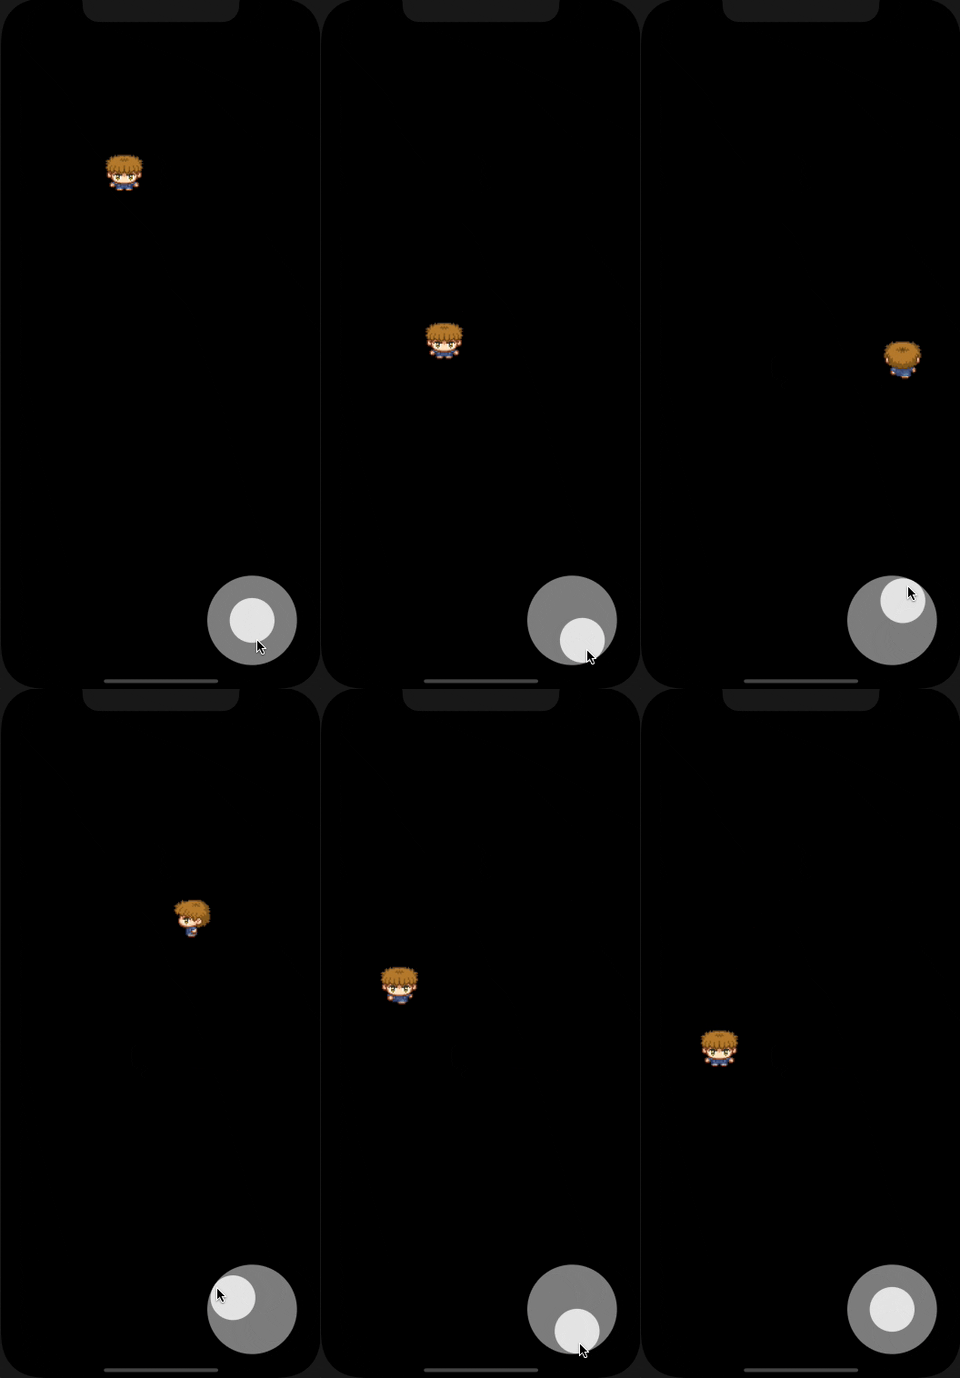
Build and run, and you’ll see your playable character has come to life as they run in each direction.
At this point, you have the fundamentals of a game in place: a playable character with user input and movement. The next step is to add a world for your player to move around in.


