Developing and Testing Server-Side Swift with Docker and Vapor
Use Docker to develop and test your Vapor apps and learn to use Docker Compose to run different services, which include a database. By Natan Rolnik.
Sign up/Sign in
With a free Kodeco account you can download source code, track your progress, bookmark, personalise your learner profile and more!
Create accountAlready a member of Kodeco? Sign in
Sign up/Sign in
With a free Kodeco account you can download source code, track your progress, bookmark, personalise your learner profile and more!
Create accountAlready a member of Kodeco? Sign in
Contents
Developing and Testing Server-Side Swift with Docker and Vapor
25 mins
- Getting Started
- The Server Info Endpoint
- Removing APIs That are Unavailable on Linux
- The Dockerfile
- Creating the Development Dockerfile
- Building the Image
- Running the Image
- Starting and Attaching to a Container
- Using Docker Compose to Configure PostgreSQL
- Creating the Docker Compose File
- Changing the App to Use PostgreSQL
- Building and Running with Docker Compose
- Running Your App’s Tests
- Creating the Testing Dockerfile
- Creating the Testing Docker Compose File
- Running Tests with Docker
- Where to Go From Here
Many developers who write Server-Side Swift applications come from an iOS or macOS-oriented background. For that reason, their environment is usually macOS itself, but the vast majority of servers run on Linux. When building web apps with Swift, one of your jobs is to make sure this difference doesn’t cause issues when you deploy your work.
To avoid this alignment problem, you can use containerization: a technique to package software, containing the operating system and the required libraries so they run consistently regardless of the hardware infrastructure. Docker is the most popular containerization tool. Docker containers use a fresh, lean and isolated environment, also known as images, that behave identically independent of the host machine’s OS.
By using Docker during development, you can rest assured that what runs in the local image of your app is what will run on the server. “It works my machine” no more!
In this tutorial, you’ll build a Vapor app and learn how to:
- Run the app on your own machine with Docker, using a Linux image.
- Write Swift code that’s conditional to a specific platform.
- Run different services using Docker Compose, including a database that the main app depends on.
- Run your app’s tests within the Docker image.
download from Docker’s website. Check out this great tutorial by Audrey Tam if you want to read more about the basics of Docker on macOS.
Getting Started
Start by clicking the Download Materials button at the top or bottom of this tutorial. This folder contains the files you’ll use to build the Vapor app.
The sample project is the TIL app: a web app and API for searching and adding acronyms. It appears in our Server-Side Swift book and video course.
Unzip the file, open Terminal and navigate into the the starter folder. Now run this command:
swift run
This will fetch all the dependencies and run the Vapor app.
While the app is compiling, explore the project. Take a look at the configure.swift file, as well as the routes declared in routes.swift. Then, look at the files within the Controllers, Models and Migrations folders.
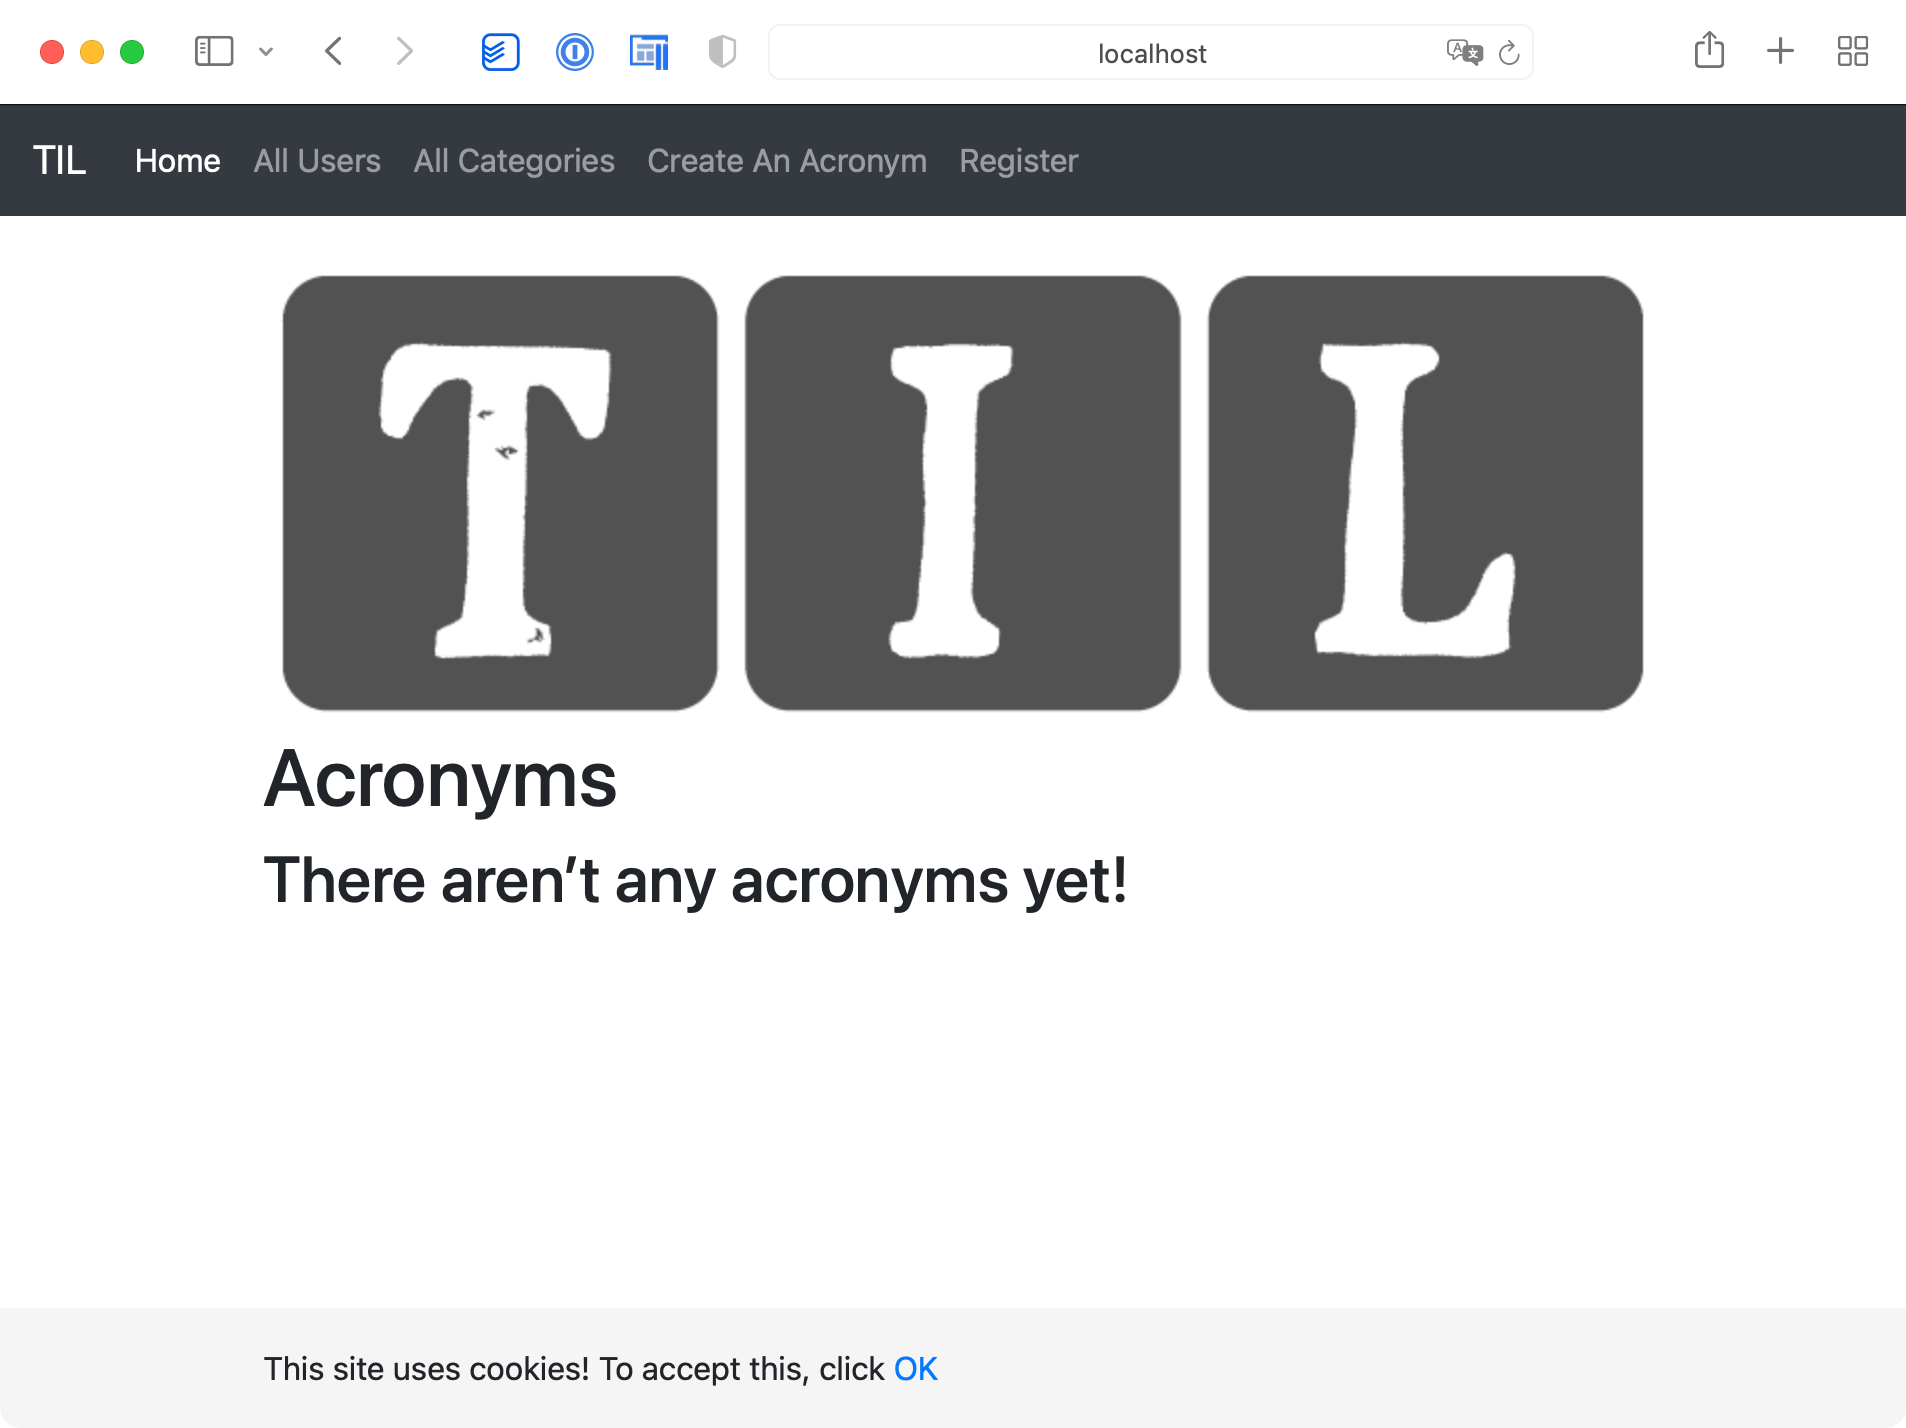
Once the app is running, visit http://localhost:8080 in your browser and you’ll see the TIL home page.
The TIL home page.

The TIL home page.
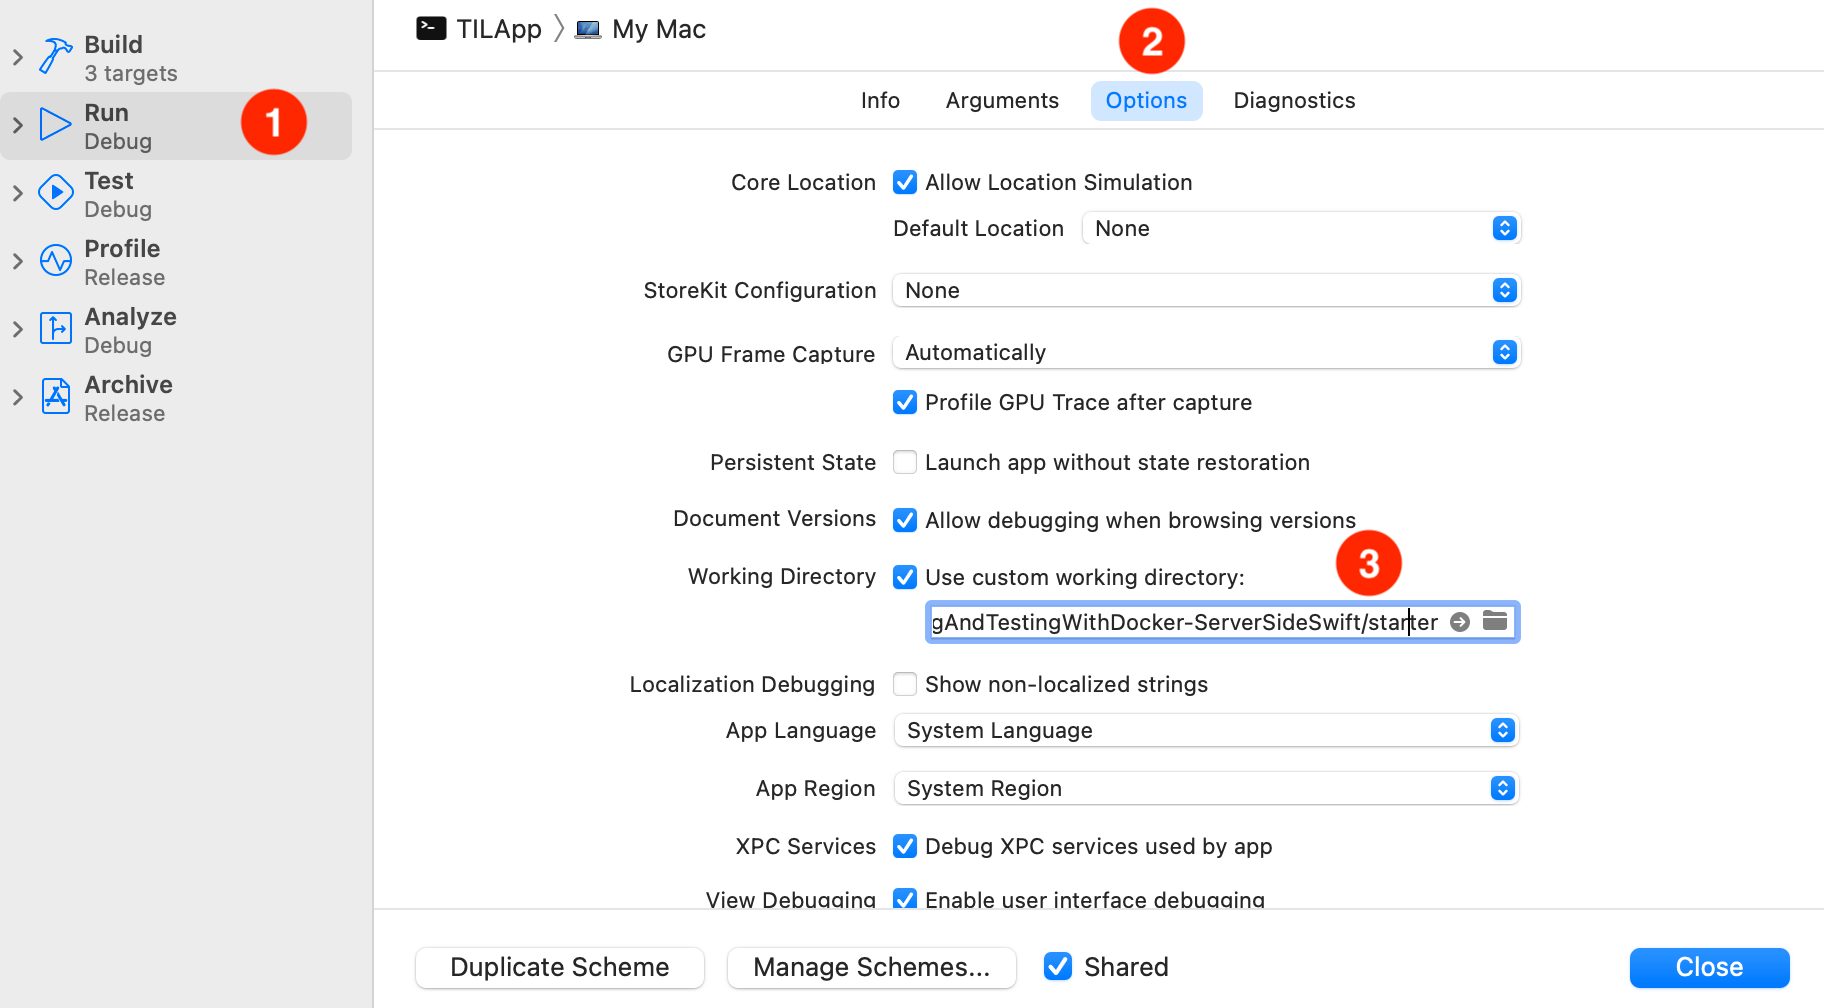
Choose the starter project’s folder as the app’s working directory.
- Select Run from the left pane.
- Click the Options tab.
- Check the Use custom working directory box.
- Set the directory to
~/Downloads/DevelopingAndTestingWithDocker-ServerSideSwift/starter, or to the directory where this tutorial’s starter project is.
Edit the app scheme by clicking the TILApp scheme next to the play and stop buttons, and then select Edit Scheme. Now, do the following (you can reference the image below for help):
- Select Run from the left pane.
- Click the Options tab.
- Check the Use custom working directory box.
- Set the directory to
~/Downloads/DevelopingAndTestingWithDocker-ServerSideSwift/starter, or to the directory where this tutorial’s starter project is.

Choose the starter project’s folder as the app’s working directory.

Choose the starter project’s folder as the app’s working directory.
The Server Info Endpoint
In the controller’s directory, there is a file named ServerInfoController.swift, which declares a controller with the same name. It contains one single endpoint: /server-info. To check what it returns, run the following command in the Terminal:
curl http://localhost:8080/server-info
This endpoint returns a JSON object containing three values: the server start date, the uptime and the platform the server is running on. Notice how the platform in this response is macOS.
The infrastructure of the project is working. Now it’s time to tackle the first objective: run code that’s conditional to a specific platform.
Removing APIs That are Unavailable on Linux
To make sure your code runs smoothly on Linux, you need to remove the APIs that aren’t available on that platform. The function in ServerInfoController that calculates the server uptime uses DateComponentsFormatter, which is currently in Swift 5.5 but is unavailable on Linux. Therefore, trying to compile the app on Linux as is will fail.
One way to prevent this is to avoid using DateComponentsFormatter. Open the ServerInfoController.swift file. Scroll to uptime(since date: Date) and replace the existing implementation with the following code:
let timeInterval = Date().timeIntervalSince(date)
let duration: String

if timeInterval > 86_400 {
    duration = String(format: "%.2f d", timeInterval/86_400)
} else if timeInterval > 3_600 {
    duration = String(format: "%.2f h", timeInterval/3_600)
} else {
    duration = String(format: "%.2f m", timeInterval/60)
}

return duration
The code above formats a time interval manually, instead of relying on DateComponentsFormatter.
Next, change the returned platform name ServerInfoResponse. Remove the following line:
private let platform = "macOS"
And replace it with:
  #if os(Linux)
  private let platform = "Linux"
  #else
  private let platform = "macOS"
  #endif
The code above uses compiler directives to specify which code should compile in each platform. Notice that these change at compile time.
Now, the app is ready to run on Linux using Docker.
The Dockerfile
It’s time to create the app’s Dockerfile. This file is like a recipe that Docker reads: it tells Docker how to assemble the image, what actions and commands it should execute and how to start your app or service. This way, when running the build command, Docker can deterministically generate the same image in different host machines. Even better: You can build the image once, upload it to a container registry and use it to spin up new servers and more. You can automate this process with a few steps as you would in a Continuous Integration environment.
The Dockerfile. It’s just like a recipe, telling Docker what to do at each step.

The Dockerfile. It’s just like a recipe, telling Docker what to do at each step.