Using CI_PRINT_TREE
CI_PRINT_TREE is a debugging feature based on the same infrastructure as Core Image Quick Look. It has several modes and operations.
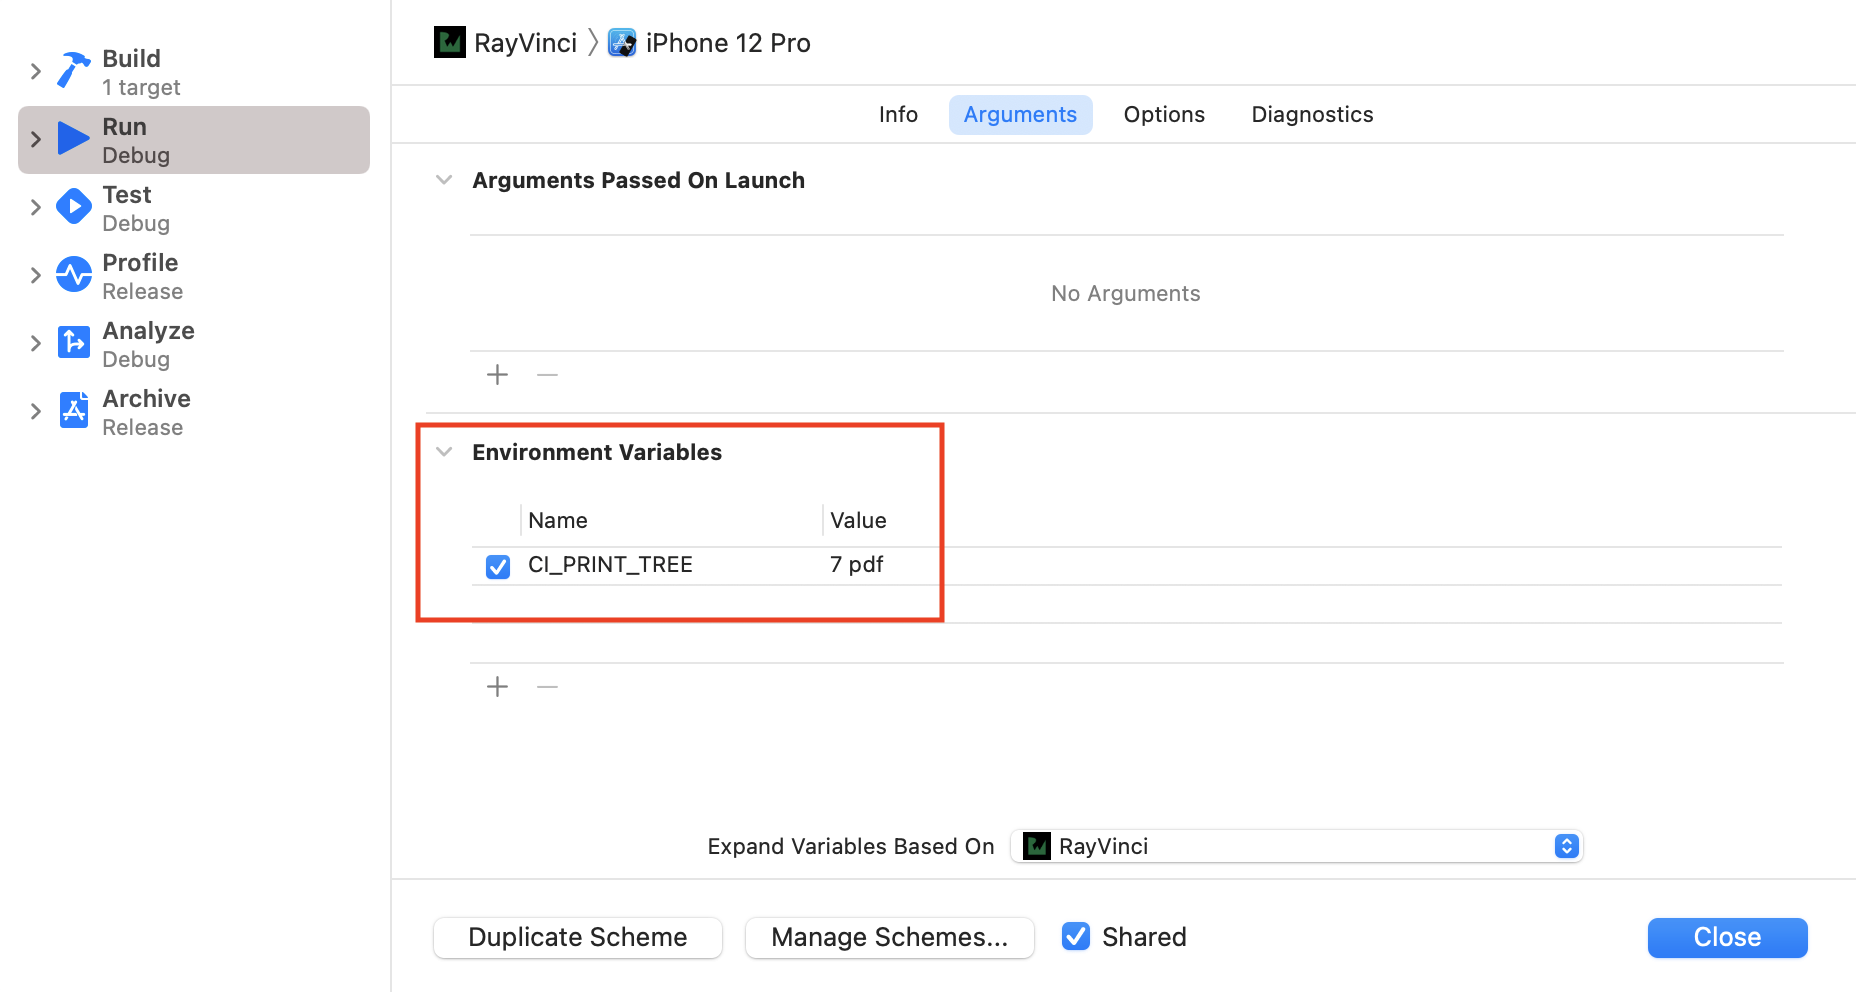
Select and Edit the RayVinci scheme. Select the Run tab and add CI_PRINT_TREE as a new environment variable with a value of 7 pdf.

The value of CI_PRINT_TREE takes the form graph_type output_type options.
graph_type denotes the stages of the Core Image render. Here are the values you can specify:
-
1: The initial graph showing the color spaces.
-
2: An optimized graph showing exactly how Core Image optimizes.
-
4: A concatenated graph showing how much memory you need.
-
7: Verbose logging. This prints all the above graphs.
For output_type, you can specify either PDF or PNG. It saves the documents to a temporary directory.
Build and run. Select “The Last Supper” in the simulator. Now, open the temporary directory on your Mac by navigating to /tmp using the terminal.
You’ll see all the graphs as PDF files. Open one of the files with _initial_graph.pdf as the suffix.

The input is at the bottom, and the output is at the top. The red nodes represent the color kernels, while the green nodes represent the warp kernels. You’ll also see each step’s ROI and extent.
To learn more about the various options you can set for CI_PRINT_TREE, check out this WWDC session: Discover Core Image debugging techniques.
Where to Go From Here?
You can download the completed version of the project using the Download Materials button at the top or bottom of this tutorial.
In this tutorial, you learned to create and apply custom filters using Metal-based Core Image kernels. To learn more, check out these WWDC videos:
You can also refer to Apple’s guide, Metal Shading Language for Core Image Kernels.
I hope you enjoyed this tutorial. If you have any questions or comments, please join the forum discussion below.

