Make Your First Android App: Part 3/3
Build upon the foundations of the first two part on how to make your first Android app and create a book search application using web APIs. By Matt Luedke.
The Up and Back Buttons
You may have noticed, or simply used it without really thinking about it, the Up button in many Android apps. The proper Android design of the Up and Back buttons is well-documented here and is worth a read, but it all begins with enabling the button as you just did.
The other steps for enabling the Up button take place in your manifest. Open AndroidManifest.xml and add the launchMode attribute to MainActivity so that it looks something like this:
<activity
    android:name="com.example.omgandroid.MainActivity"
    android:label="@string/app_name"
    android:launchMode="singleTop">
Note: Depending on your Android Studio version, the package name you selected when you created the project, and a few other factors, the above might not match what you see in your own AndroidManifest.xml file exactly. The only thing you need to really worry about is adding the new launchMode attribute as shown above. You can leave the rest as is.
Note: Depending on your Android Studio version, the package name you selected when you created the project, and a few other factors, the above might not match what you see in your own AndroidManifest.xml file exactly. The only thing you need to really worry about is adding the new launchMode attribute as shown above. You can leave the rest as is.
So, do you remember my whole spiel about how the manifest is “the boss” who takes in “jobs” in the form of Intents and checks if there is a team member right for the task? Normally, the manifest would arrange for the system to start a brand-new instance of that Activity every time.
But, by setting the launchMode attribute to singleTop, you’re telling the manifest to use an already-existing instance of that Activity, if possible. That way, when you use either the Back or Up button to return to the main screen, your most recent search results will still be there and you won’t have to start from scratch!
Next, add a definition for the DetailActivity to the manifest, immediately after the one for MainActivity:
<activity
    android:name=".DetailActivity"
    android:label="@string/activity_details"
    android:parentActivityName=".MainActivity">
    <meta-data
        android:name="android.support.PARENT_ACTIVITY"
        android:value=".MainActivity"/>
</activity>
This looks pretty similar to the definition for MainActivity, except for the stuff about “parent activity.” Setting the parent activity tells the manifest which activity should be displayed when there’s a request to go up from DetailActivity.
An Intent to Show the Detail Activity
Now that you’ve set up your manifest to be aware of your DetailActivity, you need to send it an Intent to start it! This Intent is going to originate from the MainActivity, when the user selects a book from the list.
If you recall, the method that executes when a cell is selected from the ListView is onItemClick in MainActivity.java. It used to log information originally but now is empty. Add the following code to it:
	// 12. Now that the user's chosen a book, grab the cover data
	JSONObject jsonObject = (JSONObject) mJSONAdapter.getItem(position);
	String coverID = jsonObject.optString("cover_i","");

	// create an Intent to take you over to a new DetailActivity
	Intent detailIntent = new Intent(this, DetailActivity.class);

	// pack away the data about the cover
	// into your Intent before you head out
	detailIntent.putExtra("coverID", coverID);

	// TODO: add any other data you'd like as Extras

	// start the next Activity using your prepared Intent
	startActivity(detailIntent);
Here, you create an Intent to take you from where you are now (this) to an instance of DetailActivity. But before you fire off the command using startActivity, there’s one more thing to remember to pack away.
As you’ve previously seen when you created setShareIntent, you can pack “extras” into an Intent in the form of key-value pairs. Since your DetailActivity needs to know the cover ID to display, you extract that ID from the book’s JSON data and send it along.
TODO reminder for an optional challenge to you. If you want your DetailActivity to do anything more than show an image, you should send along additional data here.Build and run your app, and you will be able to click on a list item from your search results to see your new DetailActivity! You can also navigate back to the main screen using either the Up or Back button.

Right now, you only see the placeholder image, but you know where this is headed :]
Add the following variables at the beginning of DetailActivity.java (right after the class definition line):
	private static final String IMAGE_URL_BASE = "http://covers.openlibrary.org/b/id/"; // 13
	String mImageURL; // 13
This sets the base URL for cover images on the Open Library API. You also create mImageURL to hang onto any specific URL so that different methods within your Activity can use it without needing to create the image URL all over again each time.
Next, add the following code to the end of onCreate:
		// 13. unpack the coverID from its trip inside your Intent
		String coverID = this.getIntent().getExtras().getString("coverID");

		// See if there is a valid coverID
		if (coverID.length() > 0) {

			// Use the ID to construct an image URL
			mImageURL = IMAGE_URL_BASE + coverID + "-L.jpg";

			// Use Picasso to load the image
			Picasso.with(this).load(mImageURL).placeholder(R.drawable.img_books_loading).into(imageView);
		}
The above code digs into the Intent that brought you to this Activity and sees if it contains a String with the name coverID. If so, you proceed to use Picasso to download the image, just as you did in all the row cells. You display a “loading” image until the desired image is ready.
Build and run, and you’ll see the actual cover for the book you chose from the list!

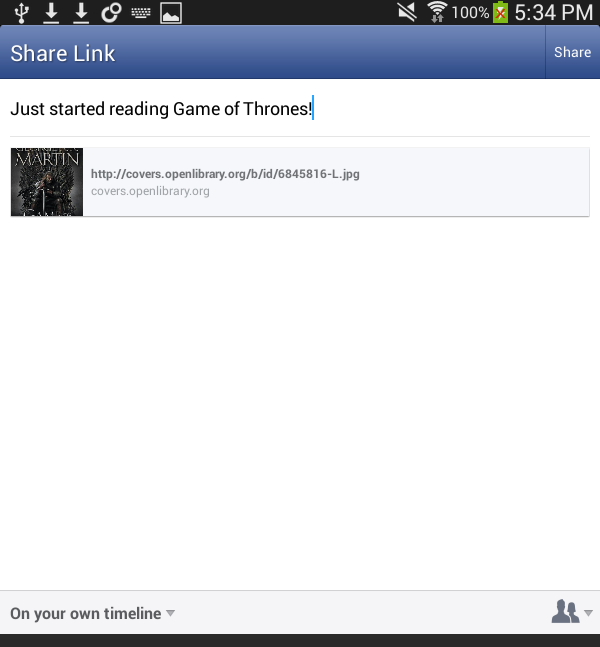
Sharing the Image
The last thing to do is allow your users to share these cover images. You’ve already seen sharing in action and the code is almost identical here.
First, add another variable to DetailActivity.java:
ShareActionProvider mShareActionProvider; // 14
This is just another variable to hold a reference to the ShareActionProvider for your Activity.
Next, add this new method to the class:
	private void setShareIntent() {

		// create an Intent with the contents of the TextView
		Intent shareIntent = new Intent(Intent.ACTION_SEND);
		shareIntent.setType("text/plain");
		shareIntent.putExtra(Intent.EXTRA_SUBJECT,
			"Book Recommendation!");
		shareIntent.putExtra(Intent.EXTRA_TEXT, mImageURL);

		// Make sure the provider knows
		// it should work with that Intent
		mShareActionProvider.setShareIntent(shareIntent);
	}
This should look very familiar, as it is nearly the same as the method you added to MainActivity earlier. The only difference is the use of mImageURL as the text to be shared.
One final thing left to do – you need to add the share button to the Action Bar. You can again reuse code from MainActivity. Add this method to DetailActivity.java:
@Override
public boolean onCreateOptionsMenu(Menu menu) {

	// Inflate the menu
	// this adds items to the action bar if it is present.
	getMenuInflater().inflate(R.menu.main, menu);

	// Access the Share Item defined in menu XML
	MenuItem shareItem = menu.findItem(R.id.menu_item_share);

	// Access the object responsible for
	// putting together the sharing submenu
	if (shareItem != null) {
		mShareActionProvider
			= (ShareActionProvider) shareItem.getActionProvider();
	}

	setShareIntent();

	return true;
}
Here, you could potentially use different menu XML files to populate the Action Bar on different screens/activities. But for your purposes, the same menu/main.xml file will do.
Build and run your app, and you’ll have a pretty powerful app! Your app now takes in your search query, returns a list of books,allows you to take a closer look at a book cover, and share that cover image with friends!