Gradle Tutorial for Android: Getting Started
In this Gradle Build Script tutorial you’ll learn the basic syntax in build.gradle files generated by Android Studio. You’ll also learn about gradlew tasks, build types, product flavors, build variants, and how to add additional information such as the date to the APK file name. By Irina Galata.
Sign up/Sign in
With a free Kodeco account you can download source code, track your progress, bookmark, personalise your learner profile and more!
Create accountAlready a member of Kodeco? Sign in
Contents
Gradle Tutorial for Android: Getting Started
35 mins
- What is Gradle?
- Getting Started
- Project-level build.gradle
- Module-level build.gradle
- Finally, settings.gradle
- Groovy vs. Kotlin in Gradle
- Why Kotlin
- Mastering the build: Gradle Commands
- What is gradlew
- gradlew tasks
- gradlew assemble
- gradlew lint
- Managing Dependencies
- Gradle Dependency Configurations
- Ready to Publish: Working with Product Flavors and Build Types
- Build Types
- Build Signing
- Build Flavors
- What is a Build Variant
- Creating Tasks
- Creating Custom Plugins
- Where to Go From Here
In this tutorial, you’ll gain a better understanding of what Gradle is, and how you can use Gradle to supercharge your builds. By the end of this tutorial you should be able to
- Build your Android apps from the command-line
- Read through a Gradle build file
- Create your own Gradle plugin
- Create build flavors for profit!
What is Gradle?
Gradle is an open source build automation system. It brings the convenience of a Groovy-based DSL along with the advantages of Ant and Maven. With Gradle, you can easily manipulate the build process and its logic to create multiple versions of your app. It’s much easier to use and a lot more concise and flexible when compared to Ant or Maven alone.
So, there was little wonder why during Google I/O in May 2013, the Android Gradle plugin was introduced as the build tool built into the first preview of Android Studio :]
Getting Started
Download SocializifyStarter, the starter project for this tutorial. At minimum, you’ll need Android Studio 3.0 installed on your computer. Open the project in Android Studio, and you’ll be prompted to setup the Gradle wrapper:
Choose OK to configure the wrapper, which you’ll learn more about later in the tutorial.
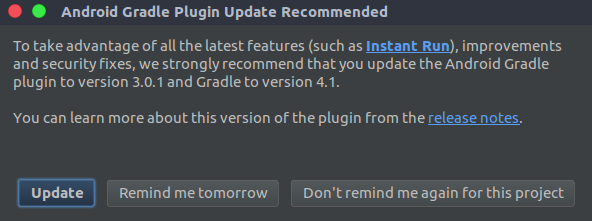
Depending on which version of Android Studio you’re running, you may also be prompted to update the Gradle plugin:
Choose Update to finish opening the project in Android Studio.
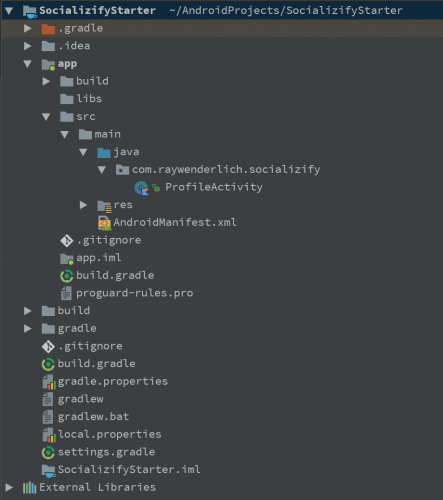
Before starting working with the project, let’s review its structure in the Project pane in Android Studio:

Pay attention to the files with the green Gradle icon and .gradle extension. These files are generated by Android Studio automatically during project creation. They are responsible for the processing of your project’s build. They contain the necessary info about the project structure, library dependencies, library versions, and the app versions you’ll get as a result of the build process.
Project-level build.gradle
Find the build.gradle file in the root directory of the project. It’s called a top-level (project-level) build.gradle file. It contains the settings which are applied to all modules of the project.
// 1
buildscript {
    // 2
    repositories {
        google()
        jcenter()
    }
    // 3
    dependencies {
        classpath 'com.android.tools.build:gradle:3.0.0'
        classpath 'org.jetbrains.kotlin:kotlin-gradle-plugin:1.1.51'
    }
}

// 4
allprojects {
    repositories {
        google()
        jcenter()
    }
}
Here’s what’s going on, step by step:
- In the
buildscriptblock you define settings needed to perform your project building. - In the
repositoriesblock you add names of the repositories that Gradle should search for the libraries you use. - The
dependenciesblock contains necessary plugin dependencies, in this case the Gradle and Kotlin plugins. Do not put your module dependencies in this block. - The structure of the
allprojectsblock is similar to thebuildscriptblock, but here you define repositories for all of your modules, not for Gradle itself. Usually you don’t define thedependenciessection forallprojects. The dependencies for each module are different and should reside in the module-level build.gradle.
Module-level build.gradle
Now go to the build.gradle file in the app module directory. It contains dependencies (libraries which a module relies on), and instructions for the build process. Each module defines its own build.gradle file.
// 1
apply plugin: 'com.android.application'
apply plugin: 'kotlin-android'
apply plugin: 'kotlin-android-extensions'

// 2
android {
    // 3
    compileSdkVersion 27
    // 4
    buildToolsVersion "26.0.2"
    // 5
    defaultConfig {
        // 6
        applicationId "com.raywenderlich.socializify"
        // 7
        minSdkVersion 21
        // 8
        targetSdkVersion 27
        // 9
        versionCode 1
        // 10
        versionName "1.0"
    }
}

// 11
dependencies {
    implementation fileTree(dir: 'libs', include: ['*.jar'])
    implementation 'org.jetbrains.kotlin:kotlin-stdlib-jre7:1.1.51'
    implementation 'com.android.support:appcompat-v7:27.0.1'
    implementation 'com.android.support.constraint:constraint-layout:1.0.2'
}
The code above does the following:
- Specifies a list of plugins needed to build the module. The
com.android.applicationplugin is necessary in order to setup the Android-specific settings of the build process. Here you can also usecom.android.libraryif you’re creating a library module. Thekotlin-androidandkotlin-android-extensionsplugins allow you to use the Kotlin language and the Kotlin Android extensions in your module. - In the
androidblock you place all platform-specific options of the module. - The
compileSdkVersionoption indicates the API level your app will be compiled with. In other words, you cannot use features from an API higher than this value. Here, you’ve set the value to use APIs from Android Oreo. - The
buildToolsVersionoption indicates the version of the compiler. From Gradle plugin 3.0.0 onward, this field is optional. If it is not specified, the Android SDK uses the most recent downloaded version of the Build Tools. - The
defaultConfigblock contains options which will be applied to all build versions (e.g., debug, release, etc) of your app by default. - The
applicationIdis the identifier of your app. It should be unique so as to successfully publish or update your app on Google Play Store. - In order to set the lowest API level supported, use
minSdkVersion. Your app will not be available in the Play Store for the devices running on lower API levels. - The
targetSdkVersionparameter defines the maximum API level your app has beeen tested on. That is to say, you’re sure your app works properly on the devices with this SDK version, and it doesn’t require any backward compatibility behaviors. The best approach is to thoroughly test an app using the latest API, keeping yourtargetSdkVersionvalue equal tocompileSdkVersion. -
versionCodeis a numeric value for the app version. -
versionNameis a user-friendly string for the app version. - The
dependenciesblock contains all dependencies needed for this module. Later in this tutorial, you’ll find out more about managing your project’s dependencies.

