Finding the Baseline Snapshots
SnapshotTesting stores your baseline snapshots right inside your project directory. This allows you to add your baseline snapshots to your project’s Git repository, so they’ll be accurate across different branches, and so you can share them with your teammates.
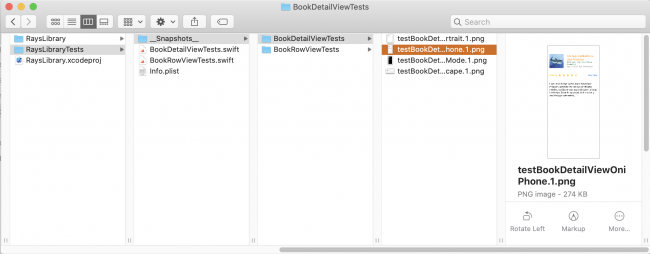
To find the baseline snapshots, open Finder and navigate to your project directory. Open RaysLibraryTests, then open _Snapshots_. Inside, you’ll see folders for each of the test files you created above. Inside those folders, you’ll find the baseline snapshot images that SnapshotTesting created for each of your test cases.
Open BookDetailViewTests and view each of the saved baseline snapshots. They will have the right screen dimension, orientation and traits specified in their respective test cases.

Note: As you add more tests to the project, the snapshots folder can grow in size. If you’re using version control, like Git, use
GIT LFS to save the snapshots in the repository.
You’ll find this immensely useful when a snapshot test fails and you have to debug the reason why.
Where to Go From Here?
Download the completed version of the project by clicking the Download Materials button at the top or bottom of this tutorial.
Continue learning by adding more tests to the project for various traits as well as by exploring the options and testing strategies available in the SnapshotTesting framework.
Here are a few resources to learn more:
I hope this tutorial has provided an overview of how to use snapshot testing and the benefits it has to offer. If you have any questions or comments, please join the forum discussion below!
