Improving Visuals With Post Processing
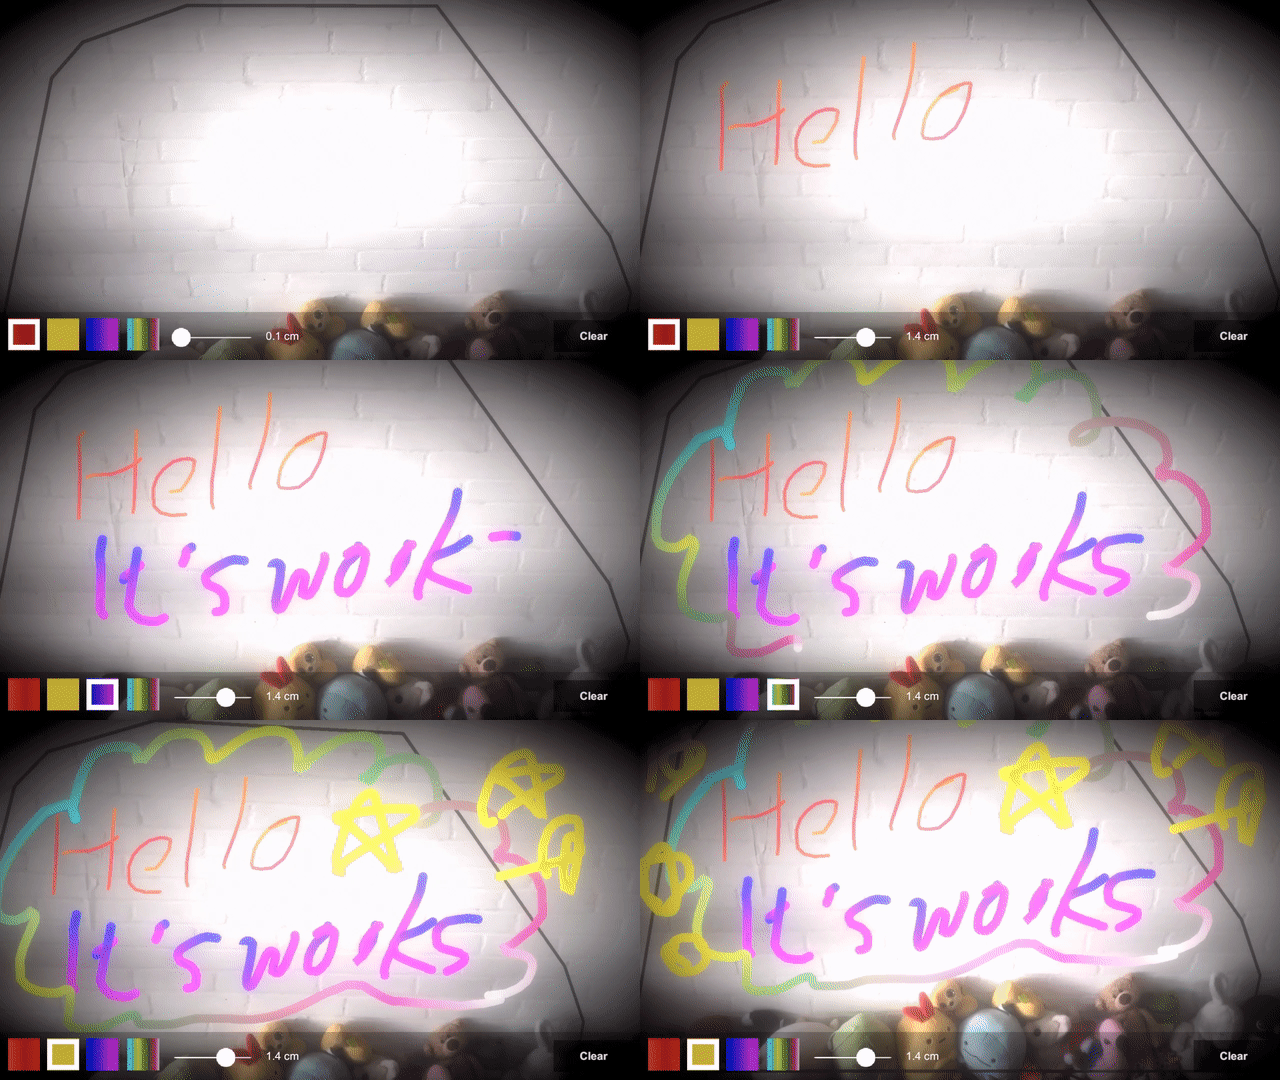
Although the AR doodling is ready, the visuals aren’t super appealing. To improve this, you’ll apply some post-processing effects:
-
Vignette: This effect makes the edges on the screen darkened.
-
Bloom: This effect makes doodle lines glow.
To set these up, do the following:
- Right-click an empty area in the Hierarchy and select Volume ▸ Global Volume, which handles the global post-processing effects.
- Select Global Volume and click New at Profile in the Inspector.
- Click Add Override in the Volume component and select Post Processing ▸ Bloom. Set the Boom’s Threshold value to 0.4, the Intensity to 2.5, and the Scatter to 0.7.
- Click Add Override again in the Volume component and select Post Processing ▸ Vignette this time. Set the Intensity value to 0.5, the Smoothness to 0.5, and other values as the default.
- Select AR Camera in AR Session Origin, and check Rendering ▸ Post Processing to enable in the Inspector.
Build and run.

Where to Go From Here?
Download the starter project by clicking the Download Materials button at the top or bottom of the tutorial.
You’ve learned how to build an AR experience with the tools provided by AR Foundation.
But the journey doesn’t stop here! There are tons of awesome AR Foundation features for you to explore — features like face tracking, image tracking and even object tracking. You’ll find more details in the official documentation.
We hope you enjoyed this tutorial. If you have any questions or comments, please join the forum discussion below!
