Indoor Maps on iOS: Advanced MapKit
In this MapKit tutorial, you’ll learn how to use Indoor Maps to map the inside of buildings, switch between different stories and find your location inside the building. By Alex Brown.
Using Location With Indoor Maps
You may be wondering, “How can GPS possibly work indoors!?” The simple answer is: It doesn’t. At least not well.
Indoor positioning doesn’t actually use GPS at all. Apple uses sensors inside an iOS device to determine your indoor location based on direction, travel speed and radio frequency “fingerprints”.
Fixed Wi-Fi access points emit traceable frequency patterns inside a building. These unique signals are collected using Apple’s Indoor Survey app. With the Indoor Survey app open, you walk around your venue collecting the frequencies and signals as you go. This maps your building from the inside.
Don’t worry, you don’t have to fly out to California and map out the office in this article — maybe next time. :]
Add the following variable to the top of MapViewController.swift, above let decoder = IMDFDecoder():
let locationManager = CLLocationManager()
Now, add the following method above segmentedControlValueChanged(_ sender:):
func startListeningForLocation() {
  locationManager.requestWhenInUseAuthorization()
}
Lastly, add the following code to the bottom of viewDidLoad():
startListeningForLocation()
With the code above, you start listening for location changes when the view controller loads.
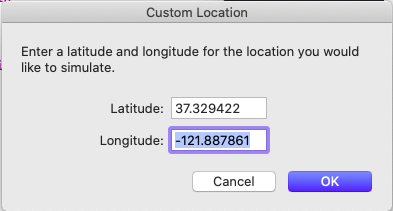
For this to work, you need to enable location services in your simulator and add a custom location. With the simulator in the foreground, navigate to Features ▸ Location ▸ Custom Location. In the dialog that appears, enter the following:
- 37.329422 for Latitude.
- -121.887861 for Longitude.
Build and run. The simulator will ask for location permission — make sure you grant it!

I should have known you’d go straight to the Games Room, slacker. :]
Where To Go From Here?
You can download the completed version of the project using the Download Materials button at the top or bottom of this tutorial.
You now know the basics of IMDF, but there’s a lot more to learn. Try using the GeoJSON in this tutorial to build your own map geometries. Try adding floors, changing names and customizing colors.
A good place to start creating your own GeoJSON is at geojson.io. Try drawing shapes on the map and using them inside the IMDF archive in this project.
If you want to take your MapKit knowledge to the next level, try our pro course: MapKit and CoreLocation.
Make sure you also check out the two talks on indoor maps from WWDC19: What’s New in MapKit and MapKitJS and Adding Indoor Maps to your App and Website.
If you have any questions about the above article, or anything else relating to indoor mapping, please join the discussion in the forum below!