How to Submit An App to Apple: From No Account to App Store – Part 1
How to submit an app to the Apple App Store from beginning to end. In the first half of this two-part series, you’ll learn how to set up an Apple Developer Account, generate certificates and prepare your app for the store. By Rony Rozen.
Sign up/Sign in
With a free Kodeco account you can download source code, track your progress, bookmark, personalise your learner profile and more!
Create accountAlready a member of Kodeco? Sign in
Sign up/Sign in
With a free Kodeco account you can download source code, track your progress, bookmark, personalise your learner profile and more!
Create accountAlready a member of Kodeco? Sign in
Contents
How to Submit An App to Apple: From No Account to App Store – Part 1
30 mins
Learn how to submit an app to Apple in this two-part series. This tutorial documents every step of becoming an Apple iOS developer – from literally no account, to published on the App Store!
You’ll learn how to sign up for Apple’s iOS Developer Program, how to generate the various certificates needed, how to configure your app, and how to submit an app to the App Store for approval.
To create this tutorial, I created a completely new App Store account and submitted a new app to the App Store, keeping careful note of each step along the way.
This tutorial will walk through the process to submit an app called Drop Charge, which comes from 2D iOS & tvOS Games by Tutorials. The app has already been approved and can be downloaded for free from the App Store here. You should use your own app as you follow along.
For this tutorial, you will need US$99 (or the equivalent fee applicable in your country), a valid credit card, and a browser. This may go without saying, but to develop apps, you’ll need a Mac computer, with macOS installed. Lastly, you’ll want to have at least one real iDevice to test your app before submitting it to the App Store.
Finally, you will need Xcode, Apple’s development software. You can download Xcode from the Mac App store now or wait until it’s covered later in the tutorial.
It will help to approach this tutorial with some patience and perspective. Becoming a registered developer is a lengthy process and is sometimes repetitive. Just remember: in the end you will be able to submit an app (or multiple apps) to the App Store for potential fortune and glory!
Getting Started
The first step on the path to the App Store is to register as an Apple developer. Becoming an Apple developer is free, but this won’t enable you to submit an app to the App Store — to do that you must pay the aforementioned US$99 fee.
You may already have a developer account with Apple. If so, feel free to skip this section.
If you don’t yet have an Apple developer account, go to the Apple Developer Site and in the upper right click the Account link:
On the following page, you can choose to create a new Apple ID or use an existing one. If you want, you can save time and use the Apple ID you already use for your iTunes purchases. Keep in mind that it may be better to have two different IDs to keep your personal and professional lives separate.
So, click Create Apple ID:

Fill in your email, password and security information. Use an email address that you check often because Apple sends frequent updates on the program and on the status of apps you’ve submitted for approval.
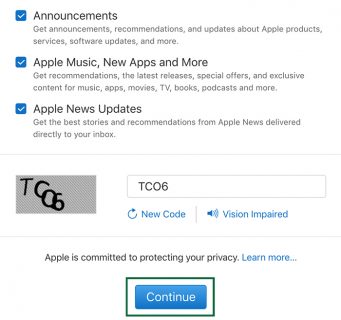
Scroll down and complete the remaining security questions and the captcha prompt, then click Continue:
Check the email account you specified when registering. You should receive an email just like this:
The next page will prompt you to enter the code emailed to you. Enter the code and click Continue:

You now have a developer account Apple ID. Great work! :] Log in to the developer site using your new ID:

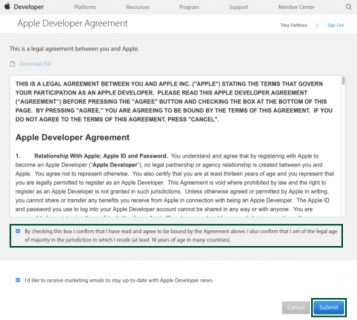
The next page is the mandatory legal agreement. As always, it’s a good idea to consult with your lawyer before signing this and future agreements mentioned in this tutorial. When you’re ready, click the checkbox. Then click Submit:
Cool, you’re now an Apple developer! You have access to the libraries and tools, but you need to join the paid program to submit apps to the app store.
Joining the Developer Program
Being a registered Apple developer gives you access to a lot of information, but to be able to send apps to the App Store (and to have access to certain associated portals) you need to enroll in Apple’s Developer Program. In the past, there were three programs: iOS, OS X, and Safari. Now there is one program and the same fee (US$99 per year) covers all platforms.
If you followed along with the previous section, you should be in the right place. If you skipped the previous section because you already have an Apple developer account, go to the Developer Member Center, and log in.
Once logged in, click the Join the Apple Developer Program link on the lower center of the page. Then, click Enroll:
The following page describes enrollment as an Individual or as a Company. For this tutorial, you’ll see how to enroll as an individual. If you choose to enroll as a company, the process will be slightly more complicated (you will need to submit documents to prove your involvement with the company).
There are two main benefits to enrolling as a company:
- You’ll be able to invite other people to join your developer account (great for groups of developers working together on the same app).
- The Seller field on the App Store will display your company name (and not your first and last name).
So, if you think one of these may be relevant to you now or in the future, maybe it’s worth dealing with the extra paperwork of signing up as a company, instead of as an individual.
Once you’ve made your decision, click Start Your Enrolment:
The sebsequent page asks if you want to enroll as an individual, as a company, or as a government organization. For the purposes of this tutorial, select Individual / Sole Proprietor / Single Person Business, and click Continue:
Enter your billing/business information to verify your identity. Apple will attempt to confirm this information with your credit card company, so make sure you enter it correctly. Fill in the remaining fields and at the bottom you’ll see another license agreement. When you’re ready, check the box and click Continue:
Review your information and when you’re ready to submit, click Continue:
Now you will be prompted with the cost and summary for the purchase. You have the option for automatic renewal every year, which saves having to remember to renew and prevents any chance that your apps become unavailable (apps will be removed from the store once the account is no longer active).
Check Automatic Renewal if you want this option, then click Purchase:
You’ll now have to log in again using your newly created Apple ID.
Note: The following steps only apply to countries with online Apple Stores. For countries without online Apple Stores, the process will be slightly different, requiring you to fax your credit card information to Apple. If you’re in one of those countries, follow Apple’s instructions and skip to the next section.
Note: The following steps only apply to countries with online Apple Stores. For countries without online Apple Stores, the process will be slightly different, requiring you to fax your credit card information to Apple. If you’re in one of those countries, follow Apple’s instructions and skip to the next section.
Still here? Great. Fill out the payment screen. Verify your billing information for the purchase. You will be asked to agree to the Terms & Conditions. Once you’re ready, check the box and click Continue. Finally, confirm your intent to purchase the membership:
You will then be greeted by a thank you screen. Congrats!


