Origami Studio Tutorial For Mobile Prototyping: Getting Started
In this Origami Studio tutorial, you will learn how to create amazing mobile prototypes with Origami Studio without writing code. By Tom Elliott.
Sign up/Sign in
With a free Kodeco account you can download source code, track your progress, bookmark, personalise your learner profile and more!
Create accountAlready a member of Kodeco? Sign in
Sign up/Sign in
With a free Kodeco account you can download source code, track your progress, bookmark, personalise your learner profile and more!
Create accountAlready a member of Kodeco? Sign in
Sign up/Sign in
With a free Kodeco account you can download source code, track your progress, bookmark, personalise your learner profile and more!
Create accountAlready a member of Kodeco? Sign in
Contents
Origami Studio Tutorial For Mobile Prototyping: Getting Started
30 mins
- Introduction
- Getting Started
- Introduction to the Interface
- Creating a Simple Interaction
- Wiring up Your Prototype
- RW News
- Animations
- Transitions
- Getting Fancy
- Animating the Mask
- A Finishing Touch
- Building a News Feed
- Going Loopy
- Grid Layout
- Adding Personalized Content
- More Complicated Transitions
- Interactions
- Customizing the Detail Screen Transition
- Customizing the Feed Screen Transition
- Where to Go From Here?
Customizing the Detail Screen Transition
Start by changing the opacity of the Detail Screen layer. Add a transition patch, and connect the output from the Classic Animation patch to its Progress input. Connect its output to the Detail Screen layers Opacity property, then make sure the Detail Screen is visible by clicking the eye icon for the layer in the Layer Inspector.
Tap the image in the cell and notice a mini Detail Screen appearing right where you tapped. Tap again and it disappears, as expected. Feel free to change the starting position of the Detail Screen by adjusting its Position property to get the starting position you want.
Next, add a Transition patch to change the Scale of the Detail Screen from 0.5 to 1.0, and, as before, connect it up to the output of the Classic Animation. Tap the image and watch the Detail Screen appear and grow. Tap again and watch it shrink and disappear.
Finally for the Detail Screen. It needs to move it such that it rests in the right position on the screen. Add a third Transition patch, wire it up to the Classic Animation patch as before but this time connect it to the Position property of the Detail Screen layer.
Edit the patch by accessing the contextual menu (right-click in the header of the patch) and change its Type from Number to Position. Set the start position to (x: -17, y: -159) and its end position to (x: 0, y:0). Once again, tap the image and notice the change in the transition. Feel free to tweak the values to make the transition suit your preferences.
Customizing the Feed Screen Transition
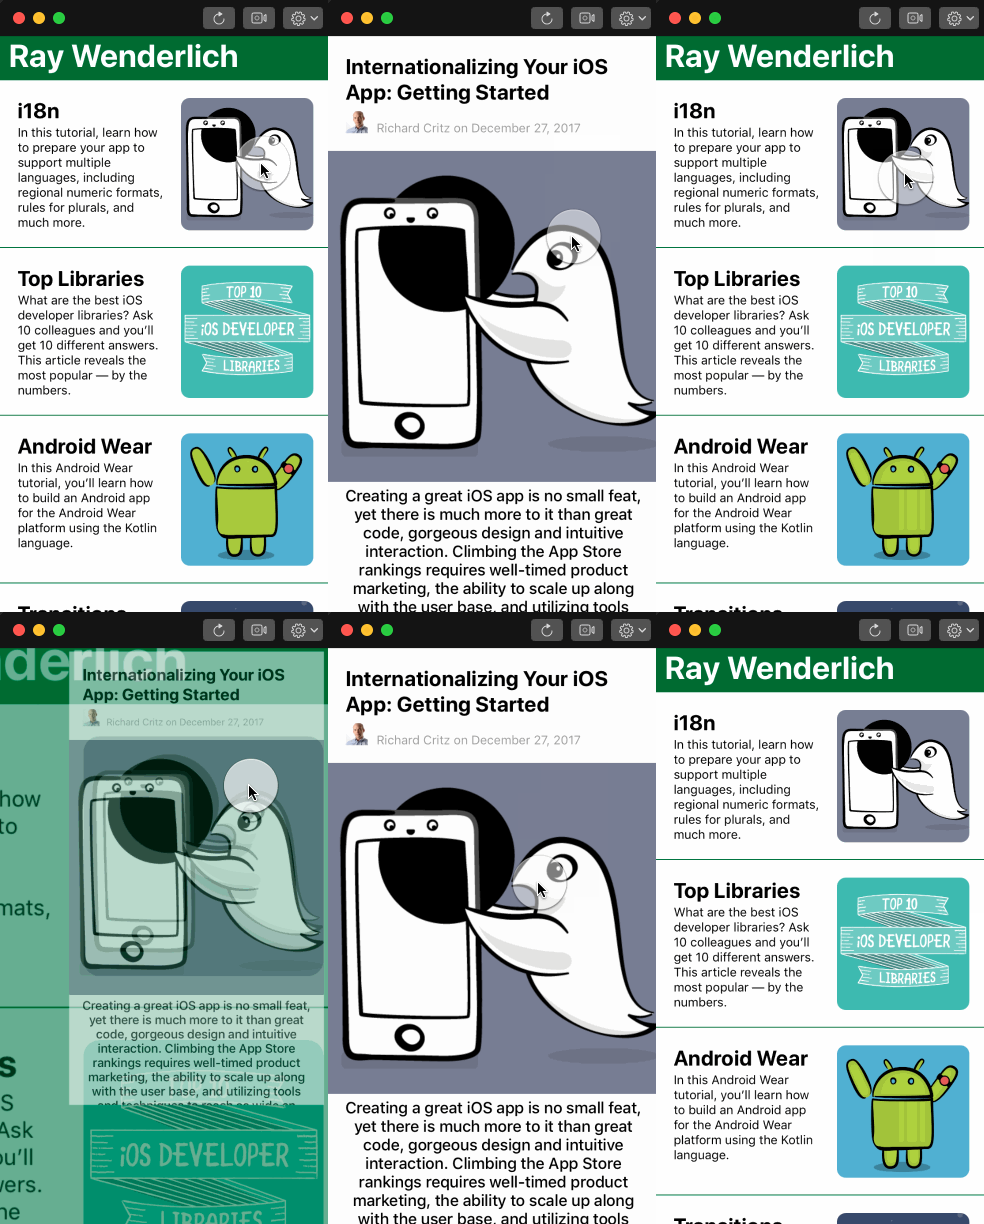
To complete the effect, you need to scale, translate and fade the cell containing the tapped image to give the appearance of the cell becoming the Detail Screen.
As before, connect three new transition patches to the output from the Classic Animation (remembering to update the type of one of them to Position). This time, wire up the output for each transition to the Scale, Opacity and Position properties of the Inner Content layer of the Feed Screen.
Experiment setting different values for the Position and Scale values. As a sensible place to start, try changing the Position from (x: 0, y: 0) to (x: -230, y: 550) and the Scale from 1 to 2.5. Invert the Opacity so it starts at 1 and ends at 0.
Tap the image – it’s nearly there!
When the feed image is tapped, the top cell and title transition, but the rest of the cells don’t. These cells don’t appear in the layer hierarchy as shown in Layer Inspector, so how do you get them to move as well?
Origami provides a Loop Select patch for exactly this purpose.
Break the connection between the Interaction patch for the Cell Image layer and the Switch by dragging the connection out of the Switch. Now, insert and connect a Loop Select patch between them. Restart the prototype and tap the top image to review your masterpiece. Nice job!
Where to Go From Here?
You can download the completed version of the project using the Download Materials button at the top or bottom of this tutorial.
Hopefully, this tutorial has given you an insight into the power and flexibility of Origami Studio for building interactive prototypes for your mobile apps. You’ve only just scratched the surface of this powerful tool!
To find out more and continue your adventure, check out the excellent tutorials on the Origami Studio website and other examples of projects created at Facebook.
The documentation provides a complete overview of all the built in patches as well as a detailed descriptions of all the inputs and outputs for each patch.
Learn how to preview your prototype on a real device, use a pop animation to create bouncy animations simply or add sounds to your prototype.
Finally, there’s a thriving community on Facebook as well.
If you’re interested in other prototyping tools, check out the tutorial on Framer.
If you have any questions or comments about this tutorial, come join the discussion below!


