CALayer Tutorial for iOS: Getting Started
In this article, you’ll learn about CALayer and how it works. You’ll use CALayer for cool effects like shapes, gradients and particle systems. By Ron Kliffer.
Sign up/Sign in
With a free Kodeco account you can download source code, track your progress, bookmark, personalise your learner profile and more!
Create accountAlready a member of Kodeco? Sign in
Sign up/Sign in
With a free Kodeco account you can download source code, track your progress, bookmark, personalise your learner profile and more!
Create accountAlready a member of Kodeco? Sign in
Sign up/Sign in
With a free Kodeco account you can download source code, track your progress, bookmark, personalise your learner profile and more!
Create accountAlready a member of Kodeco? Sign in
Contents
CALayer Tutorial for iOS: Getting Started
35 mins
- Getting Started
- How does CALayer relate to UIView?
- Customizing Views With CALayer
- Improving Performance With ShouldRasterize and DrawsAsynchronously
- Scrolling With CAScrollLayer
- Setting up Scrolling
- Locking Scrolling Directions
- Rendering Text With CATextLayer
- Playing Media With AVPlayerLayer
- Setting up Media Playback
- Changing Playback Speeds
- Updating the User Interface
- Resetting the Playback Cursor
- Color Blending With CAGradientLayer
- Creating a Loading Animation with CAReplicatorLayer
- Configuring Replicator Layers
- Setting Position and Fade
- Drawing a Star With CAShapeLayer
- Drawing a 3D Cube With CATransformLayer
- Rotating the Cube
- Making a Shooting Star With CAEmitterLayer
- Preparing the Emitter Layer
- Setting up the Emitter Cell
- Where to Go From Here?
As you probably know, everything you see in an iOS app is a view. There are button views, table views, slider views and even parent views that contain other views!
But what you might not know is that each view in iOS is backed by another class called a layer — a CALayer, to be specific.
In this article, you’ll build the Layer Player app. In the process, you’ll learn:
- What a
CALayeris and how it works. - How to use
CALayerfunctionality to achieve cool effects like shapes, gradients and even particle systems.
Getting Started
CALayer has more than a few properties and methods to tinker with. It has several subclasses with unique properties and methods. What better way to get an overview of this great API than by taking a raywenderlich.com-style guided tour?
Use the Download Materials button at the top or bottom of this tutorial to download the starter project. Open it in Xcode, then build and run to see what you’re starting with. The Layer Player app demonstrates nine different CALayer capabilities.
The starter project doesn’t do much. You’re about to write the code to turn this app into a fully functional CALayer tour guide!
In each section, you’ll add the necessary code to make the layer magic work. After adding each line of code, play around with the settings you’ve just enabled. This will give you a deeper understanding of the power of each capability you explore.
But first, some theory.
How does CALayer relate to UIView?
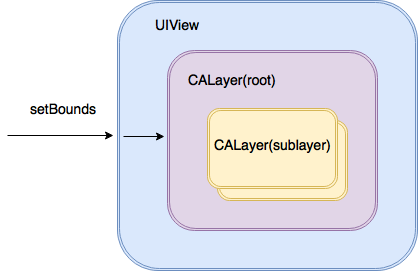
UIView handles many things, including layout and touch events. However, it doesn’t directly control drawing or animations. UIKit delegates that task to the Core Animation framework, which enables the use of CALayer. UIView, in fact, is just a wrapper over CALayer.
Each UIView has one root CALayer, which can contain multiple sublayers. When you set bounds on a UIView, the view in turn sets bounds on its backing CALayer. If you call layoutIfNeeded() on a UIView, the call gets forwarded to the root CALayer.

Here are a few more things you should know about CALayer before you dive into the Layer Player app:
- Layers can have sublayers: Just like views can have subviews, layers can have sublayers. You can use these for some cool effects!
-
Their properties are animatable: When you change the property of a layer, you can use
CAAnimationto animate the changes. - Layers are lightweight: Layers are lighter weight than views, and therefore help you achieve better performance.
- They have tons of useful properties: You’ll explore some of them in the following examples.
Now, you’re ready to get started by using CALayer to create some custom views.
Customizing Views With CALayer
Open CALayerViewController.swift and add the following code to setupLayer():
//1
layer.frame = viewForLayer.bounds
layer.contents = UIImage(named: "star")?.cgImage

// 2
layer.contentsGravity = .center
layer.magnificationFilter = .linear

// 3
layer.cornerRadius = 100.0
layer.borderWidth = 12.0
layer.borderColor = UIColor.white.cgColor
layer.backgroundColor = swiftOrangeColor.cgColor

//4
layer.shadowOpacity = 0.75
layer.shadowOffset = CGSize(width: 0, height: 3)
layer.shadowRadius = 3.0
layer.isGeometryFlipped = false
In this code, you create a customized view:
- You set the bounds of the layer, then set an image as the layer’s contents. Notice the use of the underlying
CGImage. - Then you center the image within the layer. You can use
contentsGravityto change both size — as in resizing, resizing aspect and resizing aspect fill — and position — center, top, top-right, right, etc.magnificationFiltercontrols the behavior of the enlarged image. - Next, you set
CALayer‘s background color, make it round and add a border to it. Notice that you’re using the underlyingCGColorobjects to change the layer’s color attributes. - Finally, you create a shadow for the layer. When
isGeometryFlippedistrue, the positional geometry and shadow will be upside-down.
Build and run. Select CALayer and check out the result:
The controls don’t do anything at this point. So add the following to prepare(for:sender:):
if segue.identifier == "DisplayLayerControls" {
  (segue.destination as? CALayerControlsViewController)?.layerViewController = self
}
This connects the embedded CALayerControlsViewController. Build and run again and check out the layer properties in action. Play around with the various controls to get a feel for what you can do with CALayer!
Improving Performance With ShouldRasterize and DrawsAsynchronously
CALayer has two additional properties that improve performance: shouldRasterize and drawsAsynchronously.
shouldRasterize is false by default. When set to true, the layer’s contents only render once, which improves performance. It’s perfect for objects that animate around the screen but don’t change in appearance.
drawsAsynchronously is the opposite of shouldRasterize, and it’s also false by default. Set it to true to improve performance when the app needs to repeatedly redraw a layer’s contents. This might happen, for example, when you work with an emitter layer that continuously renders animated particles. You’ll use this feature later in the tutorial.
shouldRasterize or drawsAsynchronously. Change the settings and compare the performance. This will help you determine whether activating these features actually improves performance in a given situation. If you misuse these properties, performance is likely to take a nosedive!Scrolling With CAScrollLayer
CAScrollLayer displays a portion of a scrollable layer. It’s fairly basic — it can’t directly respond to user touches or even check the bounds of the scrollable layer. But it does cool things like preventing scrolling beyond the bounds. :]
UIScrollView doesn’t use a CAScrollLayer to do its work. Instead, it directly changes its layer’s bounds. With a CAScrollLayer, you can:
- Set the scrolling mode to horizontal or vertical.
- Scroll to a specific point or area programmatically.
Build and run and select CAScrollLayer from the menu. You’ll see an image and two switches that control the scrolling direction.
Now it’s time for you to set up the scrolling.
Setting up Scrolling
Return to the code and open CAScrollLayerViewController.swift. There’s already a CAScrollLayer in the view.
Add the following to panRecognized(_:):
var newPoint = scrollingView.bounds.origin
newPoint.x -= sender.translation(in: scrollingView).x
newPoint.y -= sender.translation(in: scrollingView).y
sender.setTranslation(.zero, in: scrollingView)
scrollingViewLayer.scroll(to: newPoint)

if sender.state == .ended {
  UIView.animate(withDuration: 0.3) {
    self.scrollingViewLayer.scroll(to: CGPoint.zero)
  }
}
When a pan gesture occurs, you calculate the corresponding translation required and then call the scroll(to:) method on the CAScrollLayer to move the image accordingly.
scroll(to:) doesn’t animate automatically, so you animate it explicitly using UIView.animate(withDuration:animations:).
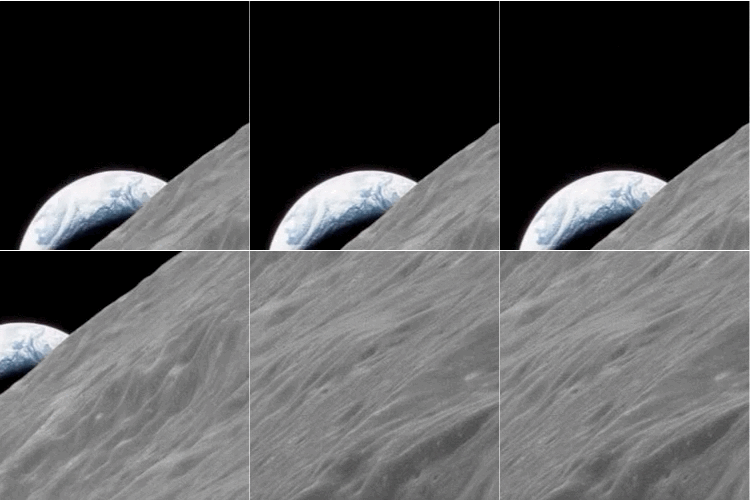
Build and run and go back to the CAScrollLayer example. Now when you pan the image, you’ll see something like this:

Layer Player also includes two controls to lock scrolling horizontally and vertically. You’ll get those working next.


